
Does this sound familiar…
The price rises past a retracement level, produces a pin bar in between the levels – not giving you an entry – and then reverses, making you miss out on a successful trade.
Or how about this one…
You enter a trade after a seeing an engulf form at a fib level but then a short time later the price spikes up, takes out your stop and reverses, causing you to lose money and miss out on a really good trade.
I’ve lost count of how many times the above has happened to me… as I’m sure you have too.
But there’s a simple way to stop situations like these from happening using a technique only a few people know exist…
A Better Way Of Trading Retracements
Take a look at the image below…

This is a perfect example of what I was just talking about.
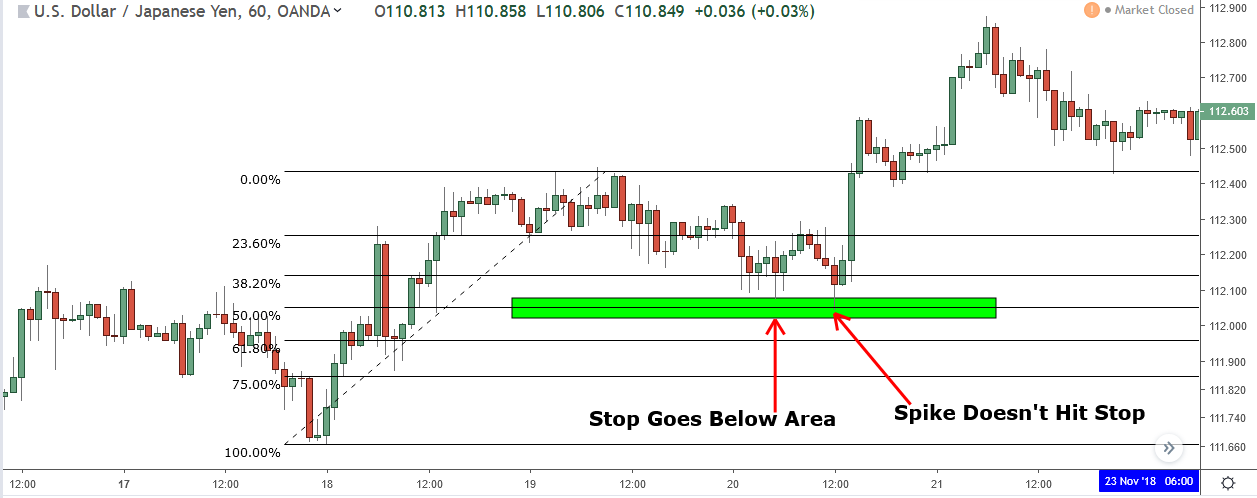
The price pulls back to the 38.2% level, produces a bullish pin bar (which is a signal to enter), and then spikes below the low of the pin – taking out your stop in the process – before finally reversing and moving higher again.
So far… same story, different day.
But let’s look at how this played out with a zone marked around the level…
 It’s doesn’t look any different, right?
I mean, the price still spikes below the low after the pin forms… the only difference is that the spike touches the area, which doesn’t change the outcome of the trade anyway.
So what’s the big deal with the area?
Well, it’s this…
If you place the stop below the area instead of at the low of the pin when the price spikes down it won’t trigger the stop, which means…
You’ll remain in the trade and get into the reversal.
So by marking an area around a level and then using that as the point to place your stop, you can avoid being taken out of successful pull-back trades due to random price spikes.
Not bad, eh?
I bet this one has happened to you a few times…
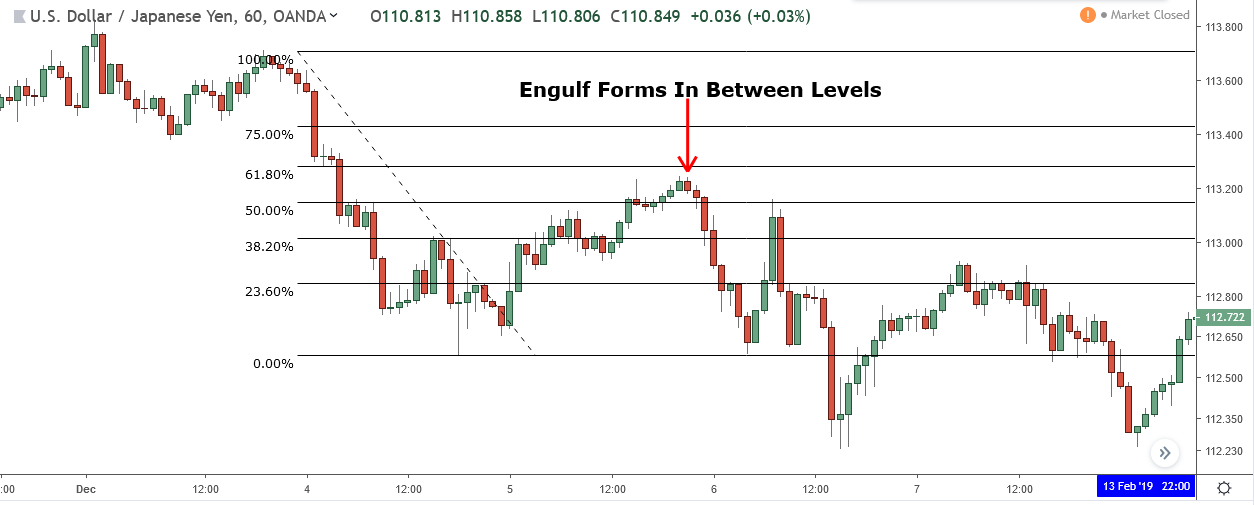 The price retraces but instead forming a pattern at one of the fib levels – which it needs to do in order to be a valid signal – it forms in between – causing you to miss what, in this case, would have a been a very successful trade.
This is a common problem, maybe even more so than having a spike hit your stop.
And it’s one that you can also fix by using zones…
 When I mark a zone around the 61.8% level, the engulf touches the zone, providing a valid entry signal.
Just another way the zones can improve your trading.
Don’t Mark Retracement Zones The Wrong Way
Marking retracement zones is pretty easy – you simply place a rectangle on each of the retracement levels. However, there’s a right and wrong way to place the zone you must know to use it correctly.
The wrong way it is to just slap a rectangle on top of the zones in any old fashion…
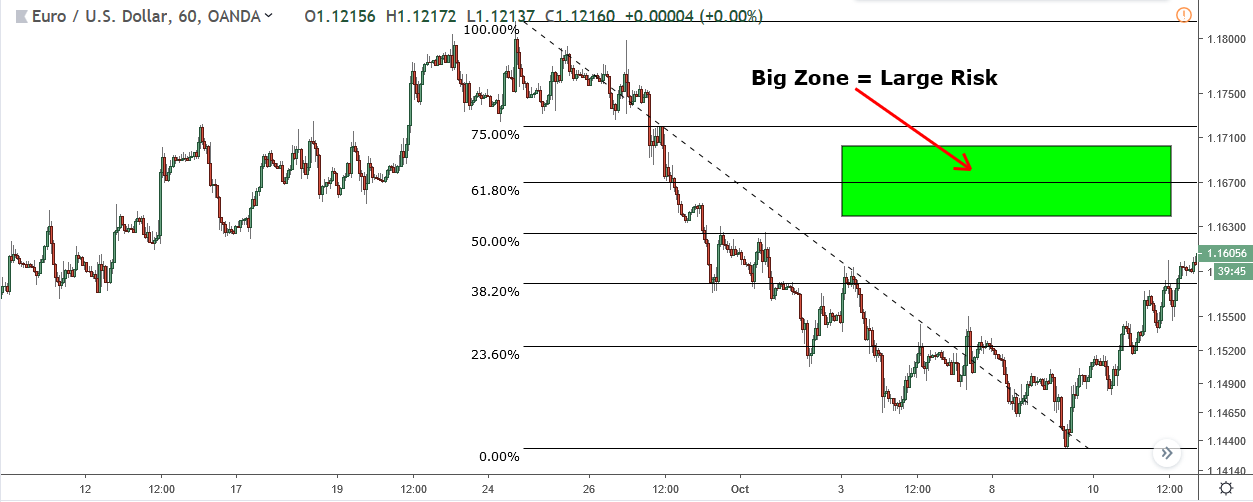 This will often get you into some successful trades but because the zone may be bigger or small than what it needs to be your risk will be messed up so you might ending up risking (and possibly losing) more or less than what you actually need to do.
The right way is to mark the zone so that each edge sits about a quarter of the way above and below the fib level.

Even though it isn’t to the pip, this way does mark a decent sized zone while at the same time leaves a small gap from one zone to the next, which cut the risk down when you’re using it place stop orders…
I did want to have an exact way of marking the zones, but because of the volatility and size difference between retracement it wasn’t possible, so I decided to just do it by eye instead.
Summary
Well, that’s it guys. I hope you enjoyed this post. I’ll have more info/posts on all things fibonacci available soon. For now, any relevant links will be left below.
Hello liam please any idea how i can measure that 25% than you