My forex mentor once told me: “you’re only ever as good as your charts, sonny”… and boy was he right.
Choosing the right chart platform to view price and carry out analysis is critical to your success in forex. If you think it’s possible to make millions with a second rate platform offered for free by a no-name broker, in the words of the great Judas Priest… “you’ve got another thing coming”.
It’s THAT simple.
Nowaday’s, trading platforms are everywhere, so knowing which has the right features and which to choose for trading isn’t as easy as it seems.
However, in the past few years, one platform has ascended to the top…
I’m talking about Tradingview – ring a bell?
Combining highly advanced charts with a whole suite of social features, Tradingview has cemented itself as one of the top forex charting platforms. It’s easy to use, packed with amazing features not found on most other platforms, and best of all, completely FREE.
Today I’m going to give you a complete walk-through of how to use Tradingview along with its many features.
I’ve used Tradingview for 3 years now – made the switch from MT4 back in 2017. So I know all the tips, tricks, and little secrets to using it that’ll help you to get started.
Here’s a quick look at what we’ll cover…
- How to sign up and create a Tradingview account.
- How to get your charts ready for trading.
- Overview of all the tools & how to use them.
- How to add lines, rectangles, and indicators to the chart.
- How to connect your broker and trade through Tradingview.
- How to set your charts up like mine (if you want to).
So, ready to dive in and see what Tradingview’s all about? Lets go…
What Is Tradingview And How Does It Work?
So, unless you’ve been living (or trading, I guess) under a rock for the past few years, you probably already know a little about Tradingview, or at the very least have seen it advertised somewhere.
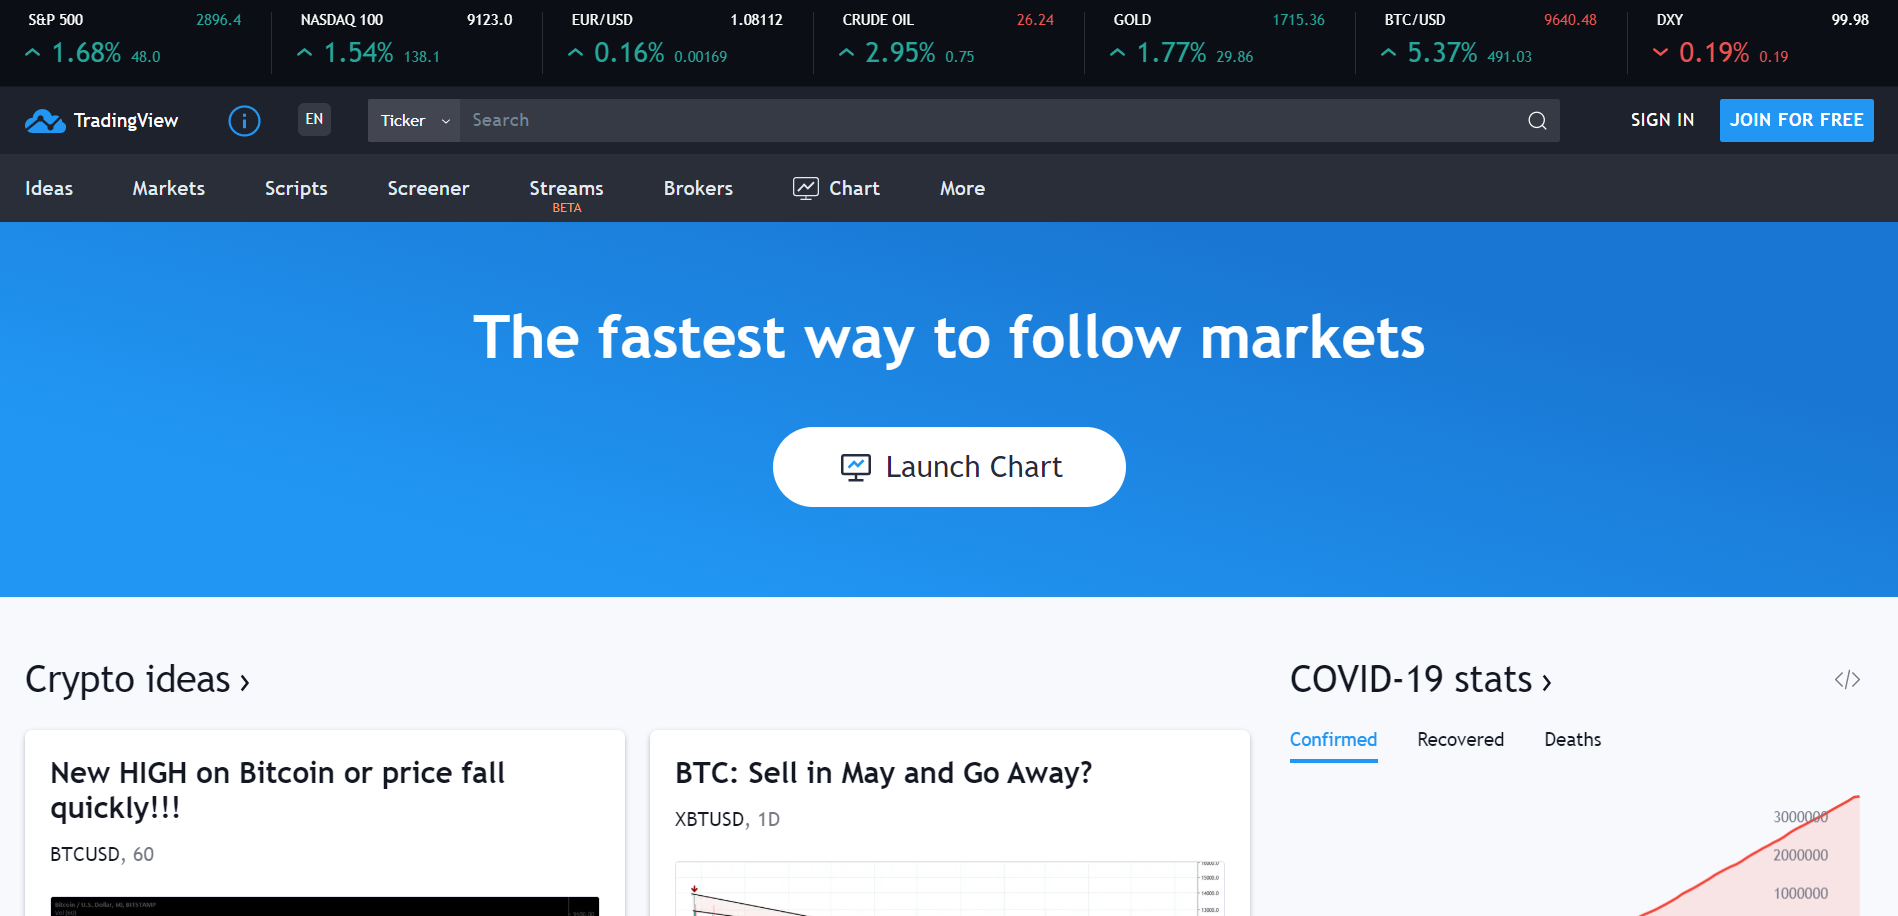
Tradingview is a charting platform; it shows charts and lets you analyze price, just like MT4.
However, unlike MT4 and most other platforms, Tradingview is web-based. All of its charts and services are hosted via a website, which you visit to look at price and conduct analysis. You don’t download any separate programs onto your PC, or sign up to a broker.
You simply enter the site into your device and then log in to start viewing charts and carrying out analysis.
Now, what makes or breaks a charting platform are its features. And it’s in this area that Tradingview sets itself apart from all the other charting platforms out there.
Simply put, Tradingview has the best features of any charting platform – and yes, that includes MT4.
Charts wise, it has everything you could ever ask for – and more you probably didn’t. A full suite of drawing tools makes finding levels and zones a breeze, a huge collection of chart types and timeframes gives you the complete picture of price, and a massive list of tools and indicators helps you find information that takes ages to find manually.
And if that wasn’t enough…
Tradingview also has a built-in strategy tester and editor. You can create and customize your own indicators, strategies, and Ea’s and then test them to see how they perform… all for free within Tradingview!
Pretty amazing, right?
While Tradingview provides great features for charting and analysis, it also contains many social features.
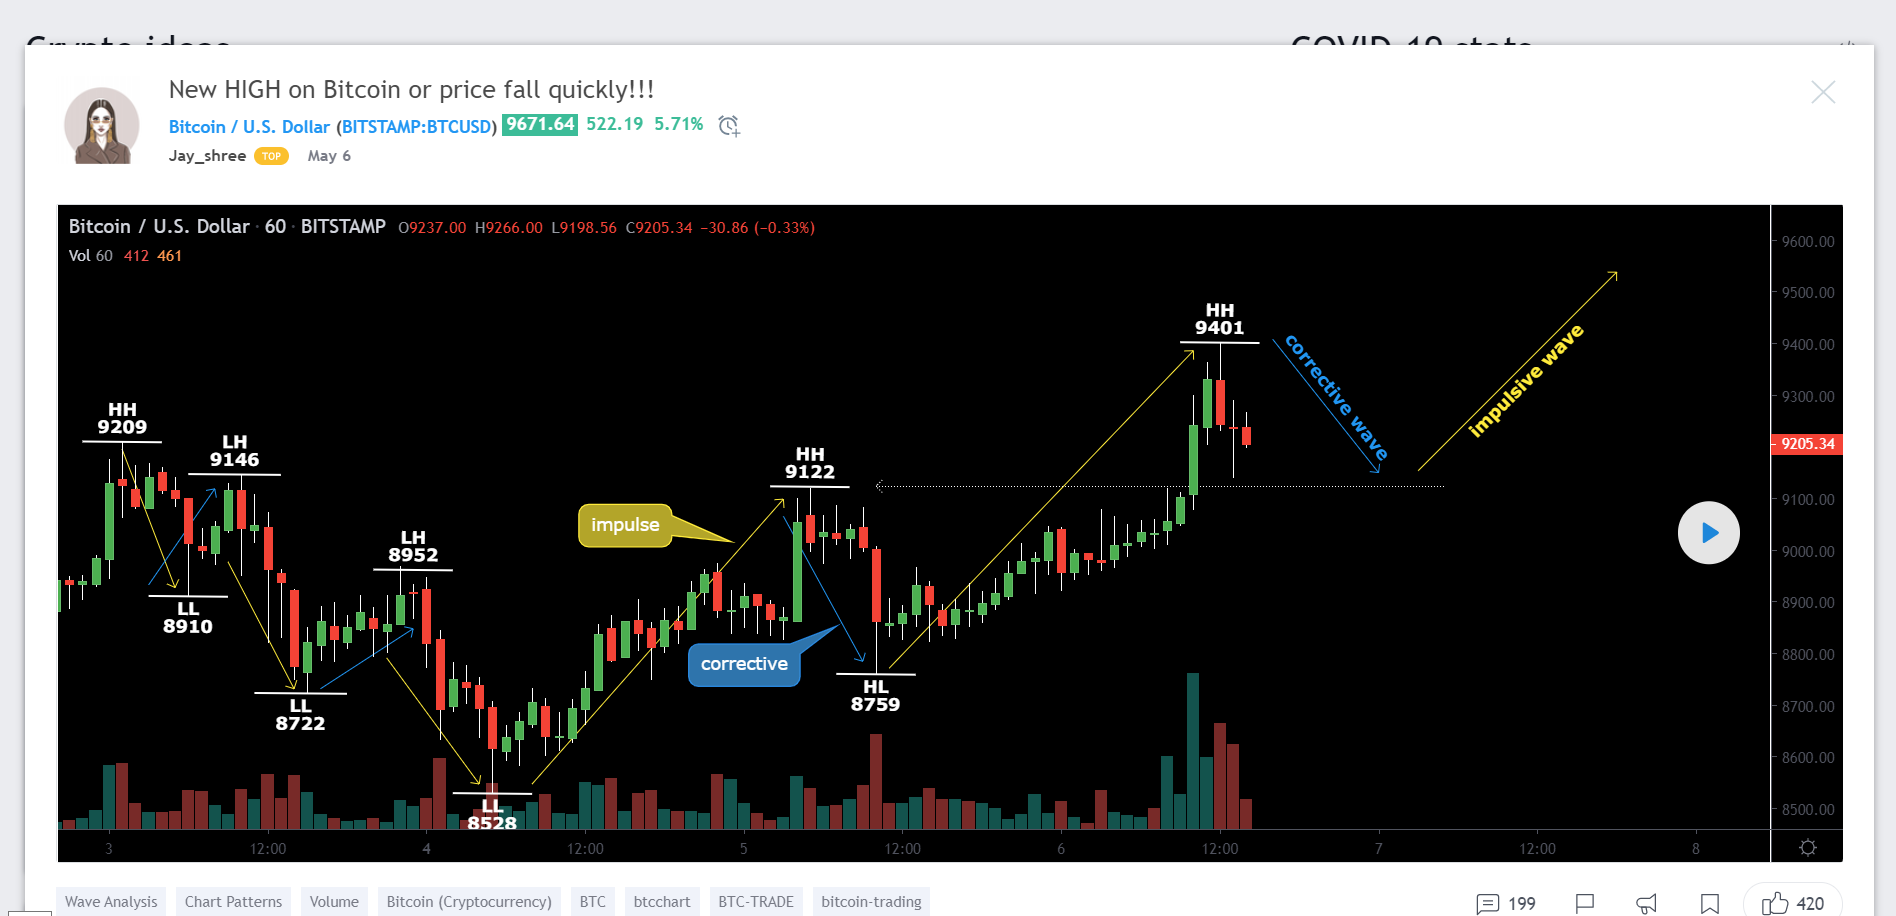
Publish your analysis, chat with fellow traders, follow and comment on the analysis of other traders… The features are extensive, and being built directly into the platform means you can access them from anywhere, including the chart screen.
Personally, I don’t use these much – I’m more of a lone wolf type of trader – but they are there if you want to use them.
Opening An Account With Tradingview
Getting setup with Tradingview takes literally a couple of minutes. You don’t need to download any programs or sign up for a broker, as you often do with MT4 or other platforms.
Just visit the site, create an account, and you’re on your way.
Keep in mind, while Tradingview is free to use, you need to open a free account for the full range of features.
With no account, you can only access a select few features. And after a while – around 15 minutes, I think – a pop up will cover the screen telling you to either create a free account or become a pro member to continue viewing charts – ads still show with a free account, but don’t stop you from doing analysis.
So to open an account up, head over to the site…
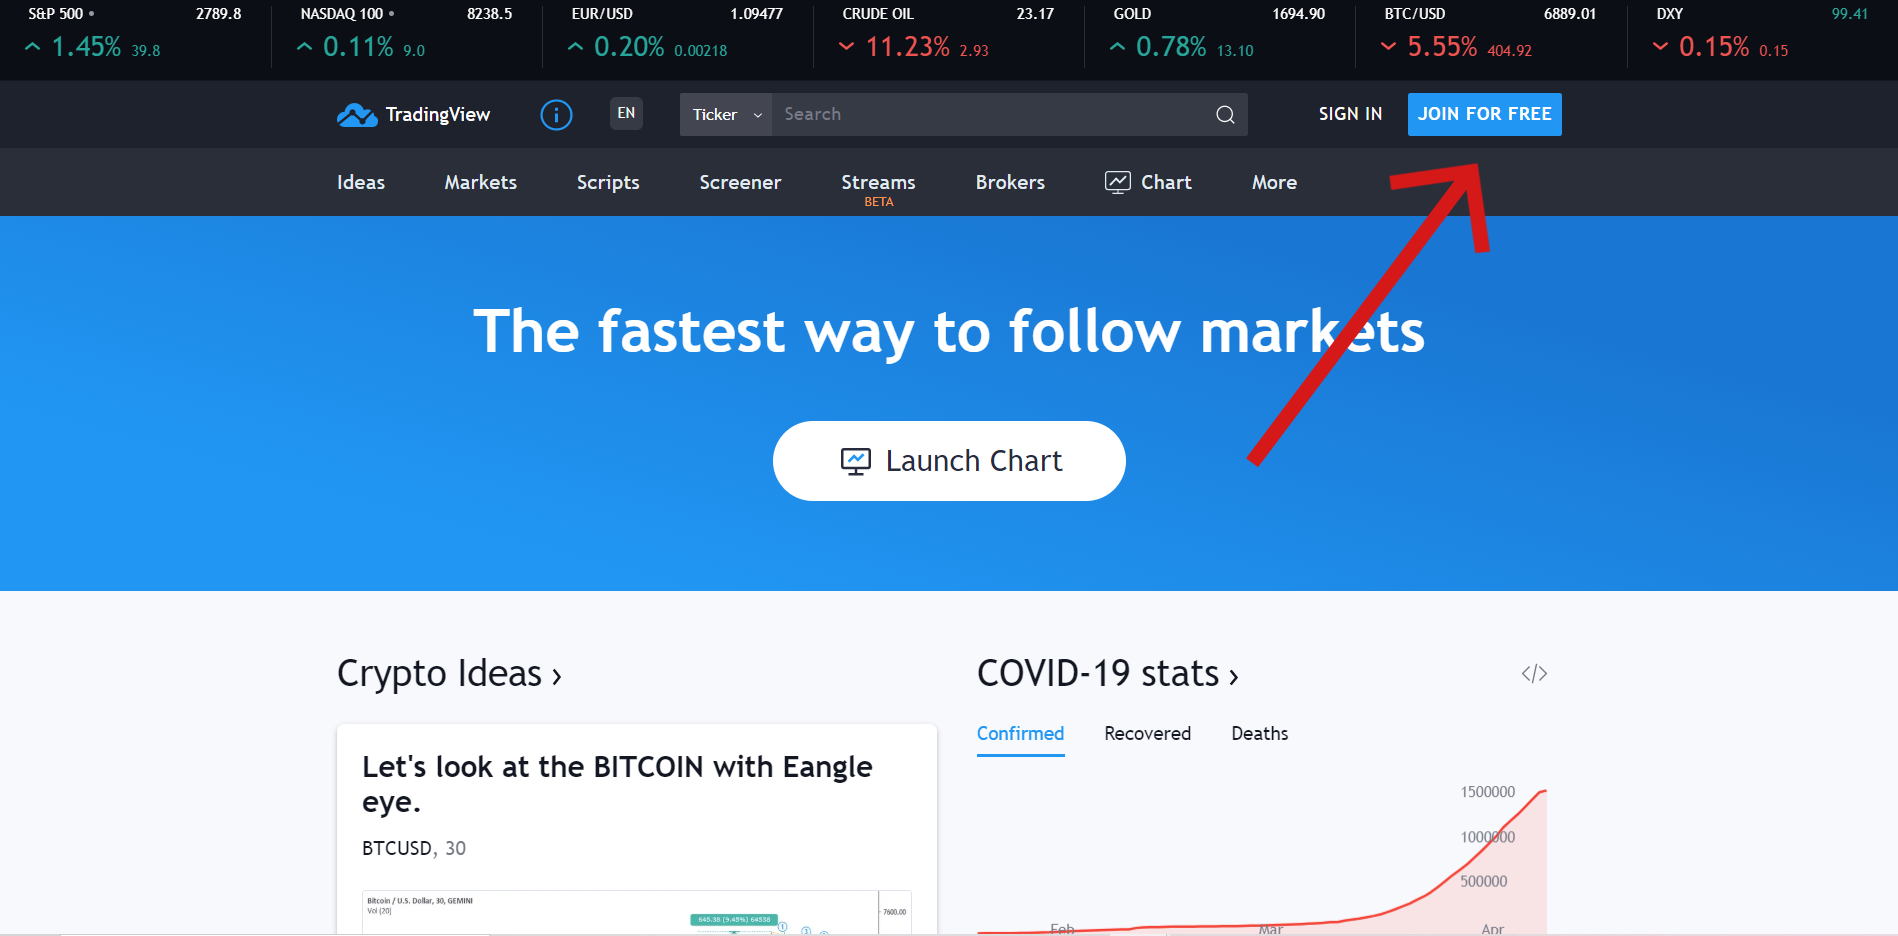
Click the “Join Now” button in the top right.
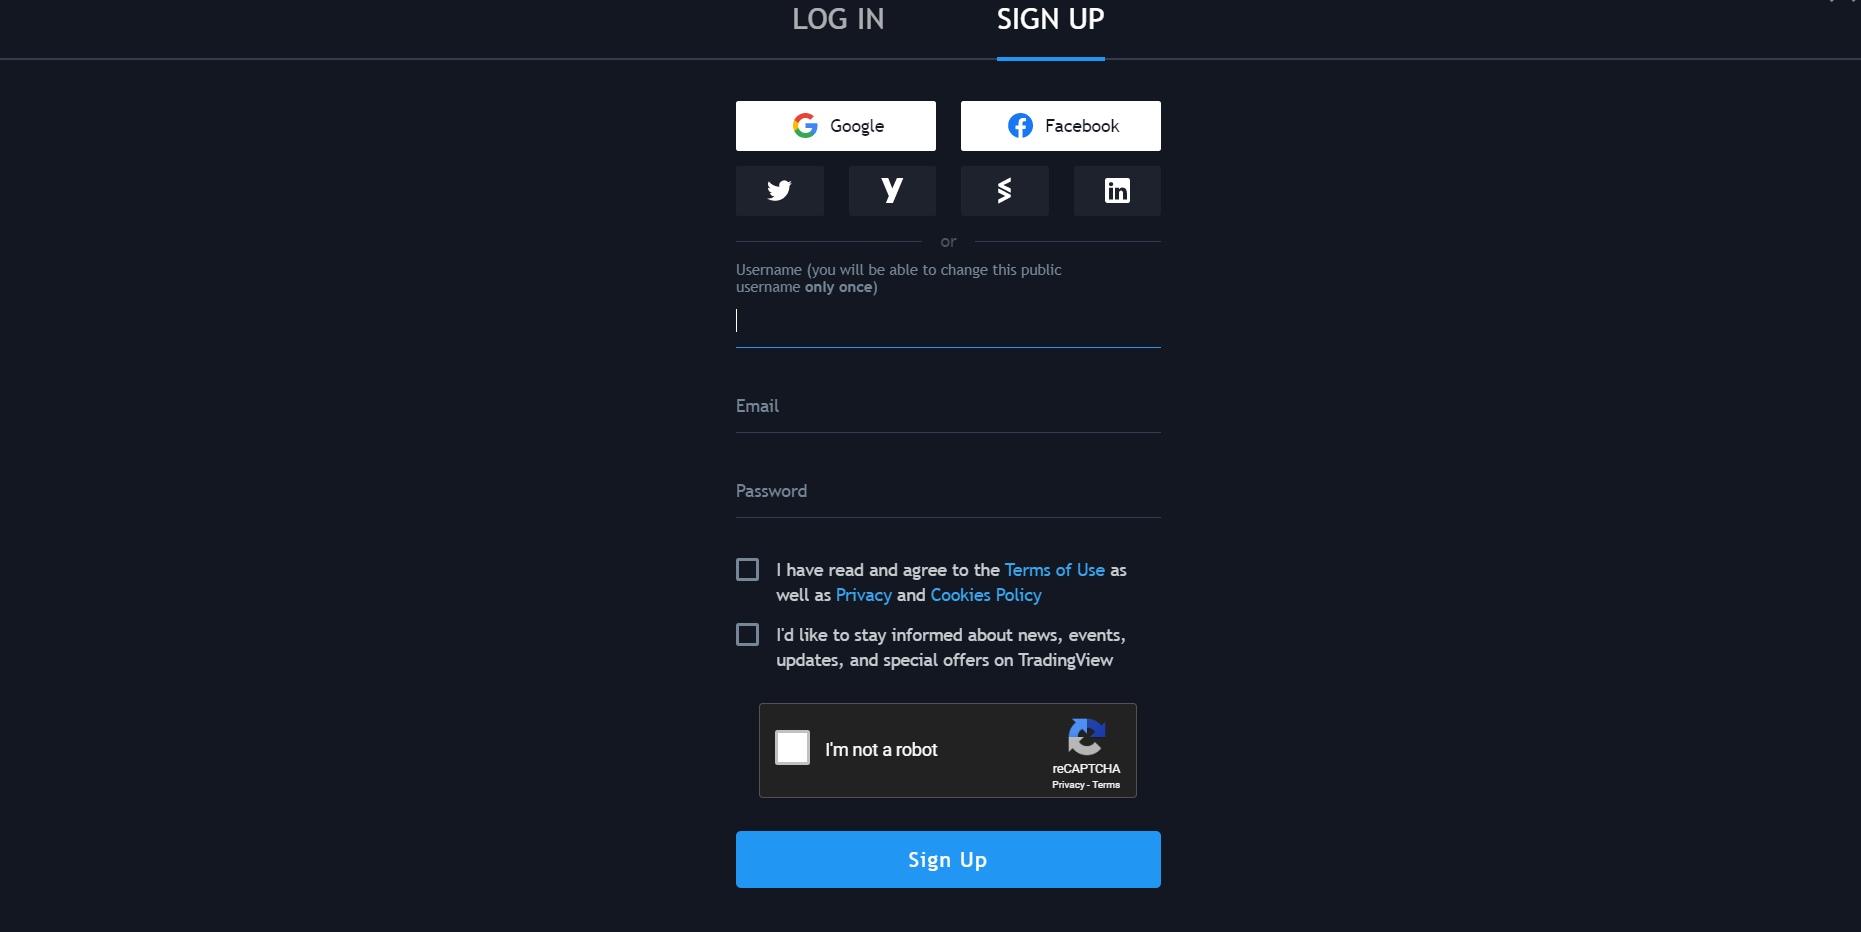
And then enter your details.
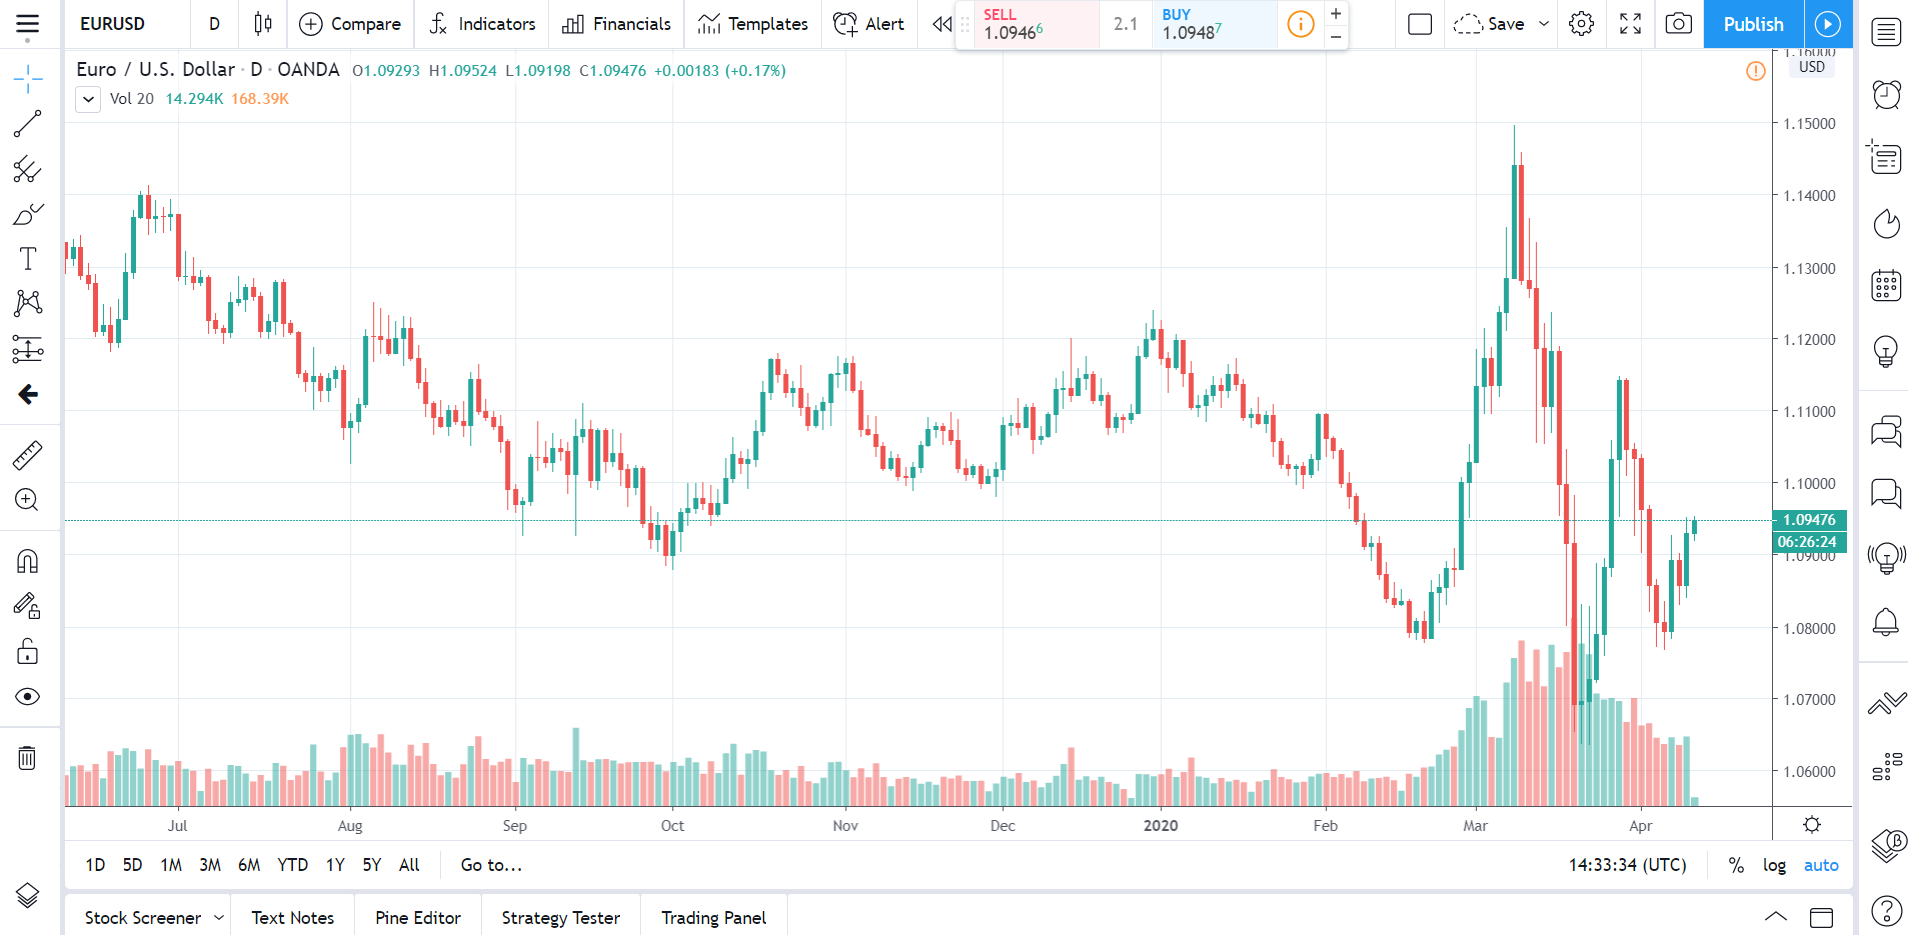
Once you confirm your account, simply log in to begin looking at charts and analyzing price.
Easy!
While a free account with Tradingview gives you many cool features, a pro account really takes things up a notch. It provides specialized tools that make trading and analysis so much easier. Many of these – like the strategy tester and market replay tools – cost money to use on other sites, so it’s pretty good value for money when you break it down.
As we go through the guide, I’ll cover some of these in more detail.
For now, here’s a quick overview of the main features you get with each version of Tradingview:
Basic (Free But Email Sign Up Required)
- Access to the charts.
- Ads every 15 (or so) minutes.
- 1 chart per tab.
- 3 indicators per chart.
- 1 saved chart layout.
- 1 indicator template.
- Stock/Forex/Crypto Screener.
- Market Replay Function (only on daily and weekly)
- Volume Profile Indicator
- Strategy Tester
Pro
- Access to the charts.
- No ads.
- 2 charts per tab.
- 5 indicators per chart.
- 5 saved chart layouts.
- Infinite indicator templates.
- Stock/Forex/Crypto Screener.
- Market Replay Function
- Volume Profile Indicator
- Strategy Tester
Pro +
- Access to the charts.
- No ads.
- 4 charts per tab.
- 10 indicators per chart.
- 10 saved chart layouts.
- Infinite indicator templates.
- Stock/Forex/Crypto Screener.
- Market Replay Function
- Volume Profile Indicator
- Strategy Tester
Premium
- Access to the charts.
- No ads.
- 8 charts per tab.
- 25 indicators per chart.
- Infinite saved chart layouts.
- Infinite indicator templates.
- Stock/Forex/Crypto Screener.
- Market Replay Function
- Volume Profile Indicator
- Strategy Tester
Check this comparison on the Tradingview site for a more detailed breakdown of the features that come with each different account type:
Important Note: Not sure if Tradingview is for you? Get the free trial… Tradingview gives all users a 1 month free trial to test the platform and try out all it’s features. All the pro and pro + features are included, and you have full access to the paid tools I talk about later.
Understanding The Chart Window
So when you first open Tradingview, either with or without a paid account, you’ll find yourself on the chart window.
Tradingview’s pride and joy here.
The chart window shows the price of a currency/stock/commodity through a chart and contains all the tools, indicators, and options you can use in your analysis.
Suffice to say it’s the place you’ll be spending most of your time.
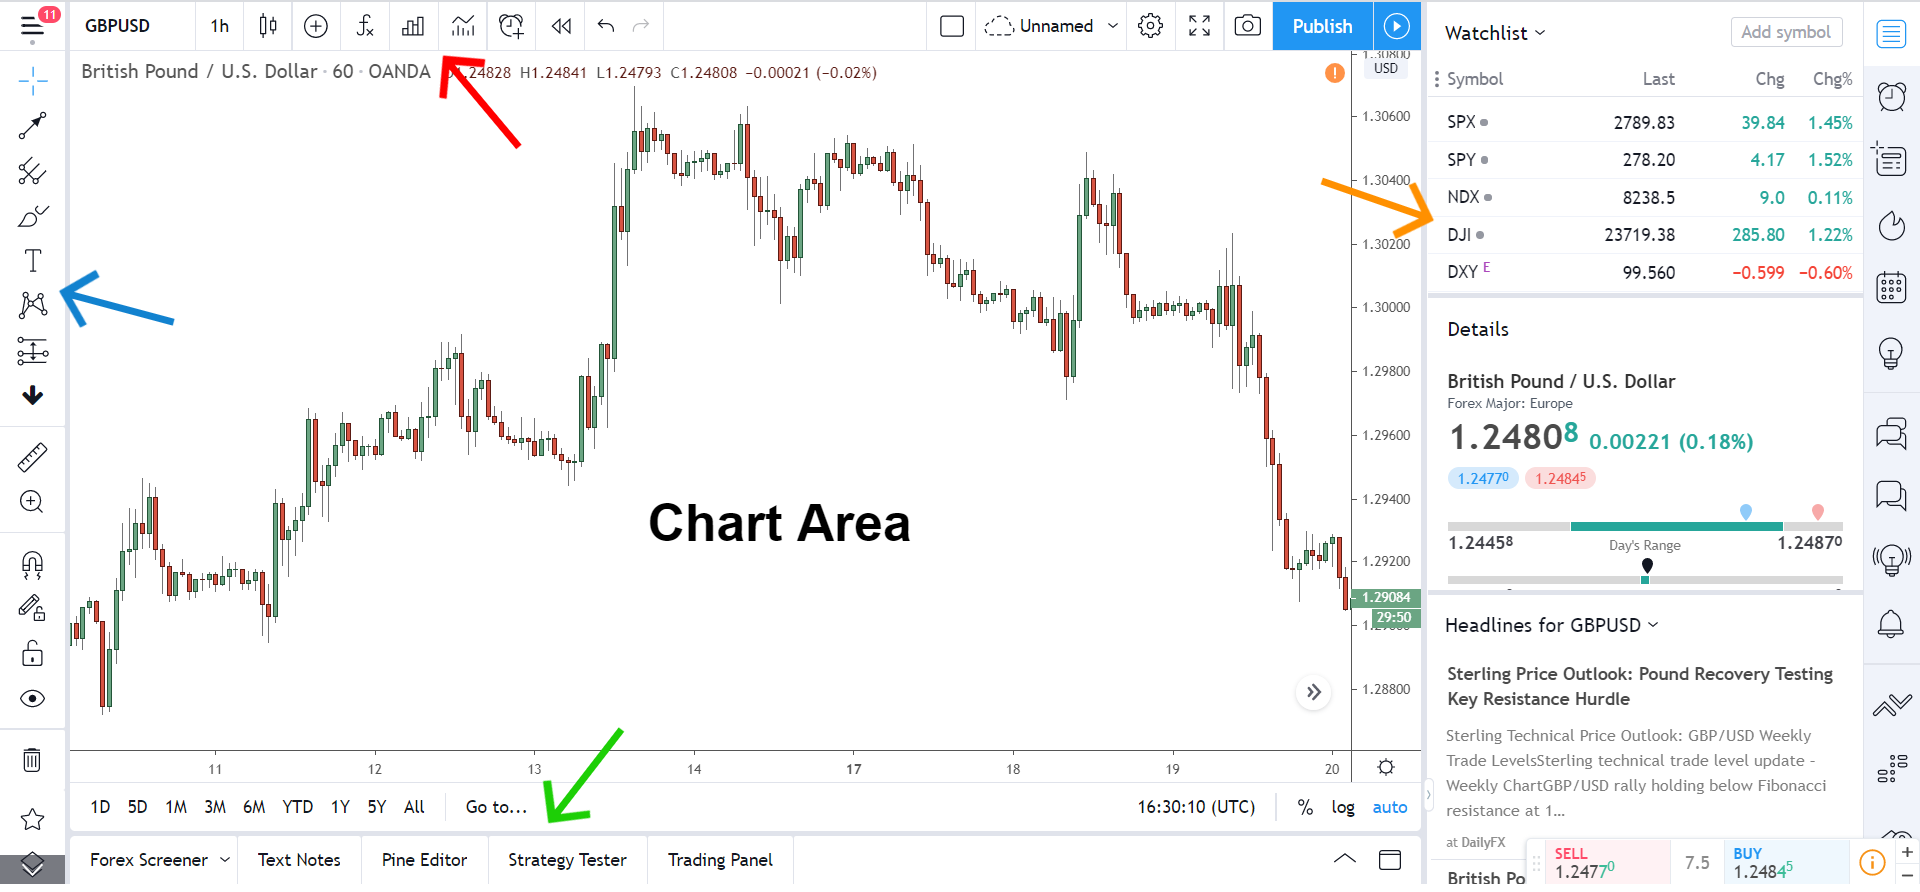
Now for all you beginners out there, this screen probably looks like a mess of different options and tools. That’s why I thought when I first started using it, and I’m sure that’s what many of you think right now.
But don’t worry… while it looks complicated at first, once you know a few things, the chart window is much simpler than it seems…
The window contains 4 different tabs, each which I’ve marked with an arrow.
These tabs contain all the options for viewing charts and conducting analysis. From here, you can add indicators, switch between different pairs (or other assets), add lines and rectangles – good for supply and demand trading – as well view information on the price of a currency and news around the world.
We’ll dive into the options of each tab later, before that, here’s a quick overview of what each one does…
Top Menu (Red Arrow)
The top menu contains the basic options for changing the chart, like switching between pairs, changing timeframes, selecting different chart types, etc. Head here first to get your chart set up ready for analysis.
Chart Area (Not Marked)
The middle of the chart, where you can see the price of the currency, is called the chart area.
When you add a tool or indicator to the chart, it’ll show somewhere here – some indicators will open in a graph below the chart too. Change the chart settings by right-clicking and selecting “Settings”.
Left Side Menu (Red Arrow)
All your favourite drawing tools like rectangles, lines, and fib retracements are found down the left side menu. As you can see, A LOT of tools feature here, and each one has a drop-down list containing even more within. We’ll go over these in more detail later on, so you can see how they work.
Right Side Menu (Red Arrow)
You probably won’t use the right menu too much. It mostly shows the different social options Tradingview provides, but the top half of the menu does contain a few useful trading tools, like the calendar and alerts box.
Bottom Menu (Red Arrow)
To find most of the specialized tools Tradingview provides, head down to the bottom menu. The strategy tester and editor I mentioned earlier feature here, as do the stock screener and notes tab.
Important Note: Unlike other online charting sites, you don’t need to manually save your analysis every time you use Tradingview. Everything gets saved to the cloud automatically as you carry out your analysis. So whenever you re-open the site and login, your charts remains the same as when you left them.
Setting Up The Chart Area
Don’t feel overwhelmed by all the options on Tradingview. I know it’s a lot to take in, but you’ll get the hang of it in no time, trust me. In a minute, I’ll run you through everything step-by-step, so you know exactly what each option does and how it works.
Before we get to that, however, let me show you how to set your charts up, ready for trading.
We only need to change a couple of things here, so it shouldn’t take too long.
So first of all, you want to change the chart type to a candlestick.
By default, Tradingview displays a line chart. While this comes in handy in certain situations – like for quickly finding S & R levels – for normal analysis, it doesn’t give us enough information about the price. So switch it over to a candlestick chart to get a better idea of what price is up to.
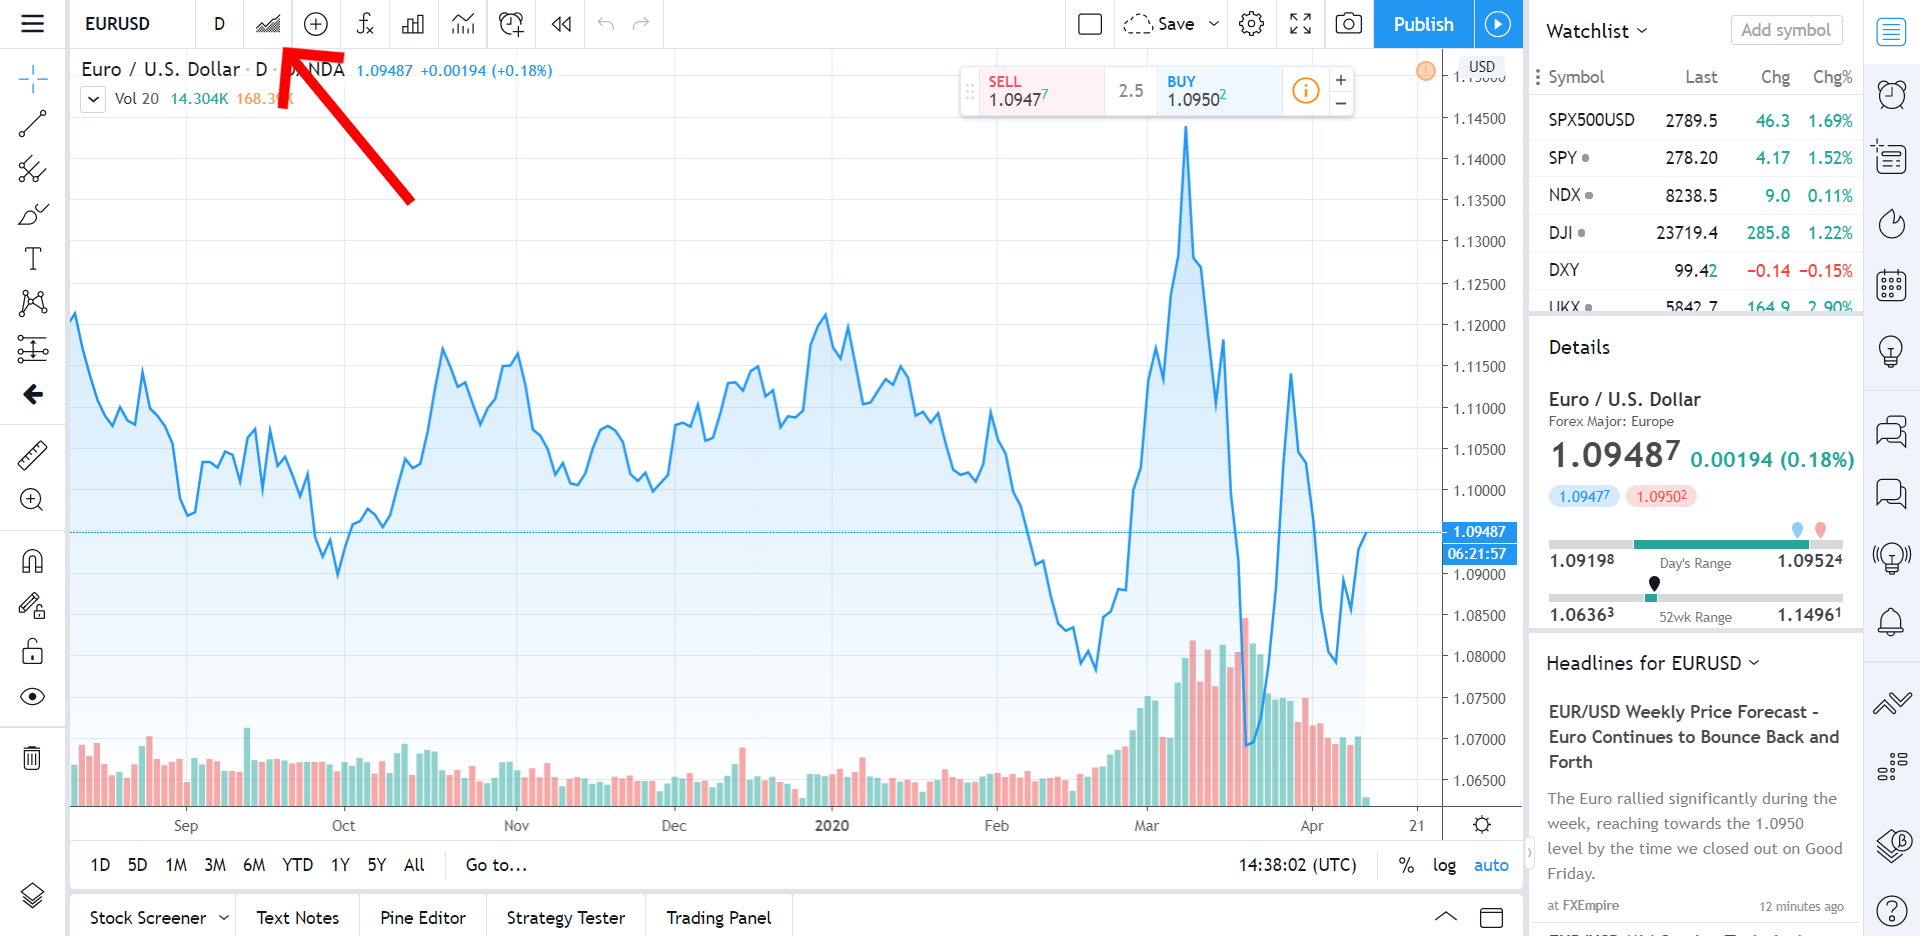
Change the chart type by clicking the little chart icon and selecting “Candlestick” from the drop-down list.
With that out of the way, it’s time to adjust the chart settings.
To do this, you need to open up the chart menu. So, right-click some blank space in the chart area and then select “Settings” from the list that appears.
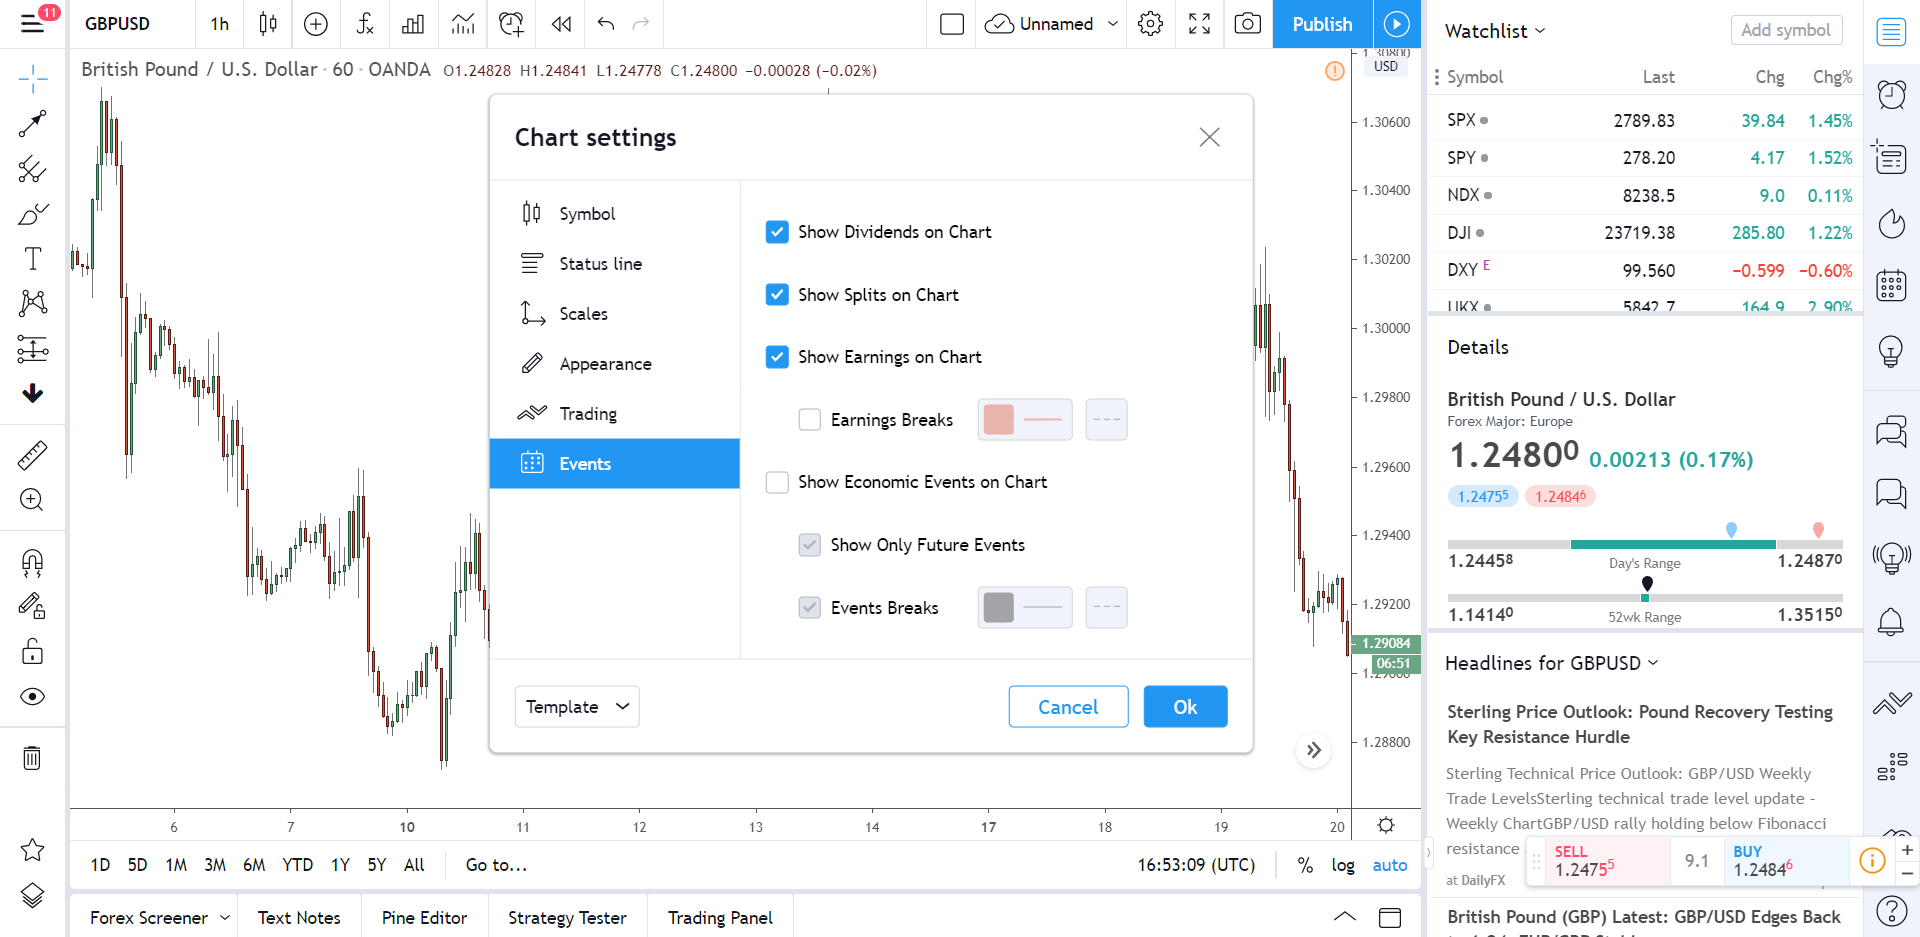
The chart menu contains options for changing how and what information the chart displays – like colours, price lines, tabs, etc. Quite a few options here, I know, but we only need to change two or three things, so it won’t get too confusing.
Right off the bat, head over to the Symbol tab and change the colour scheme of the chart.
You can keep this on the default setting if you like, but I like to change my colours to something that pops out a little better, to make it easier to see what price is doing.
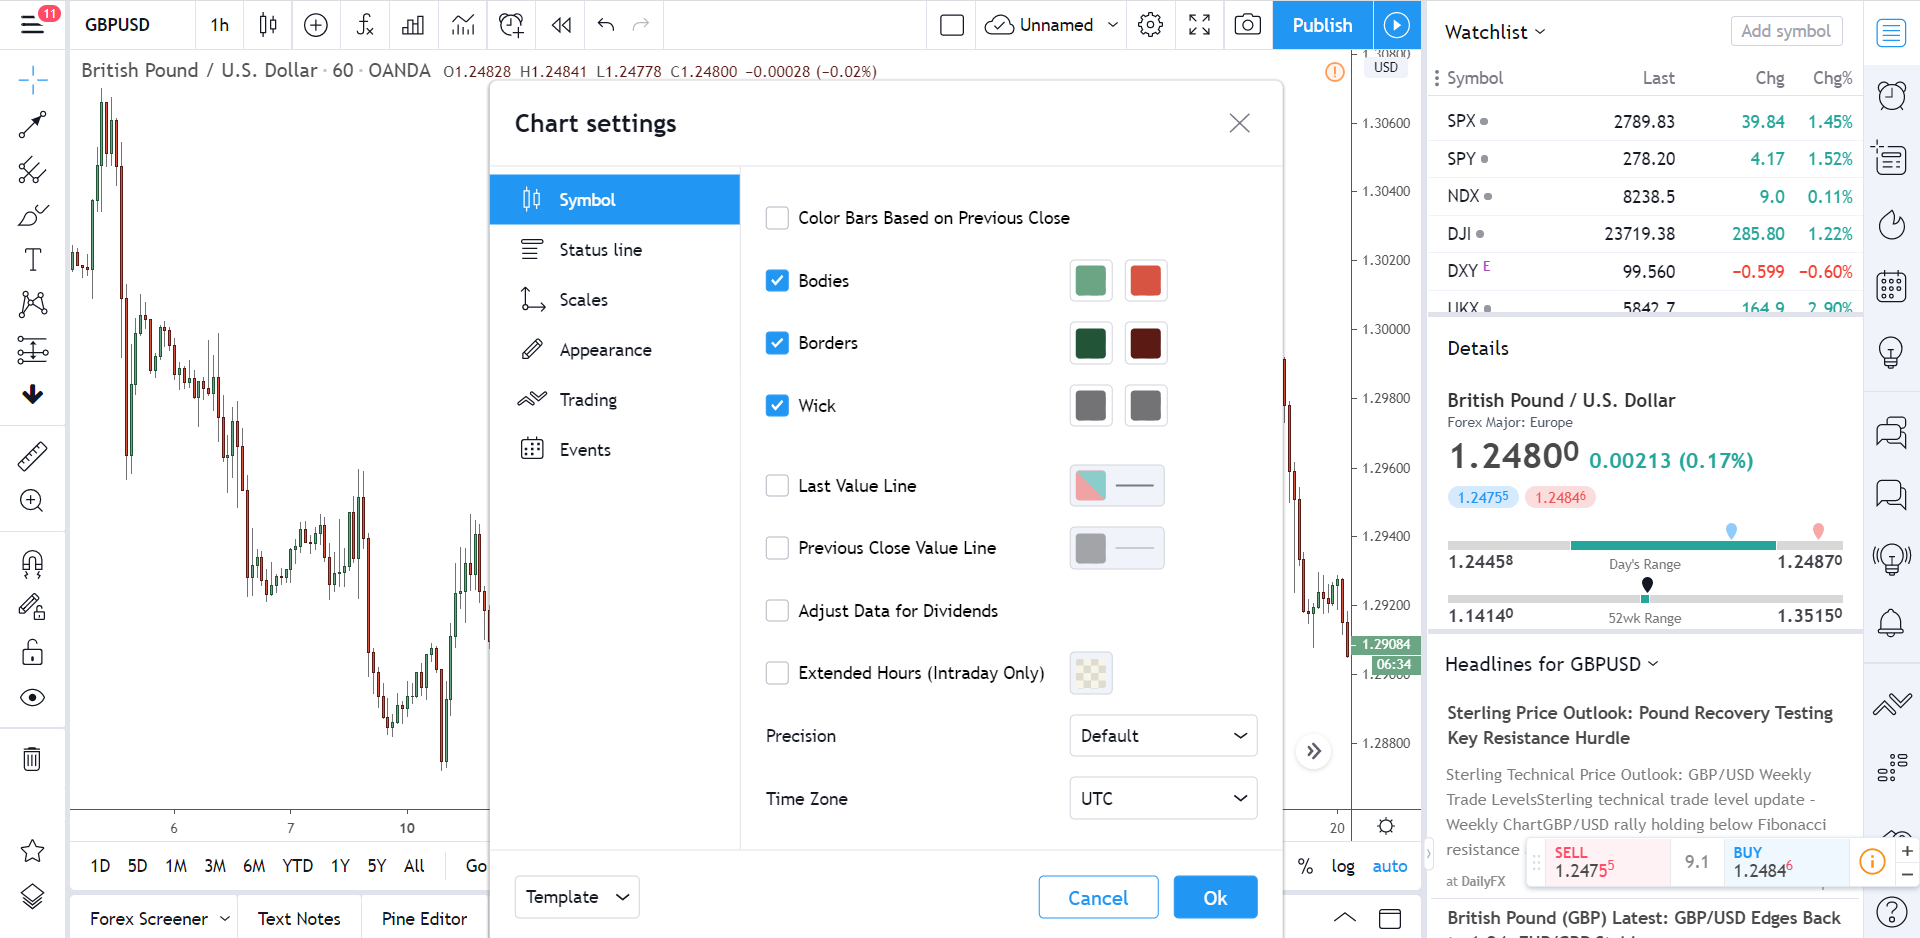
Here’s what mine looks like, in case you want to copy.
You don’t have to change this next setting, but I recommend turning it on because of how easy it makes finding where price might reverse.
As many of you know, I’m a HUGE fan big round number levels – prices that end in 500 and 0000. For my money, they create some of the strongest support and resistance levels in the market, with many of the biggest reversals beginning after price touches or comes close to the levels.
Finding the levels doesn’t take long, but marking each one on the right price gets old… fast.
However, by changing the Horz Grid Lines setting in the appearance tab to black – or whatever colour you like – the chart will automatically mark every big round number level for you, removing the need to mark them.
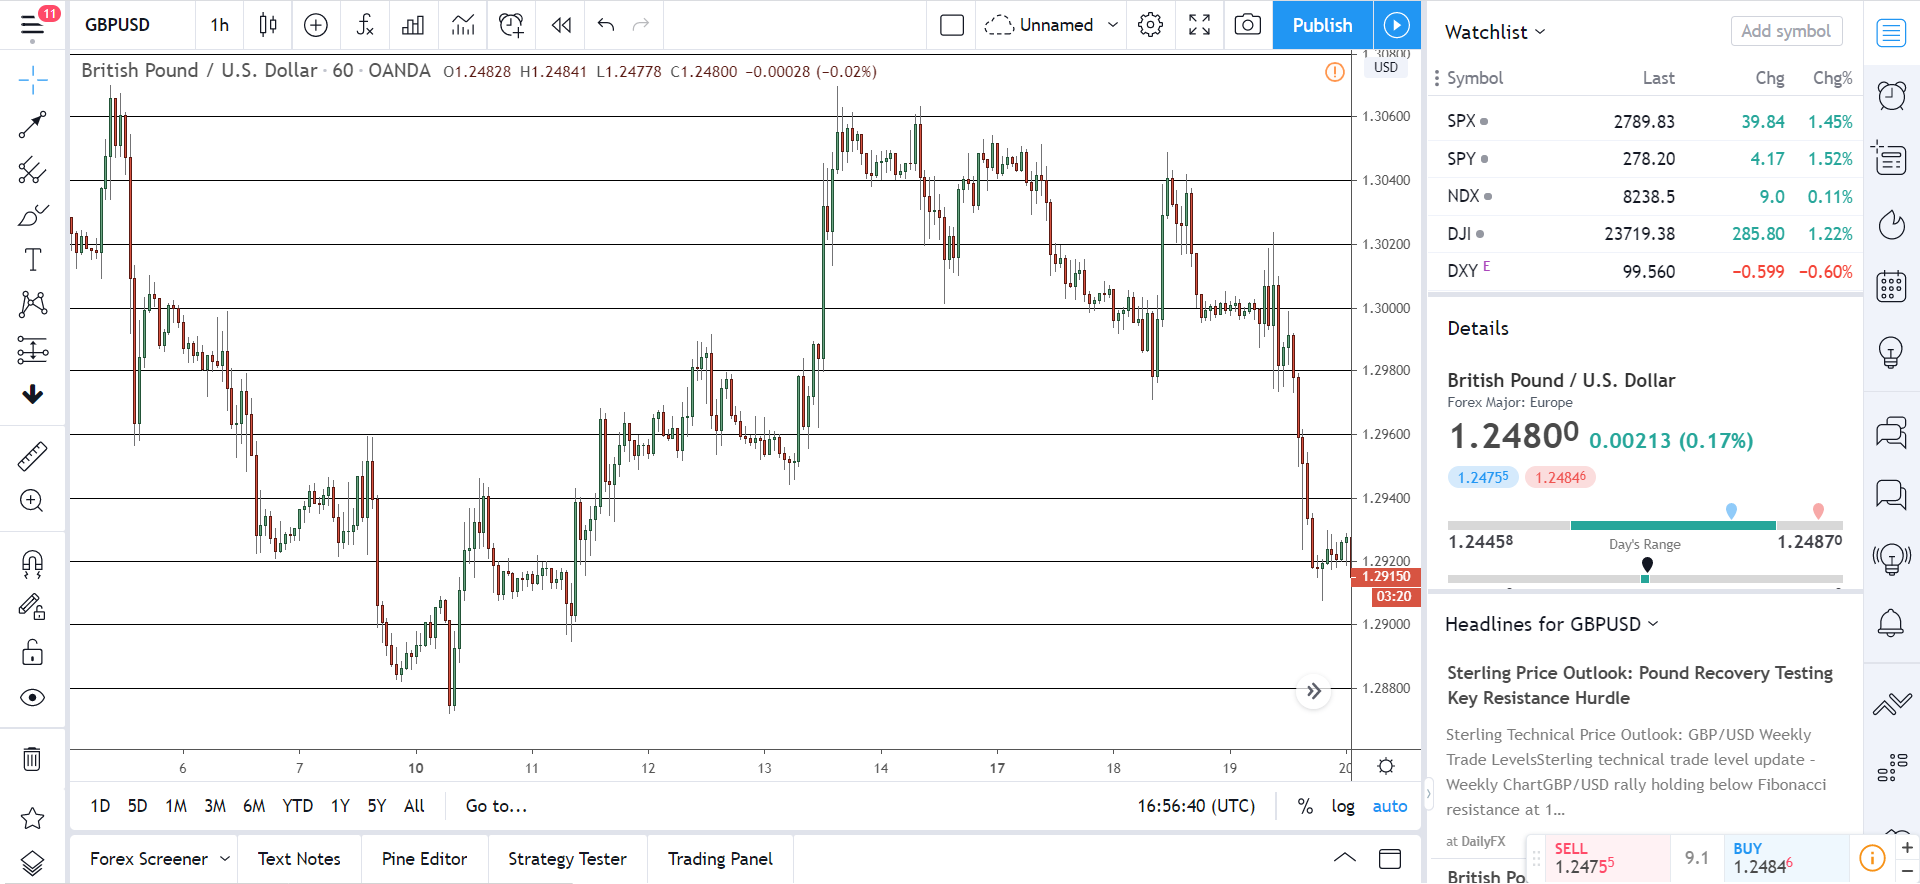
Another great little Tradingview feature provides.
I’ll talk more about this later on, but you can also connect your broker/exchange to Tradingview and trade directly from the chart. In other words, you can place, close, and manage trades directly from the chart window, without going back and forth between Tradingview and your broker. Pretty neat, right?
The Trading tab shows the important options related to this, so check it out once you connect your broker/exchange to see what stuff needs enabling and disabling.
Finally, click “Show Economic Events On Chart” inside the Events tab.
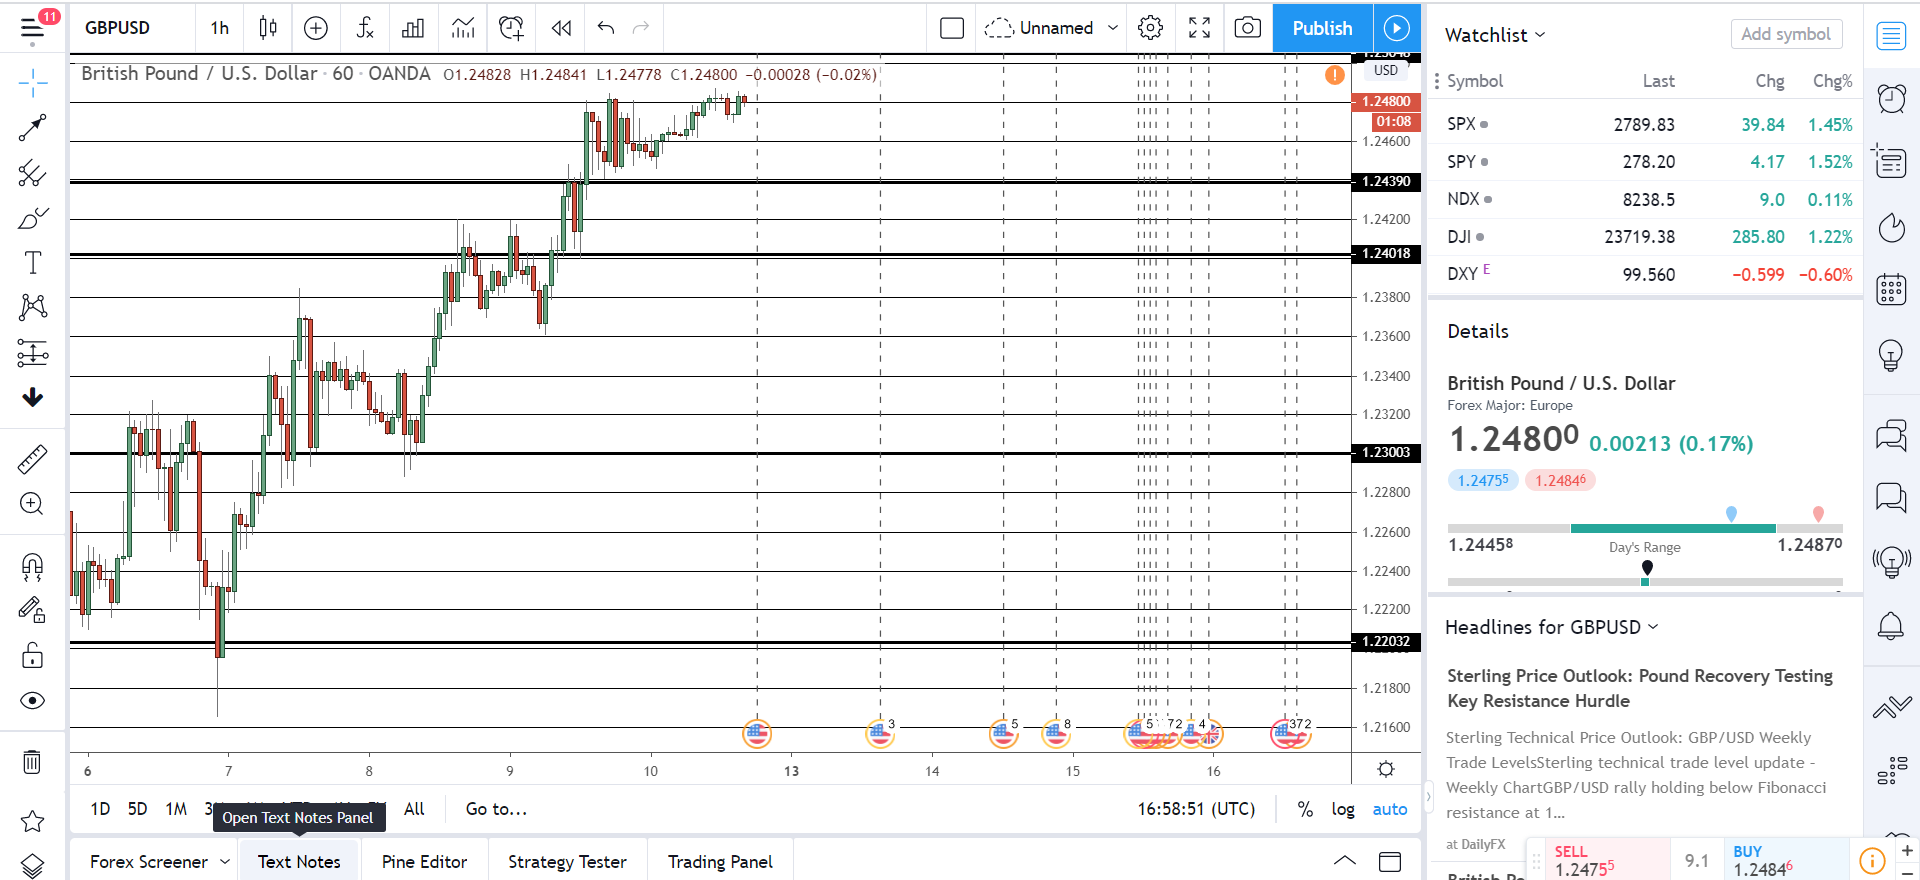
As it says, this shows important economic news on the chart via a small circle with a flag and number. The circles show the time of the announcement, and the number tells you how many events are set to be released – click the circle to get a small description of each event, and its predicted impact.
It doesn’t show every release as forex factory does – so best to still keep that open somewhere – but all the important ones will show on the chart at their respective times.
Getting To Grips With Tradingview
So time to get into the meat of the guide. Over the next few sections, I’m going to run through all different features and tools on Tradingview and show you how they work. I’ll explain each setting and tool in the 4 menus mentioned earlier, and give you my thoughts on which are useful and what for.
By the end, you should have a pretty good idea of how to set up and use Tradingview for yourself.
Top Menu
We’ll start with the top bar menu – or main menu as I like to call it. Your first port of call after opening a pair, this menu contains all the important options for changing the chart. Change the time-frame, select a different pair, and switch between chart types all from within this menu.

The top bar menu contains 18 different options, all of which I’ve labelled above.
Don’t worry… you won’t need to change or use all of these when you trade. However, it’s important to understand what each one does, so you know how to use the charts properly.
Before we cover the options, find all your account settings inside the Profile tab (1).
Click this to reveal a drop-down menu with all the settings for your account. Save your current chart layout, sign out, turning sharing on (or off) all from the menu – make sure you keep auto-saving on, to save yourself from losing your analysis by closing the chart by mistake or from your PC crashing.
With that out of the way, let’s look at the options…
So when you first open a chart, head over to the Pair Selector (GBP/USD in the image) to switch to your favoured pair.
Tradingview supports all currency pairs, thousands of international stocks and commodities, and most of the big indexes. It also supports many cryptocurrencies in case you want to trade them too.
Most pairs have multiple broker/exchange pricing as well, so you can see the price of a pair for a specific exchange/broker – just look to the right, and it’ll say Oanda, FXCM, IG, etc next to the pair.
At some point, you’ll probably want to switch to a different timeframe. To do this, click the 1-hour button to the right (3).
All the key short, medium and long term timeframes you need in trading feature here, including many you don’t tend to see on other platforms – it even has 1-second charts, for all you scalpers out there.
If you purchase the pro version, you can even create your custom time-frame if the others aren’t to your liking.
To set this up, scroll down until you see the “Add” button:
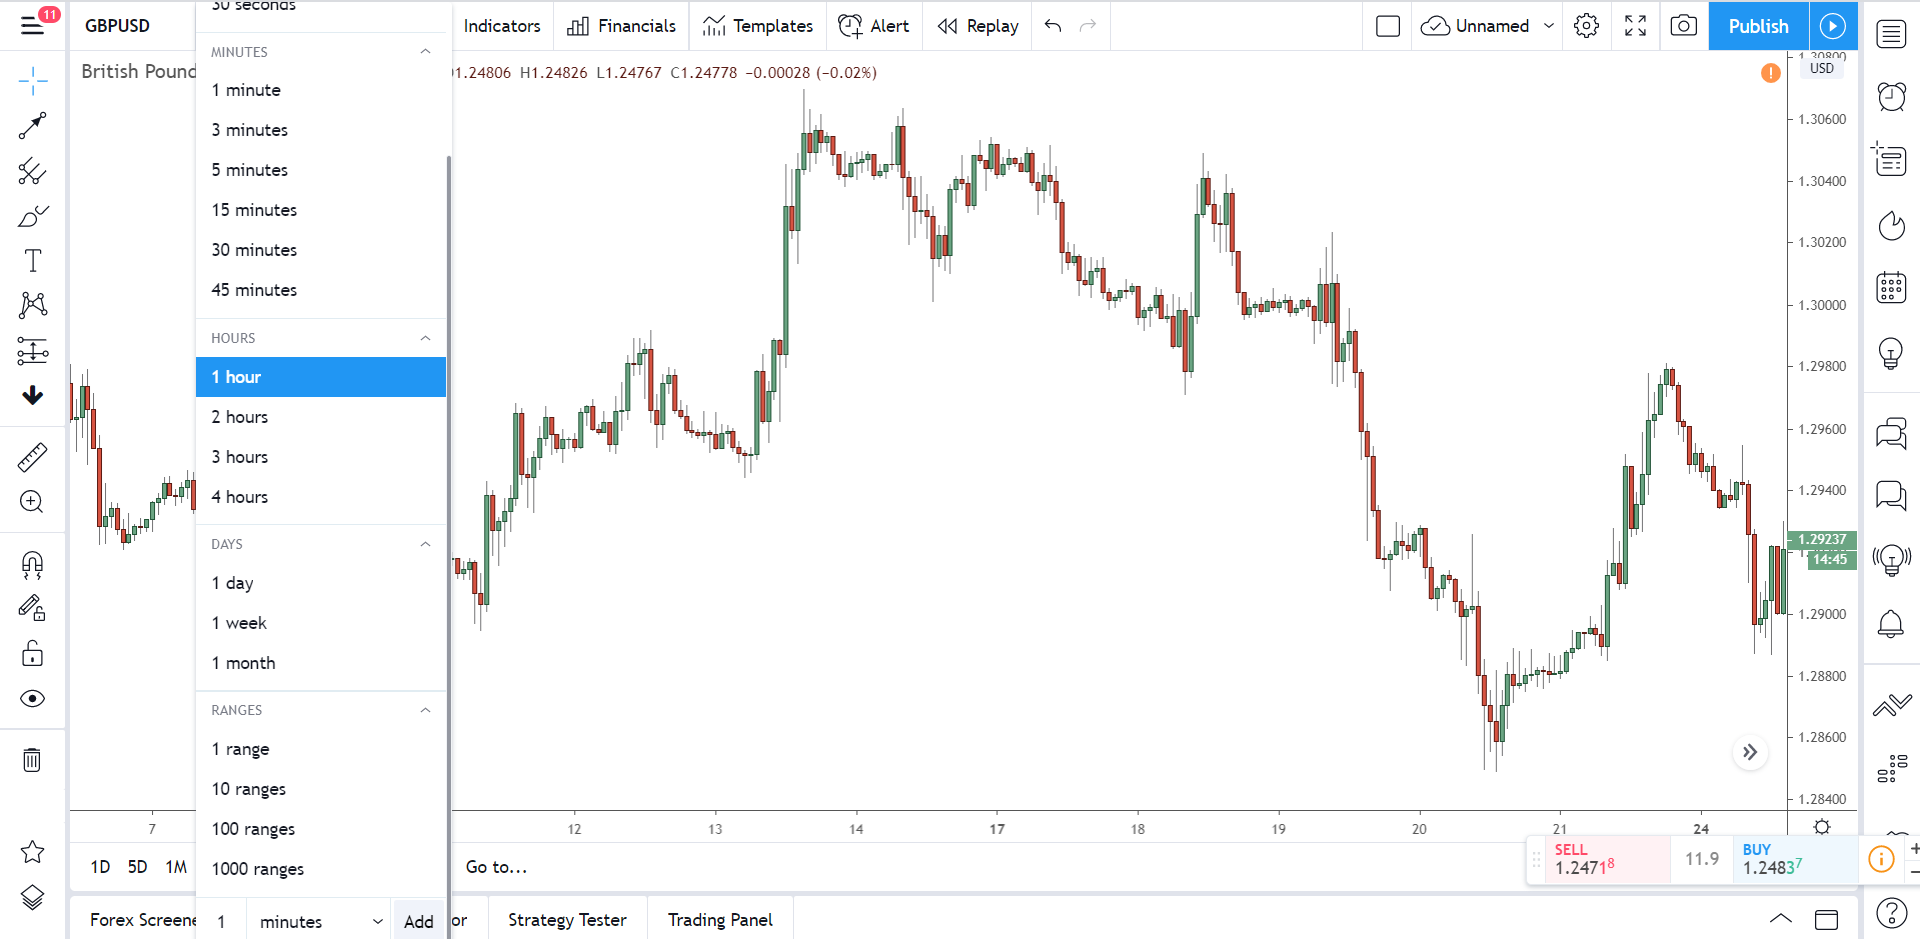
Enter the interval period and the timescale and then click “Add” to add the timeframe to the list and switch over to it on the chart.
It might be hard to see, but did you notice the little gold start next to each time-frame?
Take a look again…
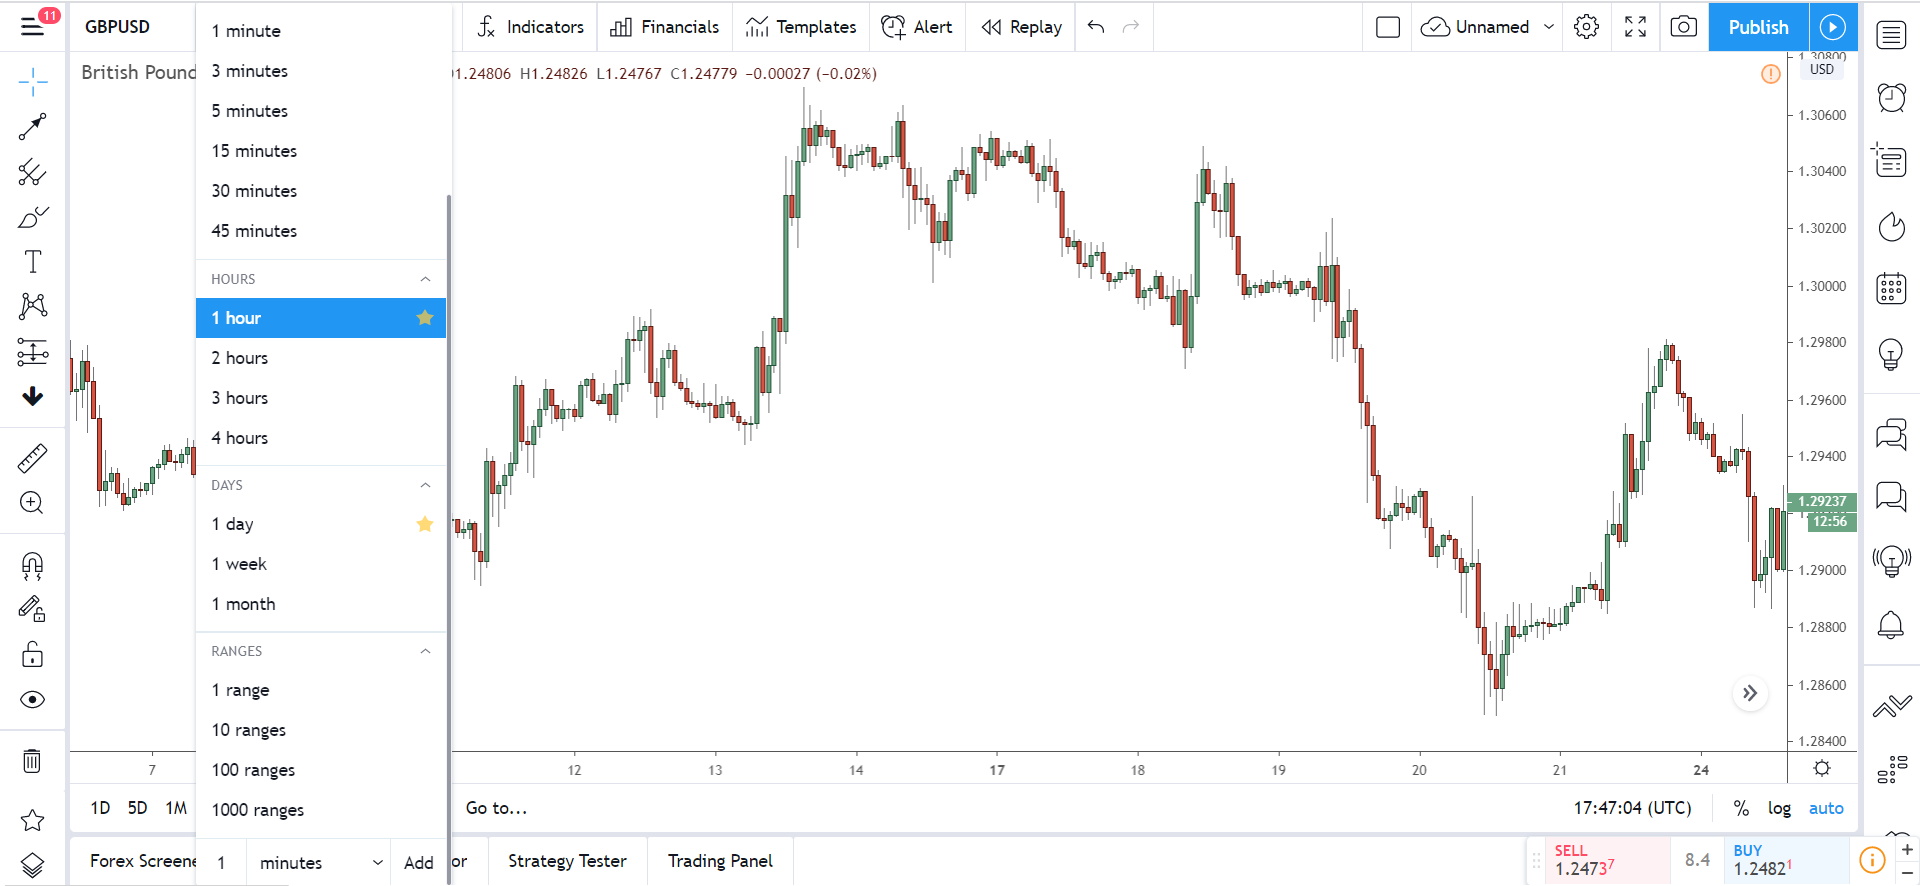
These stars aren’t for decoration. Rather, they allow you to set a time-frame as a favourite.
Your favourite timeframe will show to the left of the timeframe button, so you can instantly switch to it without cycling through the menu – super handy if you quickly need to switch back and forth between a high and low timeframe, like when day trading.
Neat little feature, if I say so myself.
Now by default, Tradingview displays a line chart, so you want to switch this over to a candlestick ASAP.
Click the little bar icon to change the chart type, like I showed earlier. Tradingview has few interesting chart types here, like the Renko and Kagi, but the candlestick works best for price action, so stick to that.
You probably won’t use this next tool too often, but it’s still useful in certain situations.
Compare lets you compare the price of two currencies – or any other assets if you like – against one another.
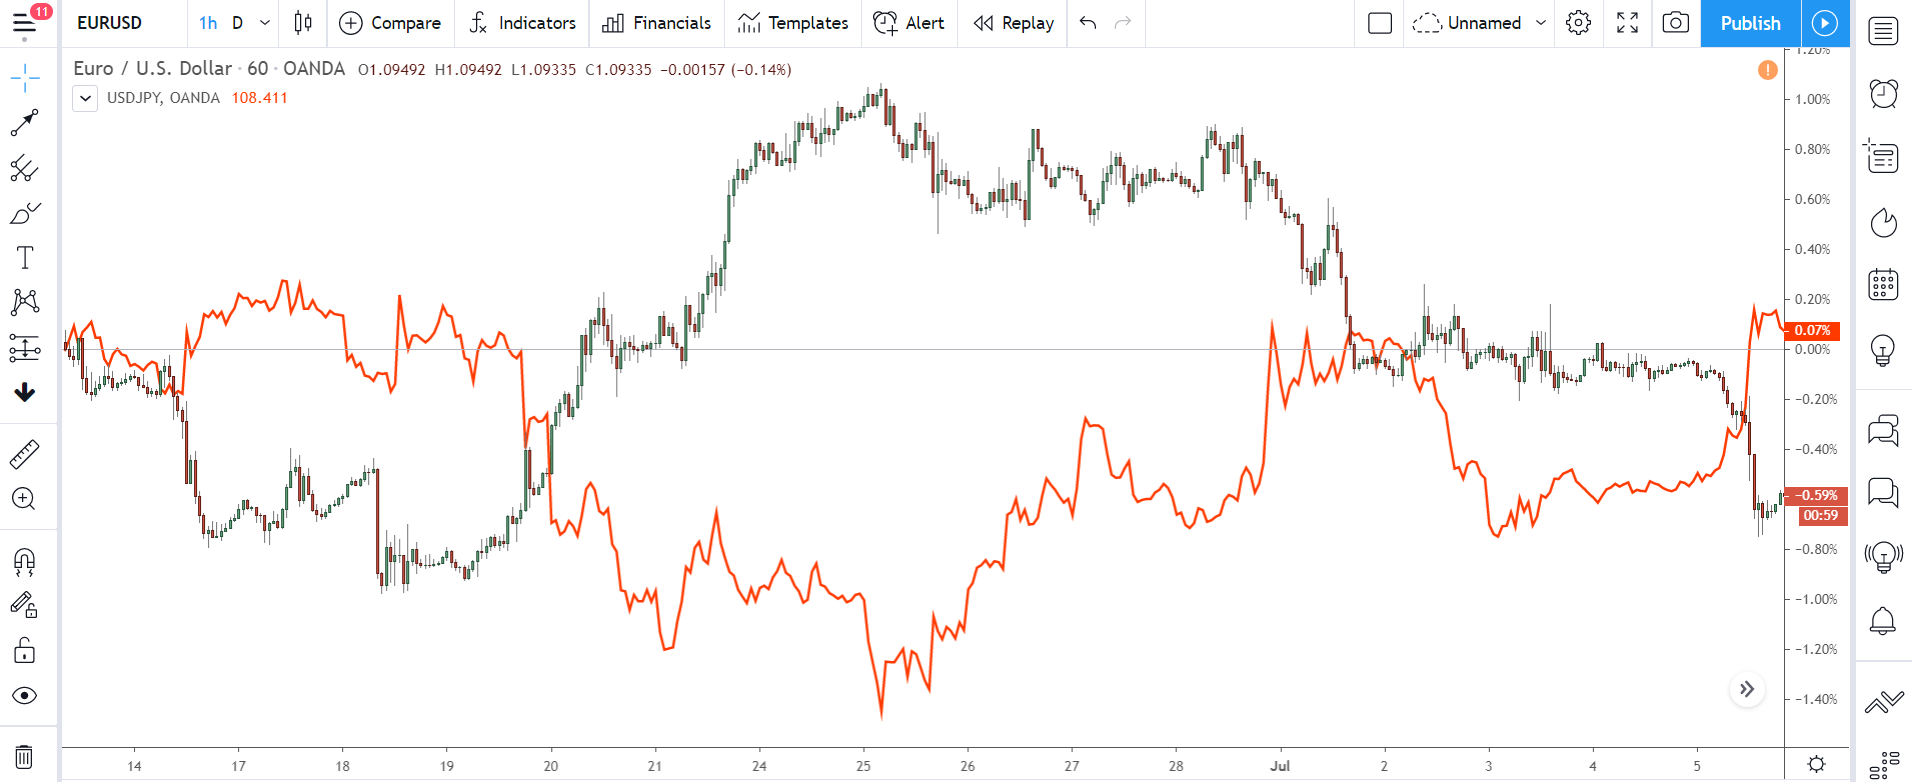
There are a few different ways you can use this, but I mainly use it to quickly see how different pairs and assets correlate to each other.
Normally, you have flick back and fourth between pairs to see how they correlate. With the tool, however, you just place the correlated pair on the chart… its price gets overlayed on top of the other pair, making it easy to see how they move and correlate to each other.
You can also view the price in a graph at the bottom, rather than overlayed on top if you want to keep your chart nice and clean. To set this up, just de-select “Overlay” inside the compare menu.
Indicators contains all the technical indicators Tradingview provides… and it provides A LOT. You won’t be short of indicators here, that’s for sure. All the basic indicators we know and love feature and Tradingview also has an exhaustive collection of custom indicators created by the community.
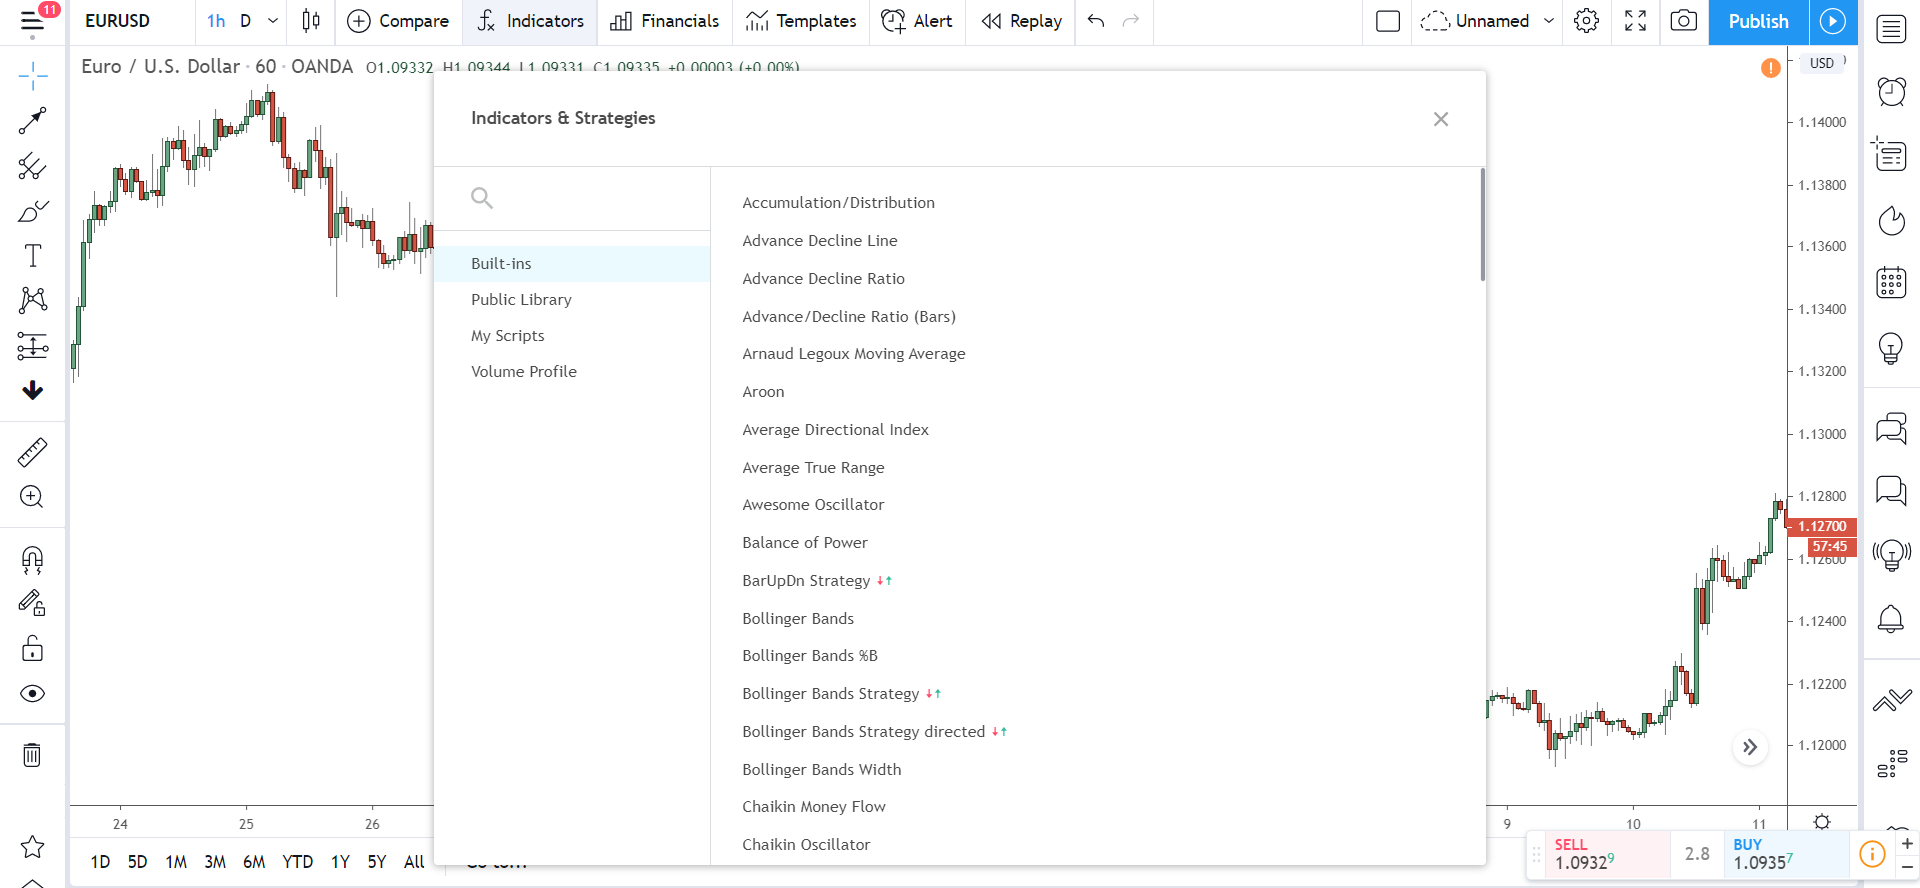
Open up the tab, and you’ll see 4 mini tabs, each containing a different set of tools and indicators.
Find the most common indicators under “Built In’s” at the top. MACD, Moving Averages, Relative Strength Index, all feature here, along with all your other favourites.
Custom library shows the custom indicators mentioned above.
Important Note: Need to change the settings of an indicator? Right click the line (or graph, depending on indicator) and hit the “Settings” button. A small menu with all the settings will pop open. What you can change depends on the indicator, but all the important stuff is supported. You can also change colours and display settings by clicking the “Display” tab inside the settings menu.
If you fancy creating or editing your own indicator, you can do so by clicking the My Scripts button.
Volume Profile is a pro account only indicator. It gives a much more advanced look at the volume and plots it vertically on the right of the chart, so you can see how much volume is building up around different prices – for those familiar with the market profile, it’s very similar to that.
Not that necessary for us price action traders, but if you can read volume, could be worth taking a look at.
Next up, we have the Financials tab.
Only really useful for stock traders this, so skip down to carry on with the forex stuff.
Financials shows important figures about a stock (earnings, debt, cash flow, etc). It plots the release of each figure in a separate graph below the chart to make it easy to see how it’s changed over time.
If you trade or invest in stocks, you’ll know how important fundamental analysis is, so this tab makes it really easy to see how the fundamental are changing over time.
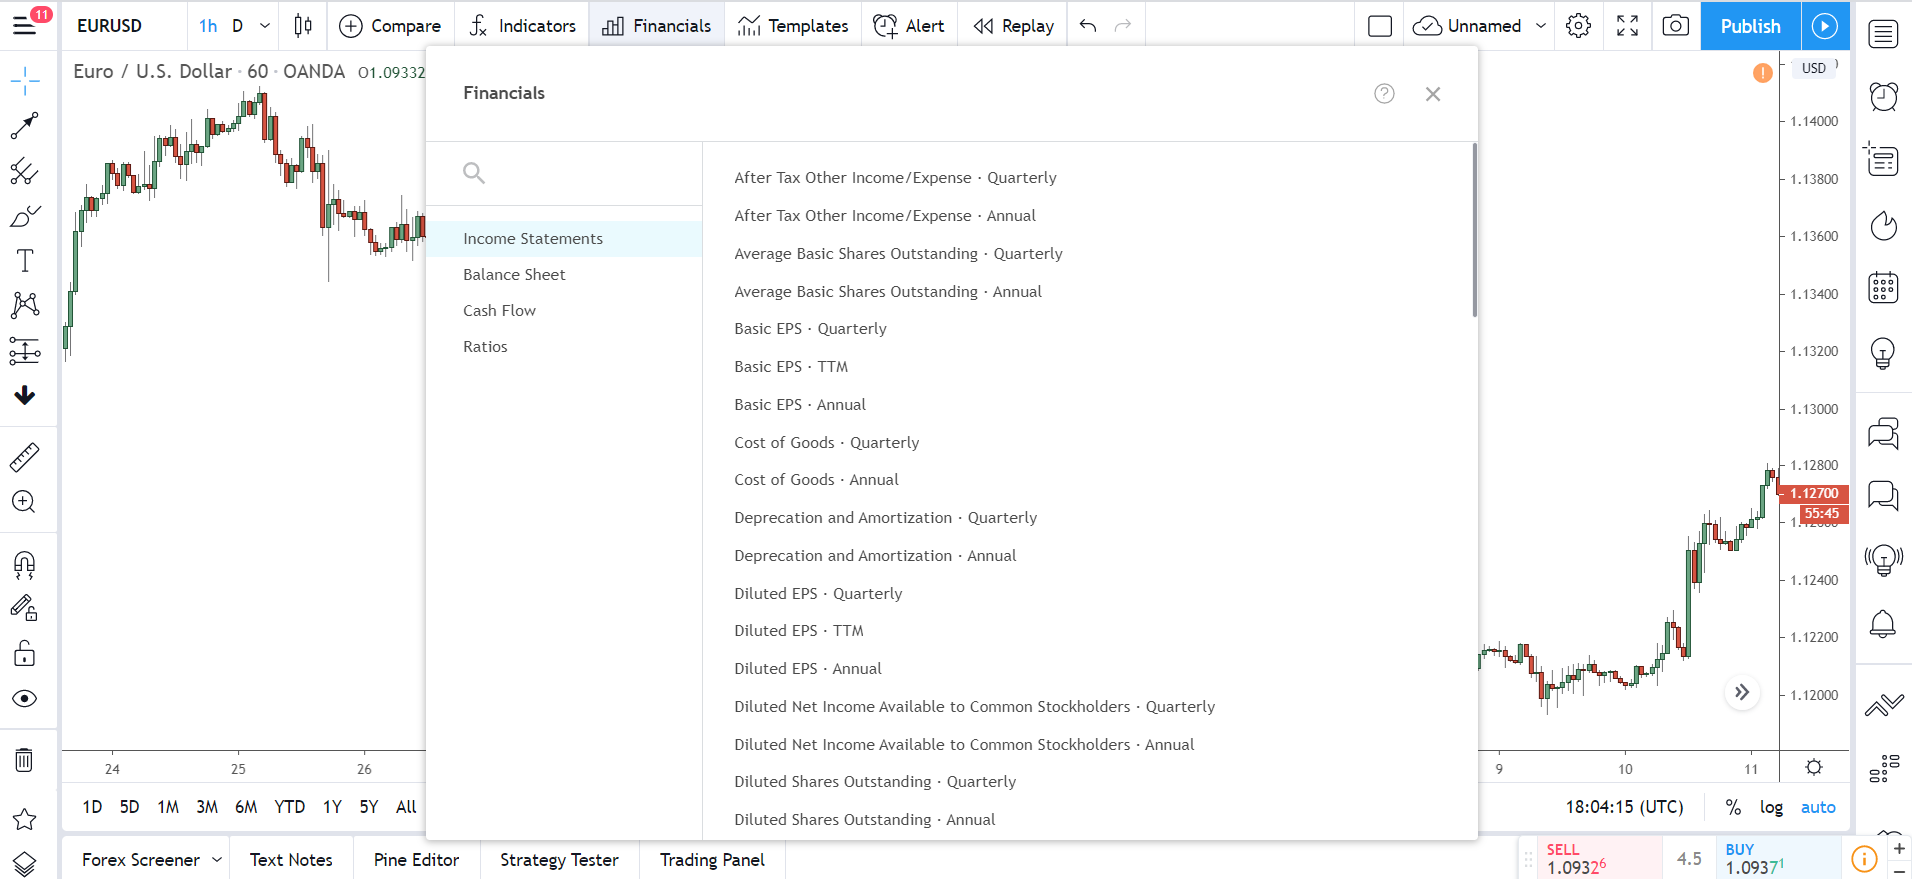
The menu shows all the important financials, and you can easily switch between them by clicking the tabs to the left.
Hate re-applying your studies (indicators, financials, etc) every time you open a new chart? Hit the Templates button to save your current chart layout as a template. Select this whenever you open a new chart to instantly have all your studies re-applied with your saved settings.
3 default templates with the most popular tools and indicators are also available, but it’s better to create your own in my opinion – more customizable, you know.
Note: You can only save 1 template using the free version of Tradingview, so choose wisely.
Alerts allows you to, yep, you guessed it… set alerts – who would’ve thought!
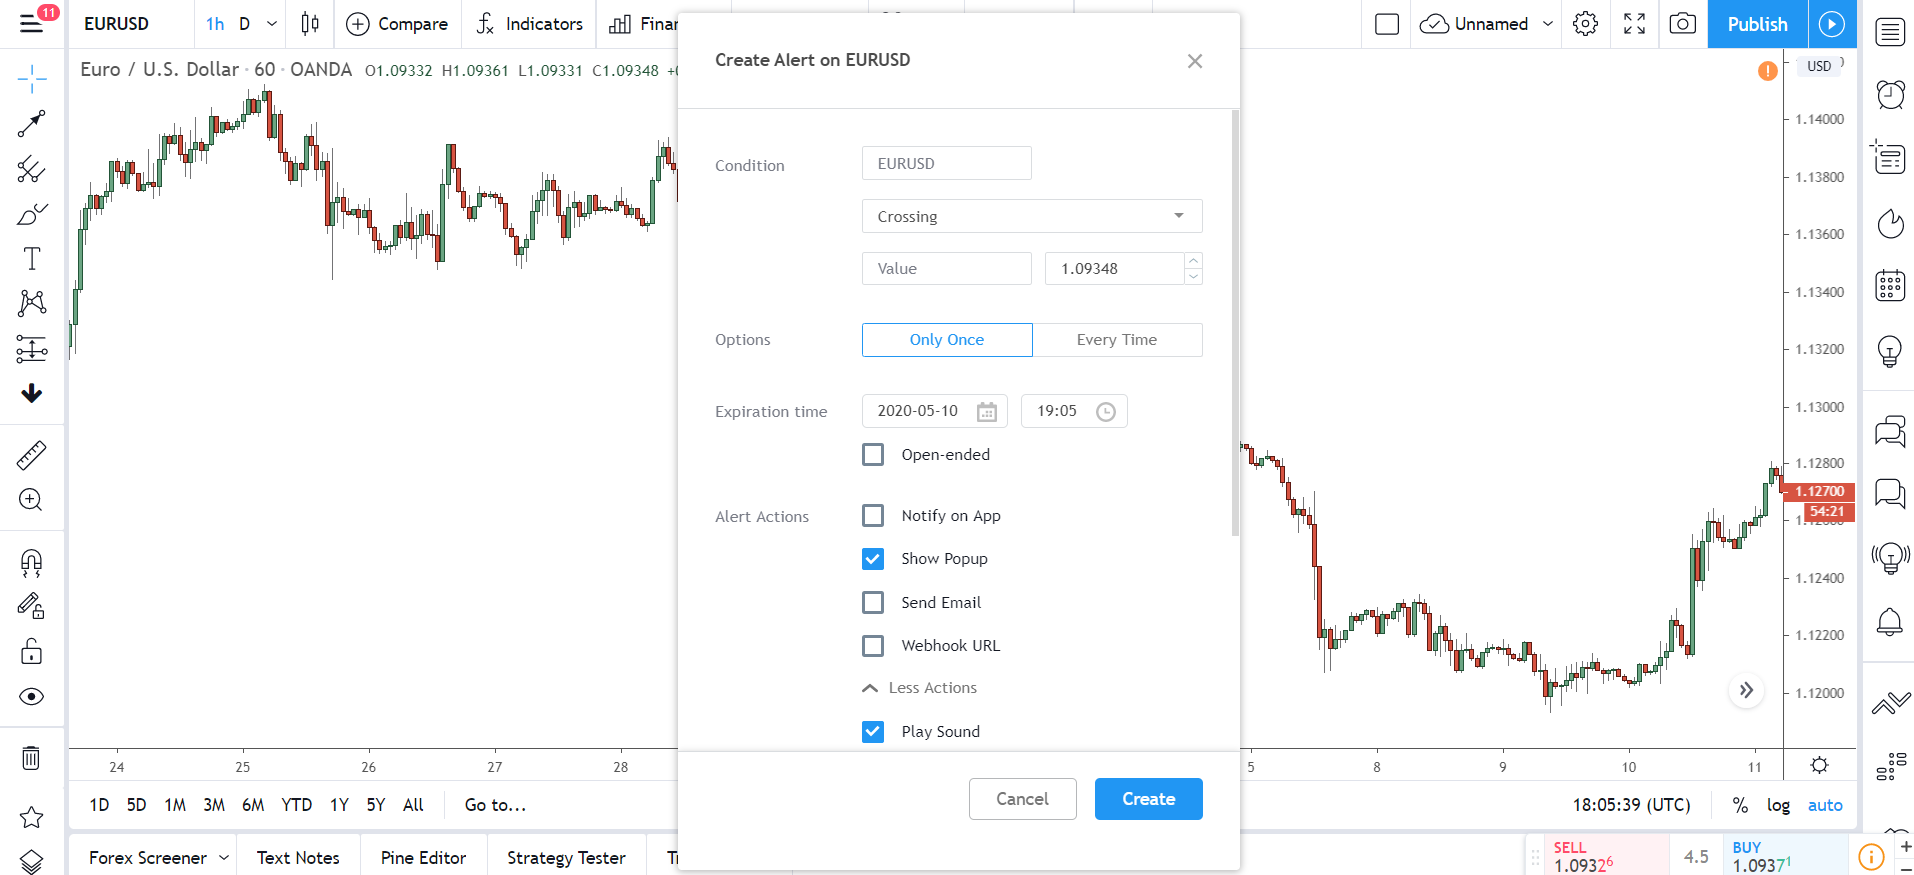
Tradingview has a HUGE range of options for setting and customizing alerts, some of which you can see above.
Set alerts when support and resistance levels get hit, when news events come out, set them for when indicators cross or hit a certain number… you can even get the alerts sent to your phone or email, so you never miss a beat when out and about!
Note: Sms alerts require a paid account, but for email, it completely free.
Setting an alert is easy, but there are two ways to do it…
The first (and easier) way is to right-click the price, technical indicator, or level you want to set the alert on and click the “Add Alert” button from the menu. Tradingview will set the alert for you at that point. The other way is to open up the Alerts tab and manually enter all the information yourself.
You can view all your open alerts by hitting the alarm clock icon in the right menu.
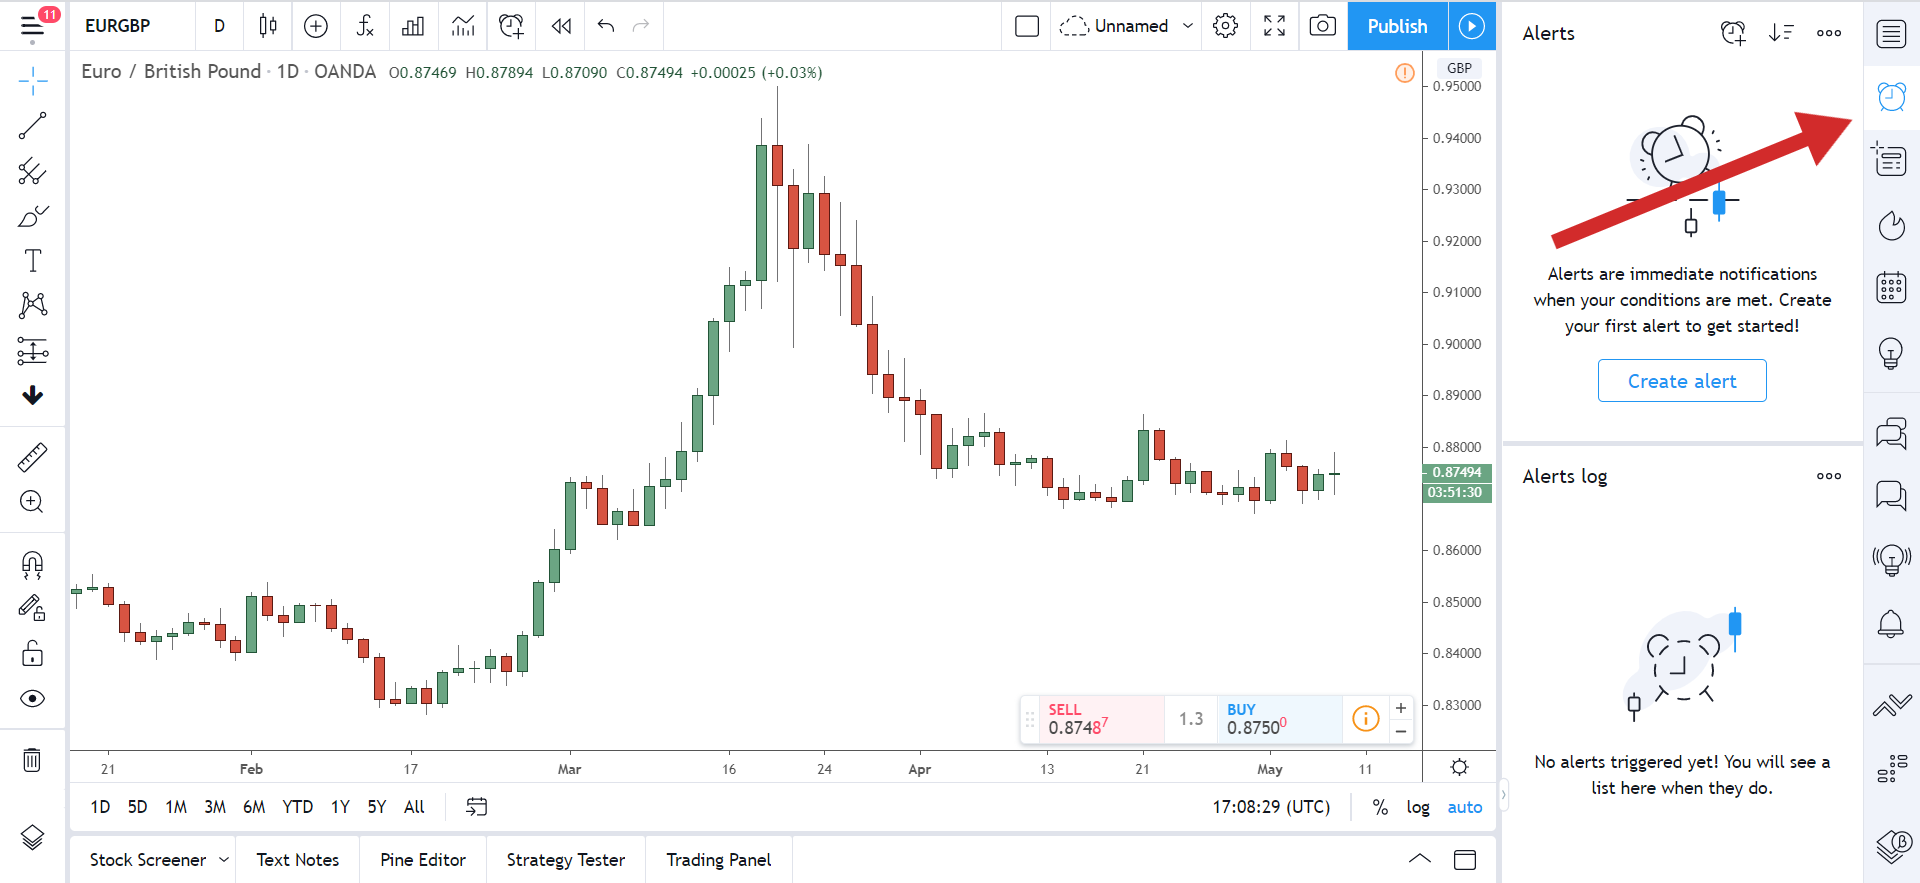
Before we move on and look at the right side of the menu, we have the Market Replay button.
A Pro account only feature this. Market replay lets you rewind the market and play it back in real-time, just like a video. I often use this to look back at old trades to see what went right (and wrong) and how I could improve.
Note: The Undo and Re-Do buttons (11) let you correct mistakes, just like word – almost forgot about this.
Over to the right side of the main tab now…

You won’t use these 5 options much, but nonetheless, they let you do some cool things worth knowing about.
If you want to change the layout of the chart, for example, to have one currency next to the other or a different timeframe shown alongside another timeframe, click the little square button (12).
Tradingview supports multiple layout types, but you need the paid version to access them all.
To the right of the square, it says Unnamed with a little down arrow next to it. Use this to save your current chart – so all the indicators, lines, drawings, tools, etc. Tradingview saves all your charts to the cloud – hence the icon – so you can quickly switch between them. Simply click the little arrow to save and load up your charts.
Note: Make sure you keep Auto-saving on, otherwise you could lose your analysis by closing the chart.
The small Cog button opens the chart settings menu, which I showed you earlier.
To full screen the chart window hit the 4 expanding arrows icon. If you want to take a screenshot of the chart, maybe to post in a forum or chatroom, click the small camera button to the right.
With Publish, you can upload your analysis to Tradingview for everyone to see. Hit the button to bring up the idea window. Enter your idea or headline for the analysis e.g Eur/Usd Breaking To New Highs, then write a description of what you think is going to happen in the small text box below.
Once approved, Tradingview will publish your analysis on the Ideas page for that pair.
Side Menu
Onto the sidebar menu now.
Probably the part of the chart you’ll be using the most, the side menu shows all the important options for drawing on the chart like lines, rectangles, shapes, Fibonacci studies, etc along with some other cool tools exclusive to Tradingview.
Lots of options to go through here, so lets jump right in.
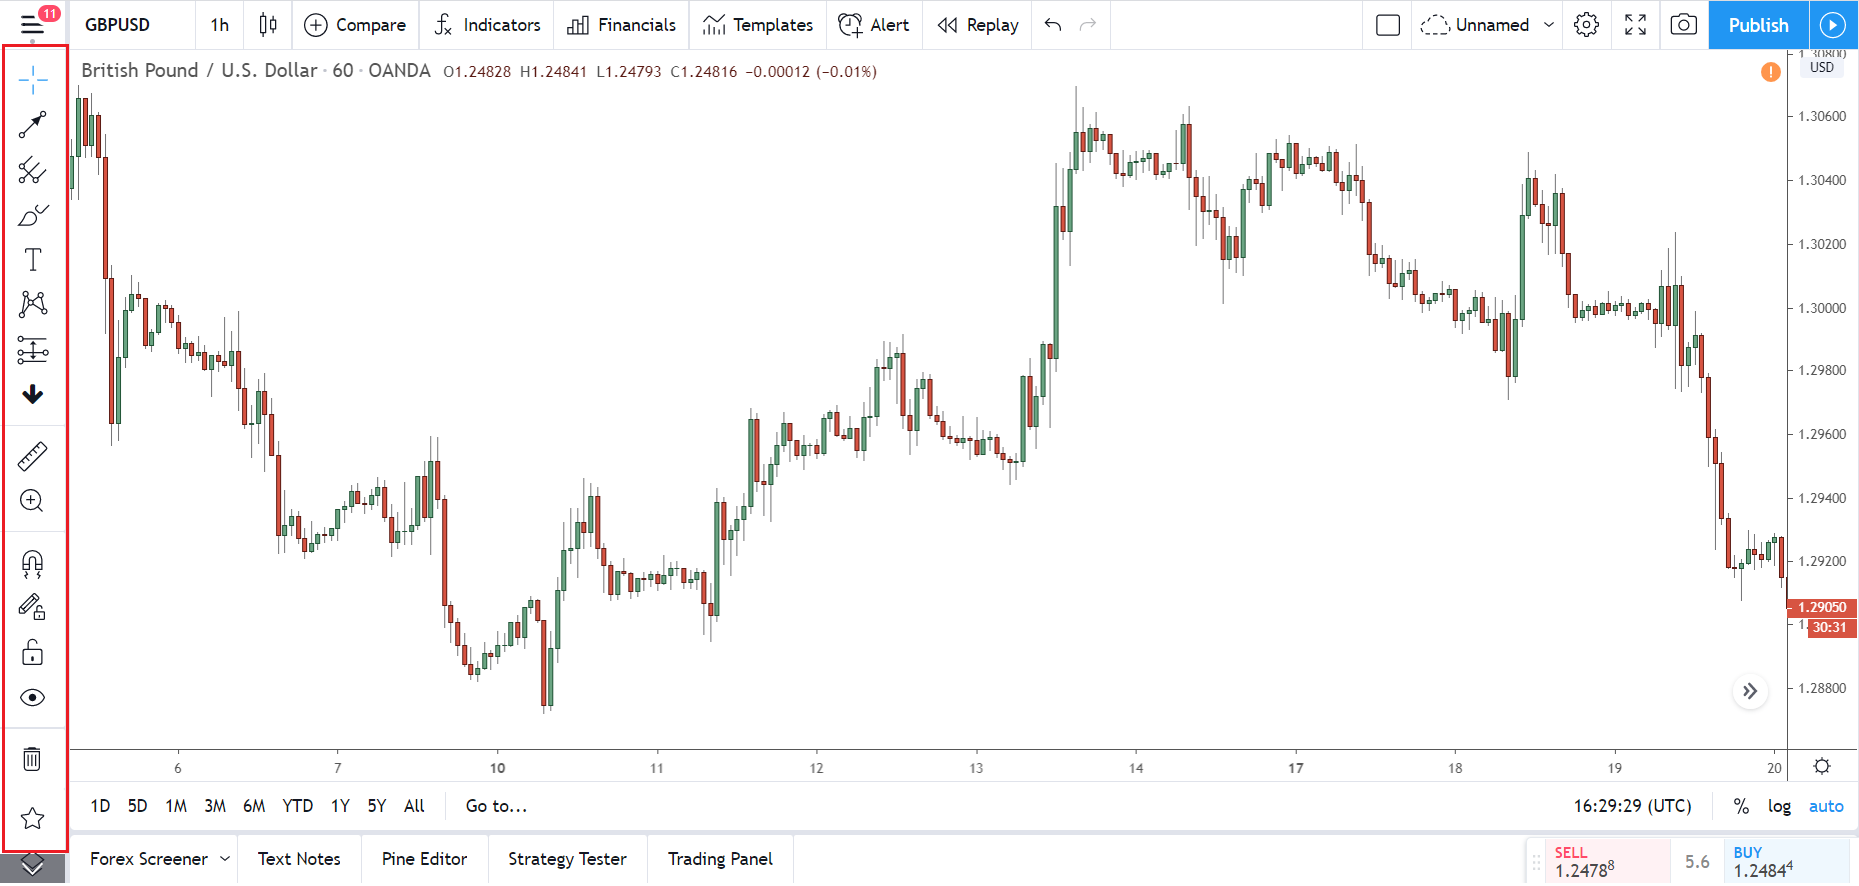
Starting from the top then, we have the cross-hair selector.
As it says, use this change your cross-hair.
I keep mine on the default cross, but you can select something else if that’s not to your fancy – you can also select the eraser tool here, in case you want to wipe a shape or line off the chart.
Speaking of lines…
At some point, you’ll no doubt want to put some support or resistance levels or trend-lines on the chart – if you don’t, what the hell are you doing on a price action site? Tradingview has all sorts of lines and channels for your needs.
To access them, head over to the line tab below the cross-hair selector.
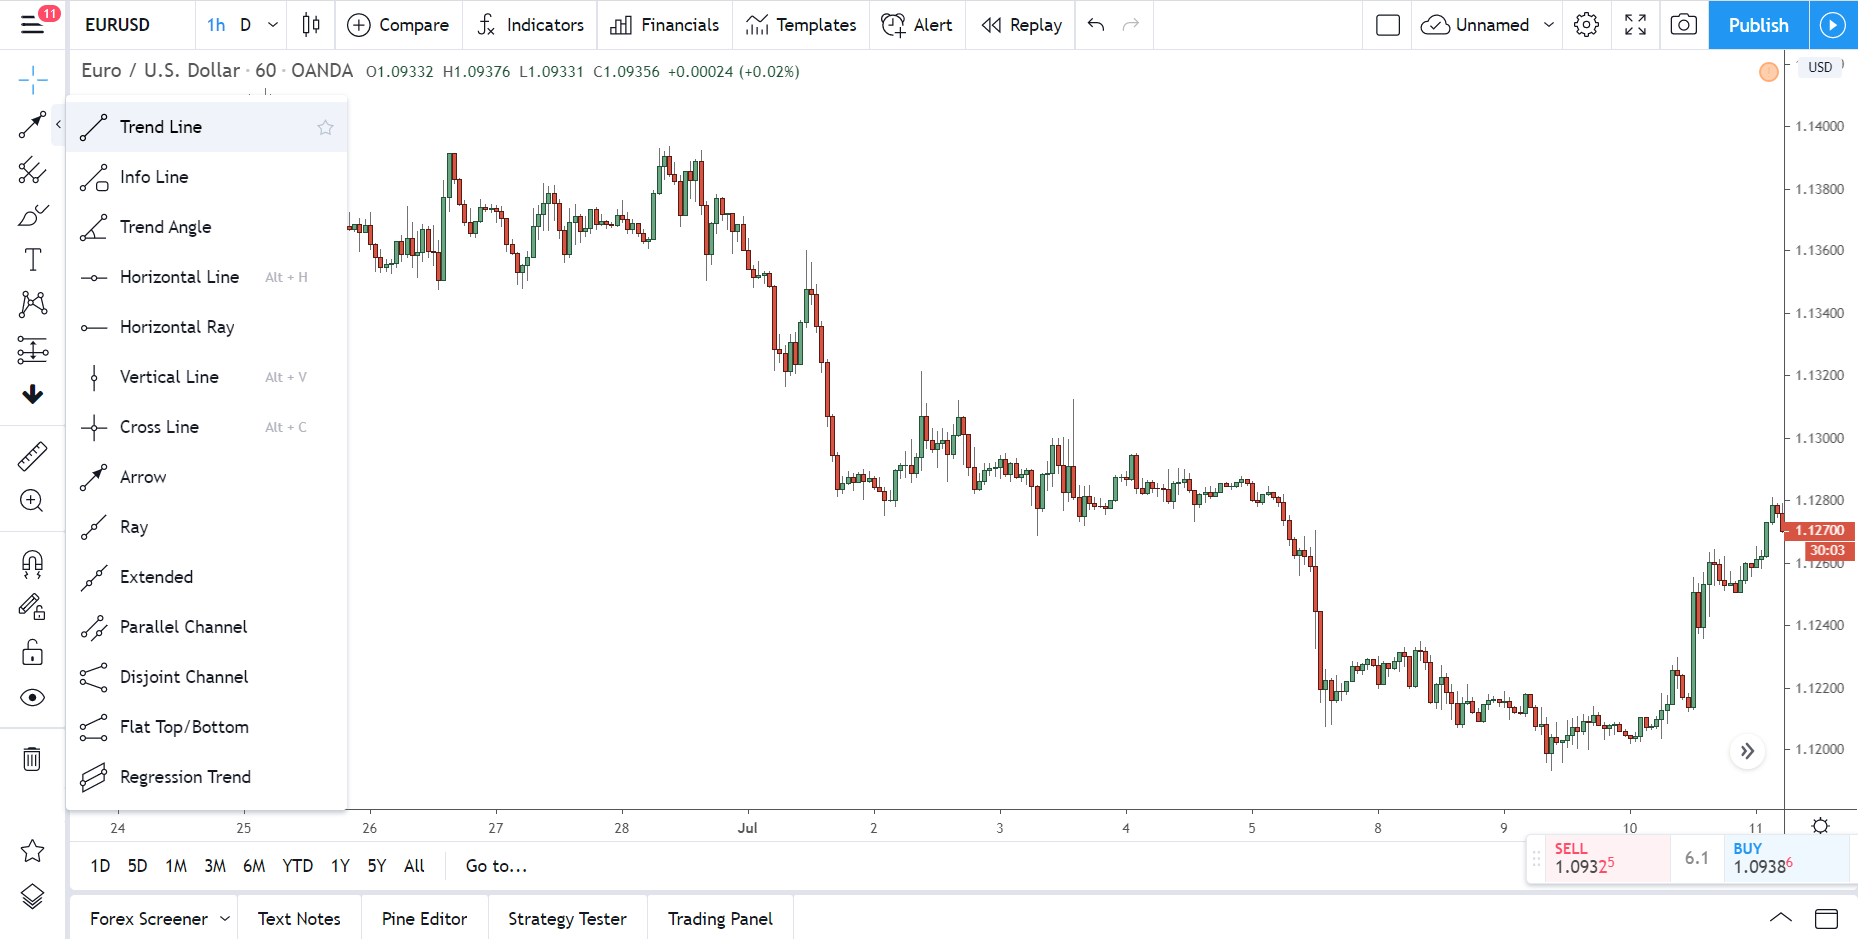
Pretty much every line type is supported, so rest assured, your favourites will be here.
Some aren’t as quite as useful as the others – flat top/bottom, anyone? – but it’s nice to see Tradingview go the extra mile and add ones we probably wouldn’t use or otherwise know about in our trading.
Quick Tip: Hold “Ctrl” while clicking a line or any other drawing on the chart to instantly make a copy – handy if you quickly need to mark a bunch of support and resistances levels or supply and demand zones.
Do you use pitchforks in your trading?
Pitchforks aren’t really my thing – a little too subjective for me. However, if you’re a fan and use them often, head on down to the pitchfork tab to find a bunch of useful tools.
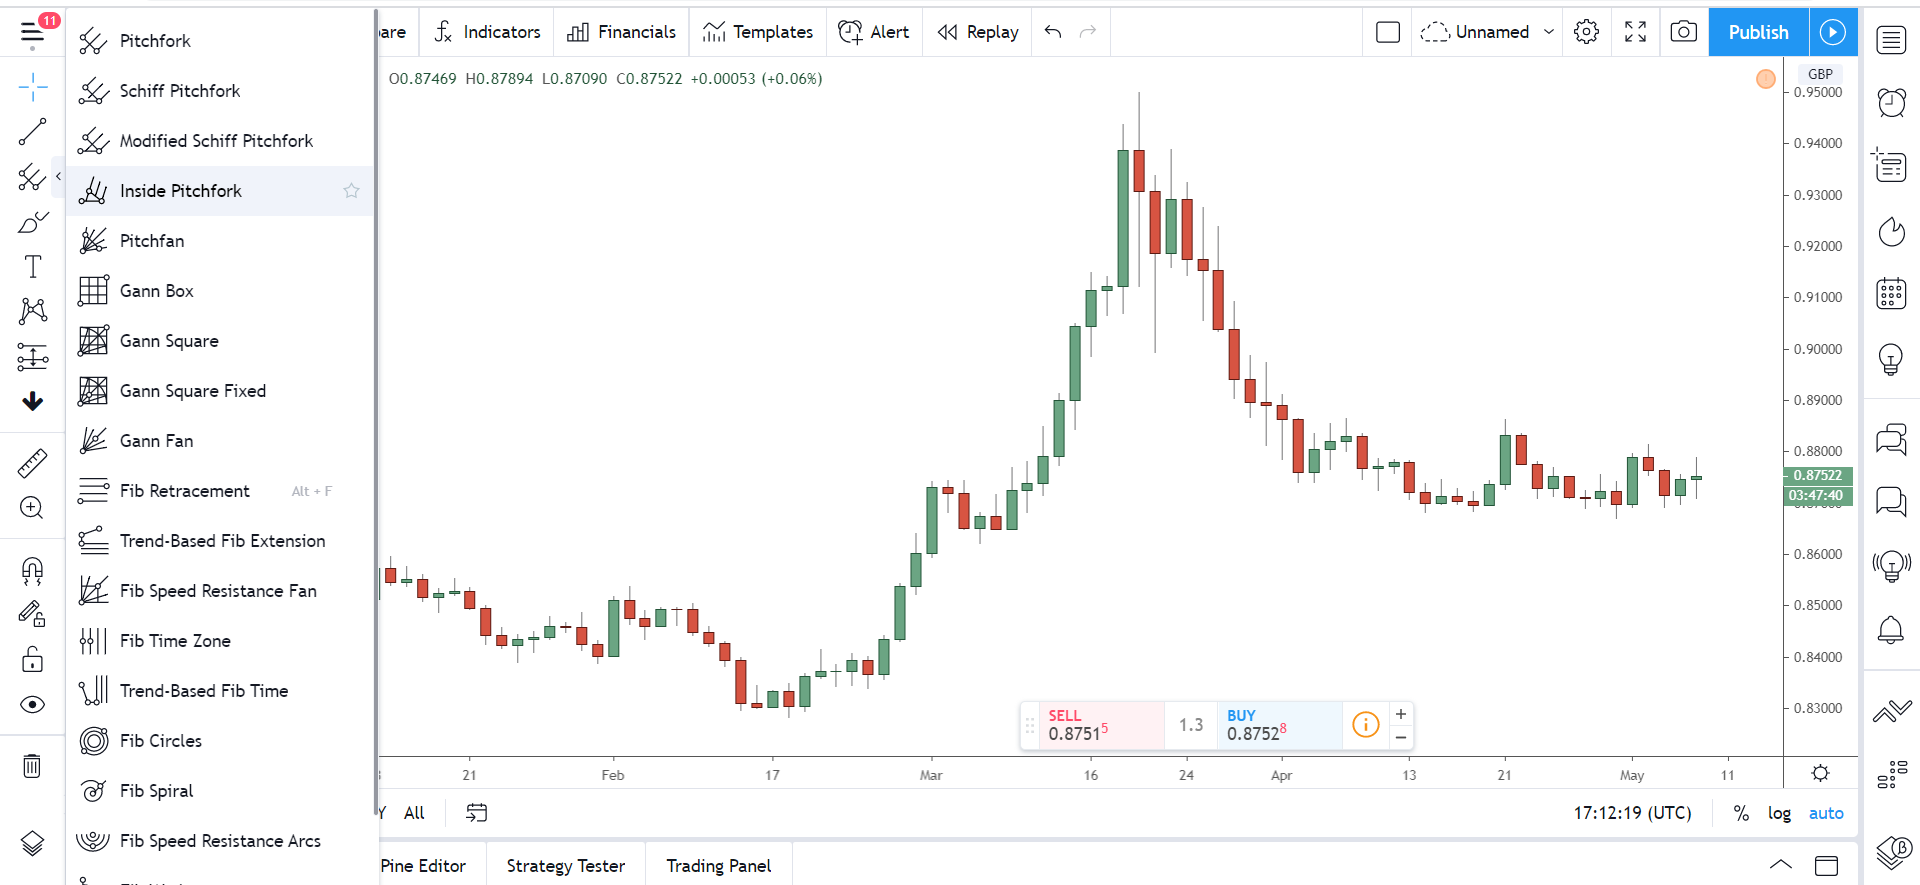
All sorts of pitchfork variations are available, including many I never knew existed – who knew there were so many types? You’ll also find Fibonacci and Gann studies here, including spirals, wedges, and, of course, the ever-popular retracements.
For all you supply and demand traders, this next tab is a must…
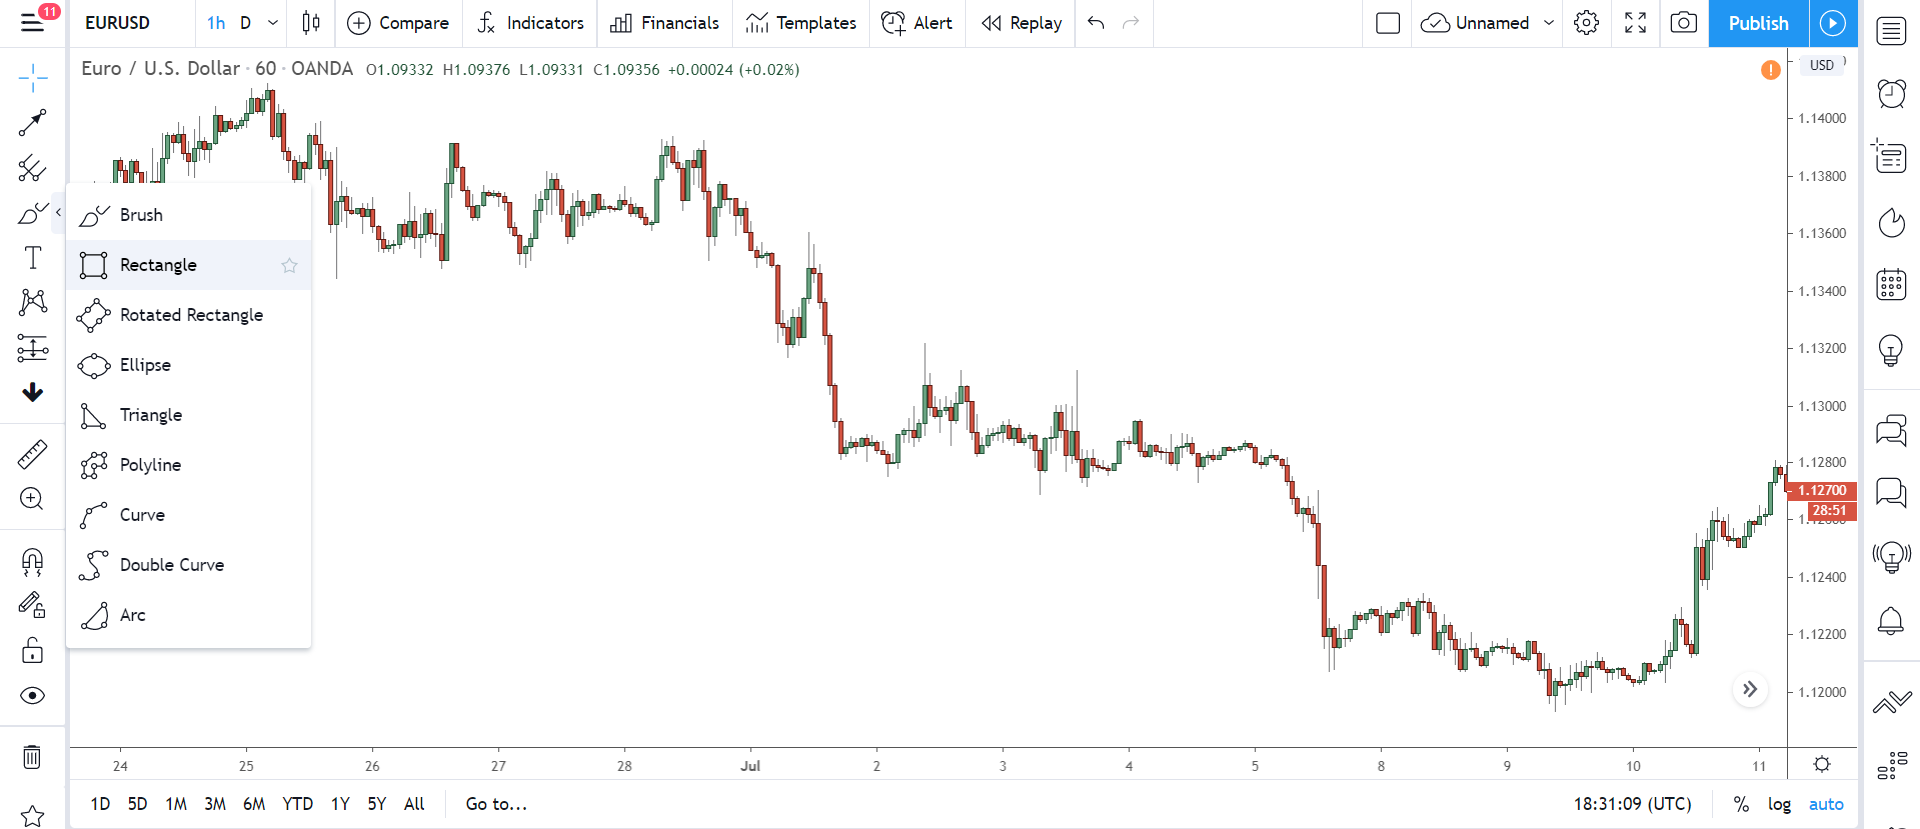
Shapes contains all the shape drawing tools Tradingview provides – and yes, that includes rectangles for S & D zones. Circles, curves, triangles, and arcs are all also available. And if those don’t tickle your fancy, select the brush tool to draw a freehand shape.
Pretty neat, huh?
The text tab (T) is self-explanatory: use it to add text to the chart using titles and boxes.
I often use this for my daily analysis, but you’ll probably use it to mark support and resistance levels or to leave important little reminders for yourself about price.
Remember: You need a free account with Tradingview for the analysis to stay on the chart. With no account, your analysis vanishes once you close the site or select a different pair.
Only a few more tools to look at now…
Here’s a handy little tool for all you pattern traders out there.
The patterns tab beneath text contains a bunch of tools for marking chart patterns. Marking chart patterns gets pretty annoying, especially complex patterns like the Gartley, ABC’s and the like.
With these tools, however, you can quickly mark them without much difficulty.
Elliott wave tools can also be found in this tab, so check them out if you love your waves and corrections.
Now this next tool is really important, so pay attention.
At first glance, the Time and Prediction tab seems nothing out of the ordinary… just another tab with some cool tools. However, inside is one of the most useful tools Tradingview provides…
The Short Position And Long Position tool.
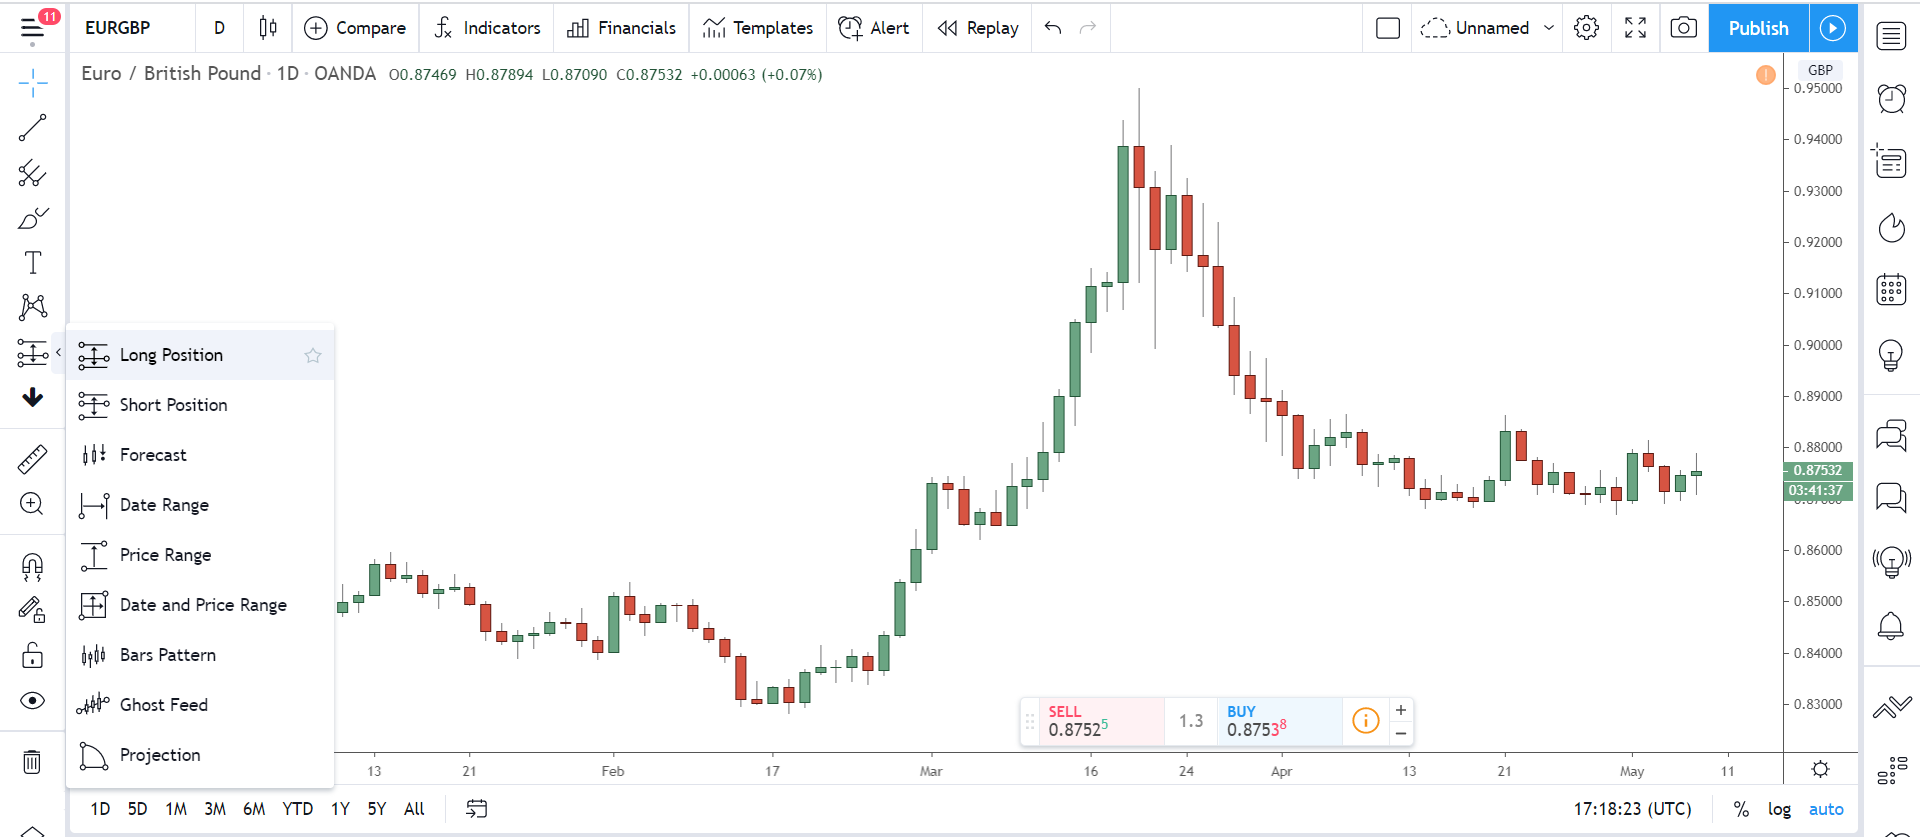
If you hate manually calculating risk/reward ratio, profit targets, and the like, you’re going to LOVE this tool.
What it does is take the after-mentioned info and show it on the chart visually via lines. When you move the lines up and down, your risk-to-reward ratio, current profit & loss, profit target, and stop-loss price show above the line, making it easy for you to quickly see what it is and how it’s changing.
So rather than work everything manually, like you normally do, you can just place the tool and move the lines around.
The tool will show all your information automatically without you needing to calculate anything or switch back and fourth with your broker.
How cool is that?
Here’s a quick example, so you can see how it works in real-time…
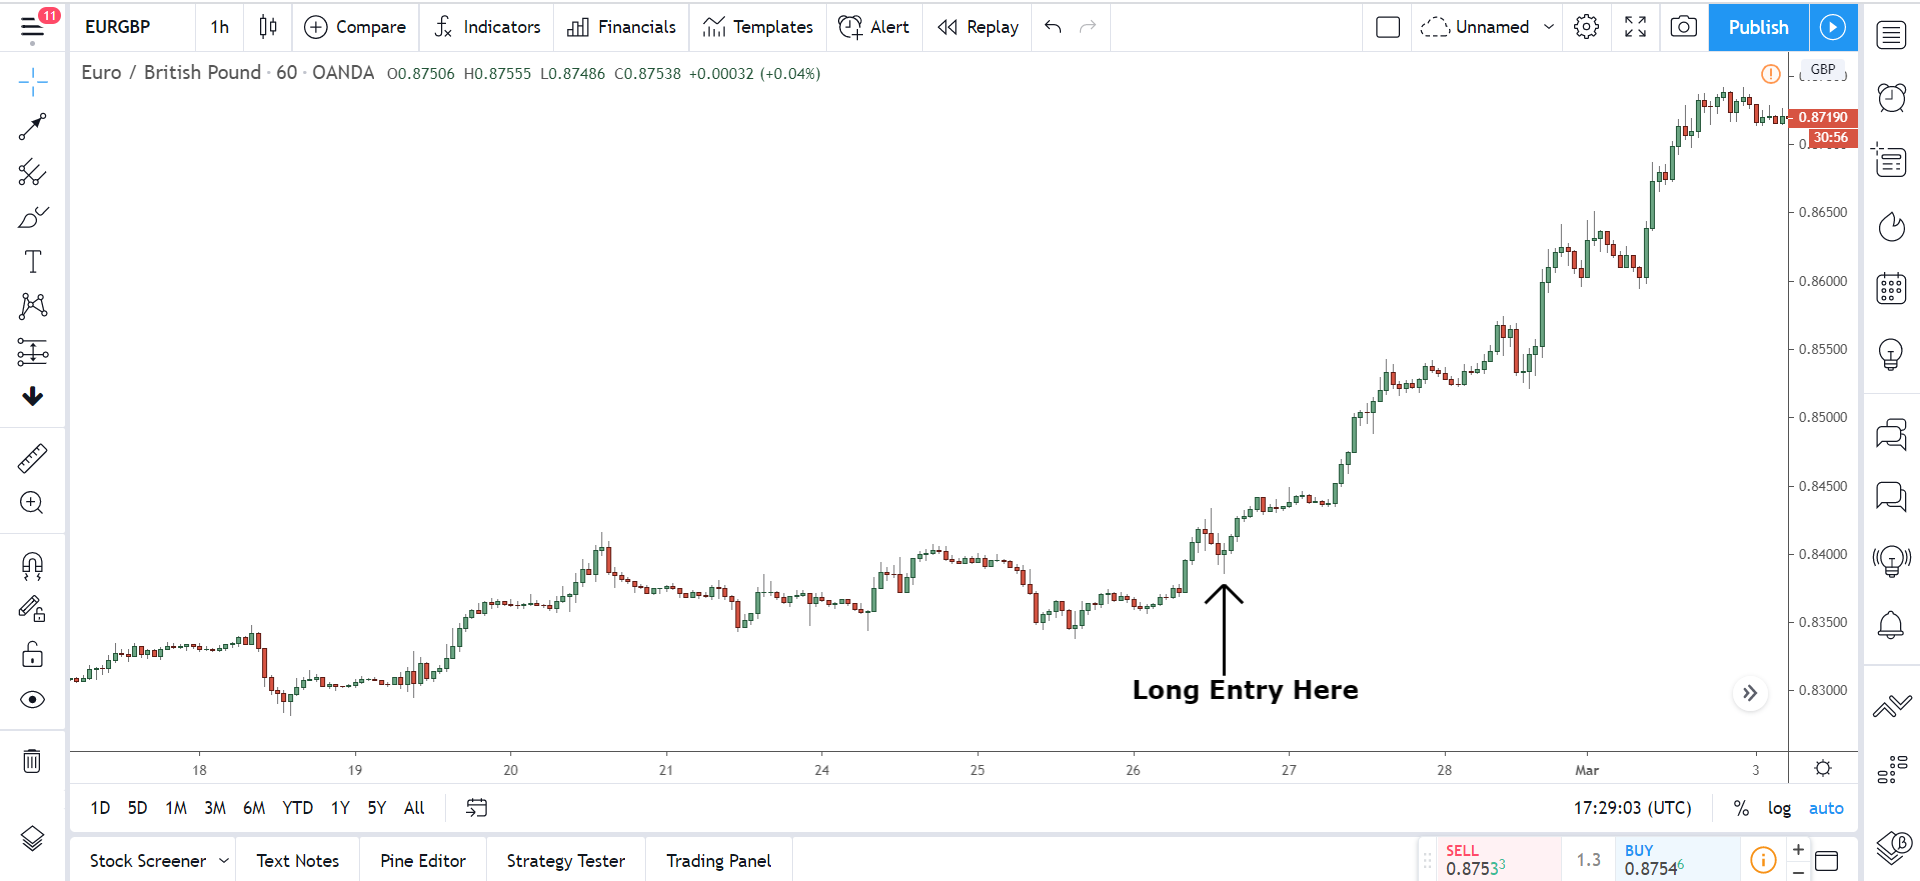
Let’s say I long Eur/Gbp from 0.84000 – we’ll use a big round number to make it easy.
Normally, I’d have to manually work out my risk-to-reward ratio. And I’d have to keep switching between my broker and chart platform to see my open P & L, max risk, and stop-loss price, etc, which takes up precious time, especially in the heat of the moment when the trade is open.
With the tool, though, all I have to do is place it on the chart and then move the lines to their respective positions.
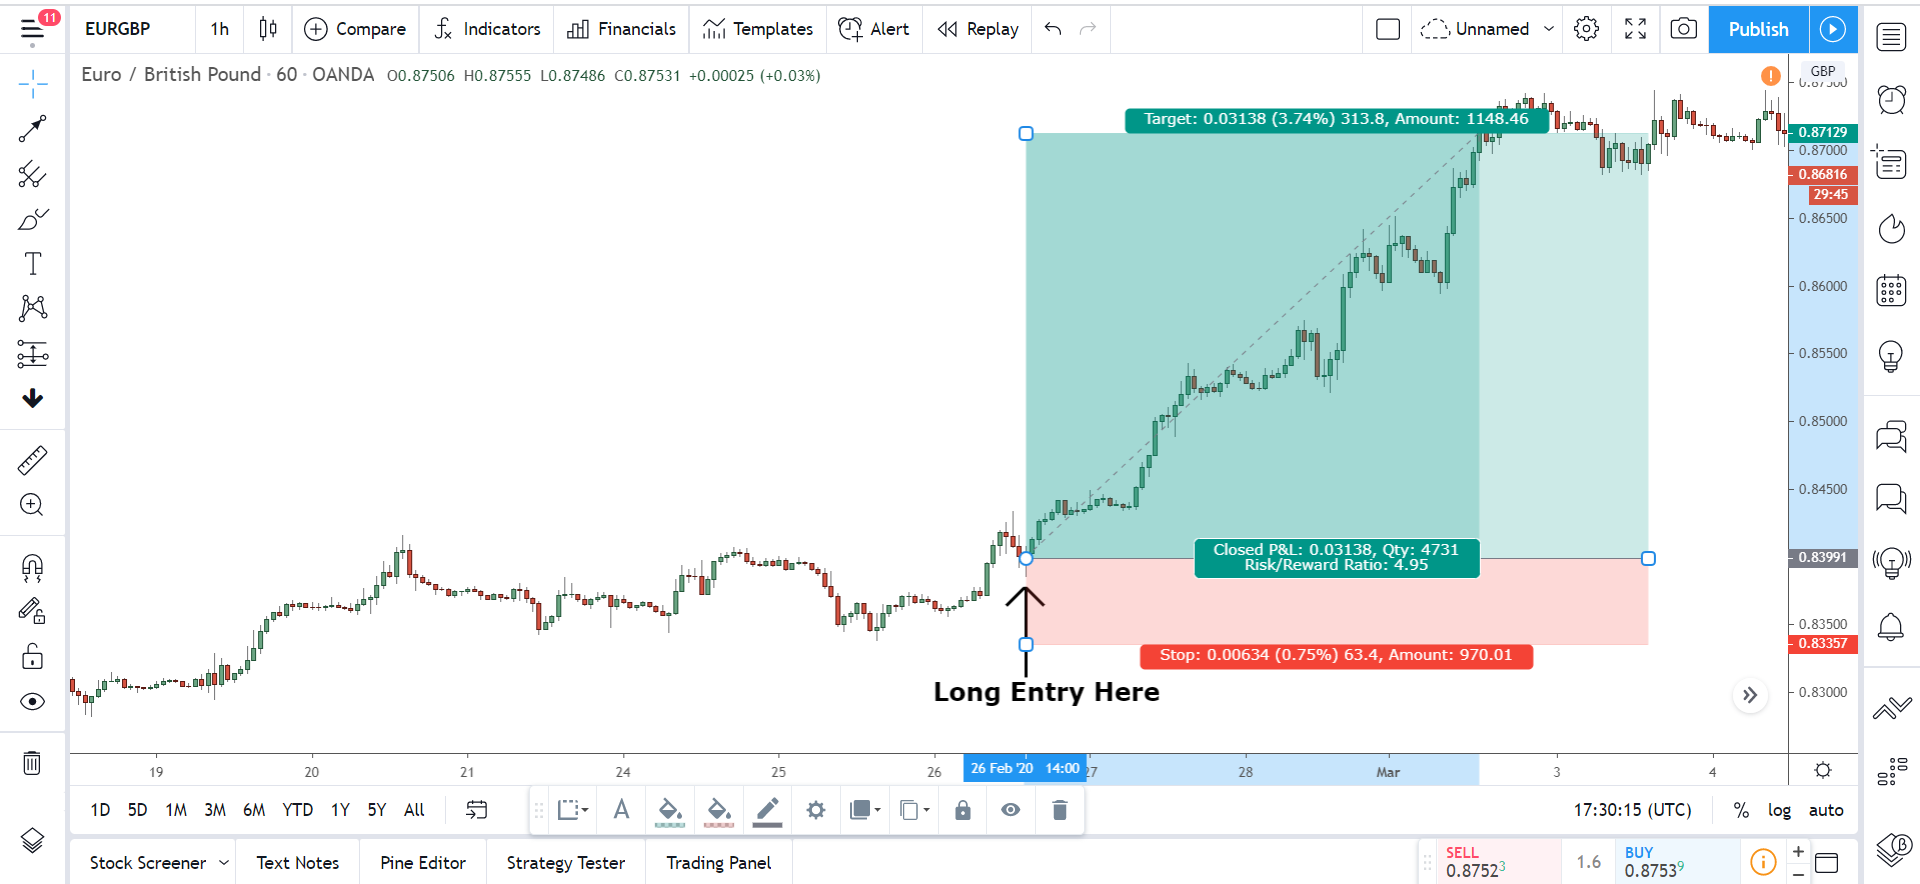
And just like that, I know all the critical information about my trade.
Amazing, right?
Remember, you need to use the correct tool for the right trade type. Don’t use the long position tool when you have a short trade open, as the levels won’t show in the right place.
Also, you must enter your account balance and trade size into the settings menu for the tool to show the right information.
To do this, simply right click the tool, select “Settings”, then enter the information. Click the “Style” and “Visibility” tabs to change the colours of the tool and what timeframes it shows on
And last but not least, we have the Icons tab.
As it says, use this to place arrows, stars, and other little decorations on the chart. Lots of different Icons here, so knock yourself out and give your chart some style.
Chart Buttons
The lower half of the side tab shows the chart buttons. These all allow you to change or manipulate the chart in some way – like zoom in, out, delete or hide drawings…
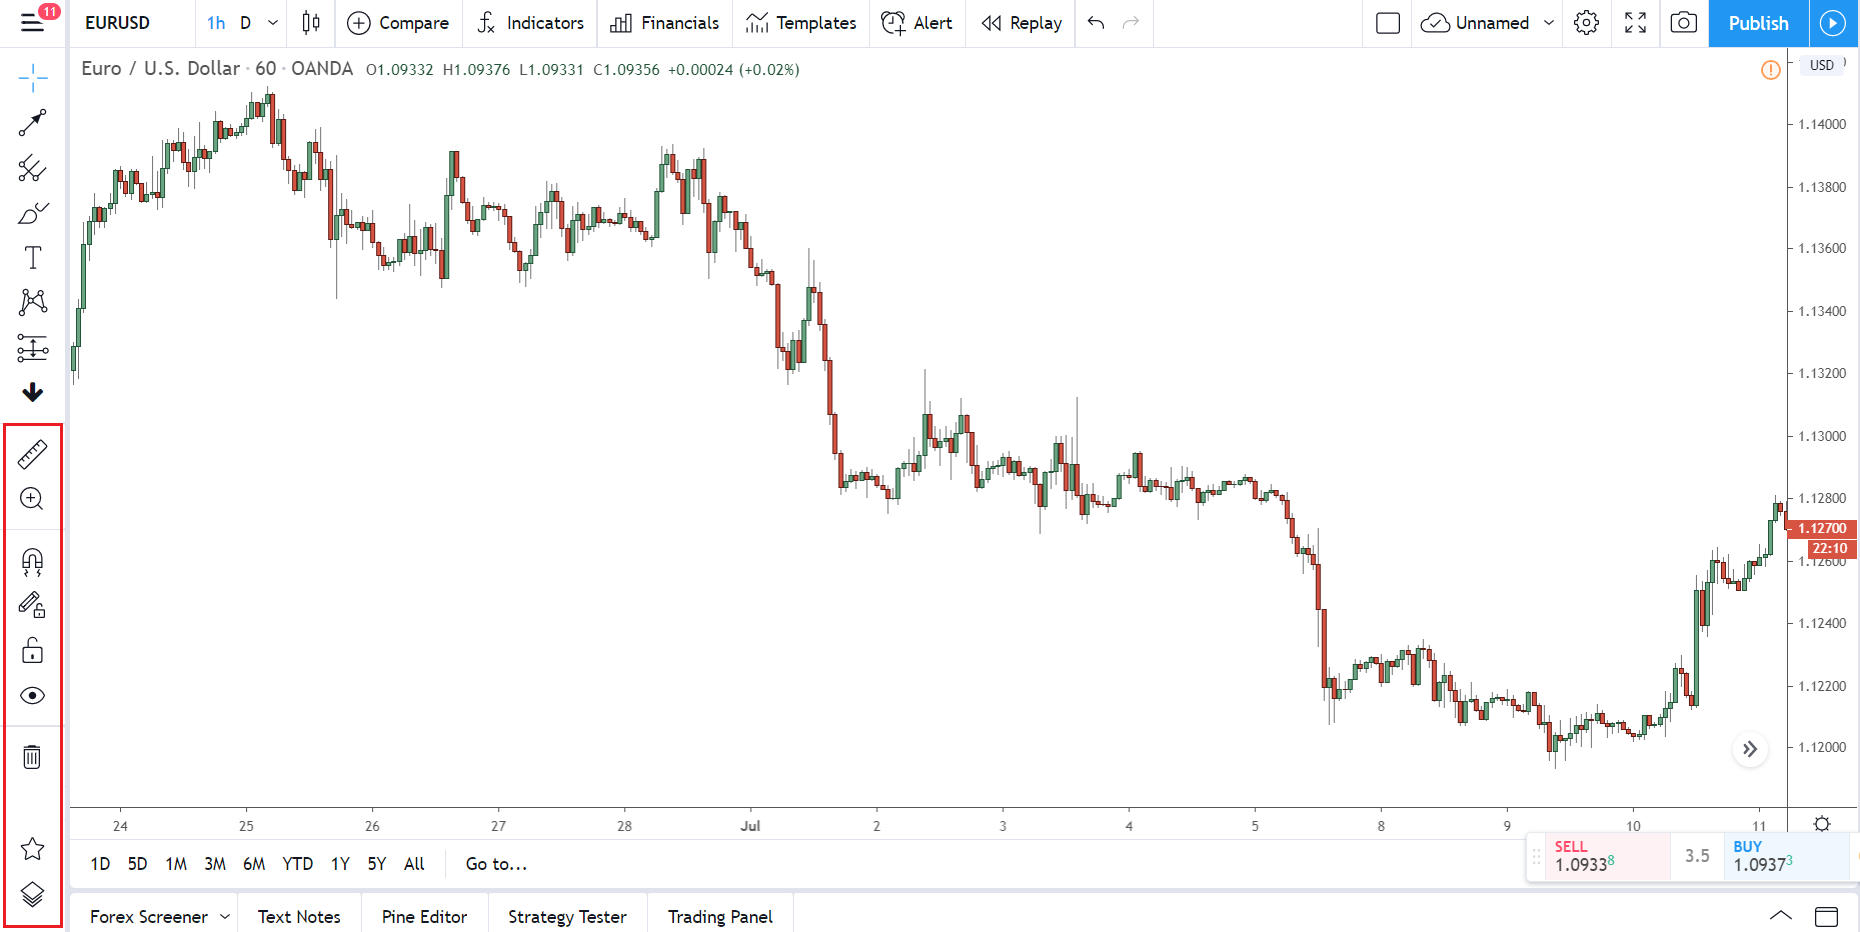
Only a few different options here, so lets quickly buzz through them.
Use the ruler icon at the top to measure price. Drag this from one point to the next, and it’ll show the pips, days, and weeks it took price to cover that distance. The magnifying glass below (2) lets you zoom in and out of the chart – you can do this with your mouse wheel, so it’s kind of unnecessary.
Note: Hold shift and drag your mouse as a quick shortcut for the measurement tool.
With Magnet (3), you can snap objects (lines, rectangles, etc) to the nearest candlesticks OHLC (open, high, low, close). It sounds useful, but in practice, it tends to make the cursor stick to everything, so best to keep it un-selected.
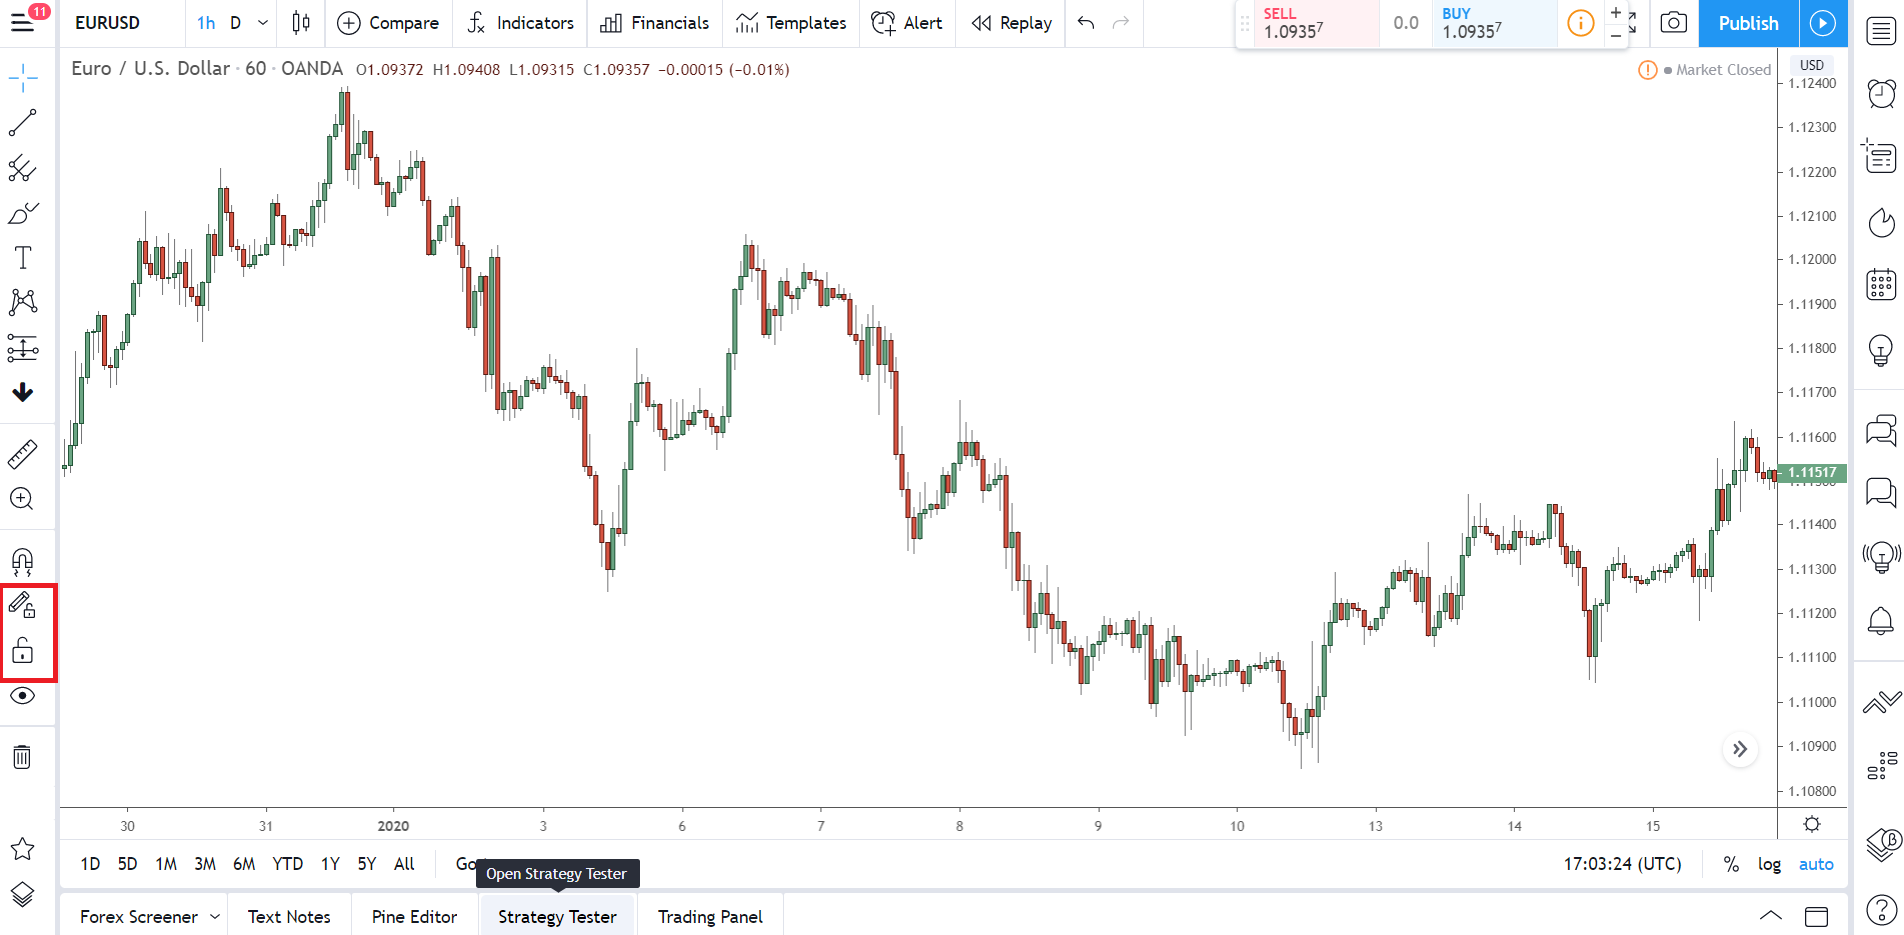
The next two tools, “Lock All Drawing Tools” and “Stay In Drawing Mode”, don’t do anything important, so just leave these unchecked.
If the chart gets too crowed with lines, zones, retracements, and the like, click the little eye (5) to hide everything – click it again to bring it back. To wipe the chart of all studies, drawings, and indicators, hit the trash can button.
Click the arrow to the right to further refine what gets wiped.
The star button opens up the favourites menu, which shows your favourite tools.
The objects tree button, right at the bottom, shows a list of all the drawings and indicators on the chart. You can individually hide, delete, and edit each indicator and drawing from this menu.
Important Note: Click the little star next to a tool to save it as a favourite. Your favourite tools will appear in a separate toolbar on the chart so you can easily switch between them when trading.
Right Menu
The right side menu mostly shows important information about your pair.
The 3 tabs (black box) show news about the currency, info about its price and let you create your own watch-list. The far-right side (red box) has a bunch of buttons for opening new tabs, most of which are social features, but a few useful ones for trading too.
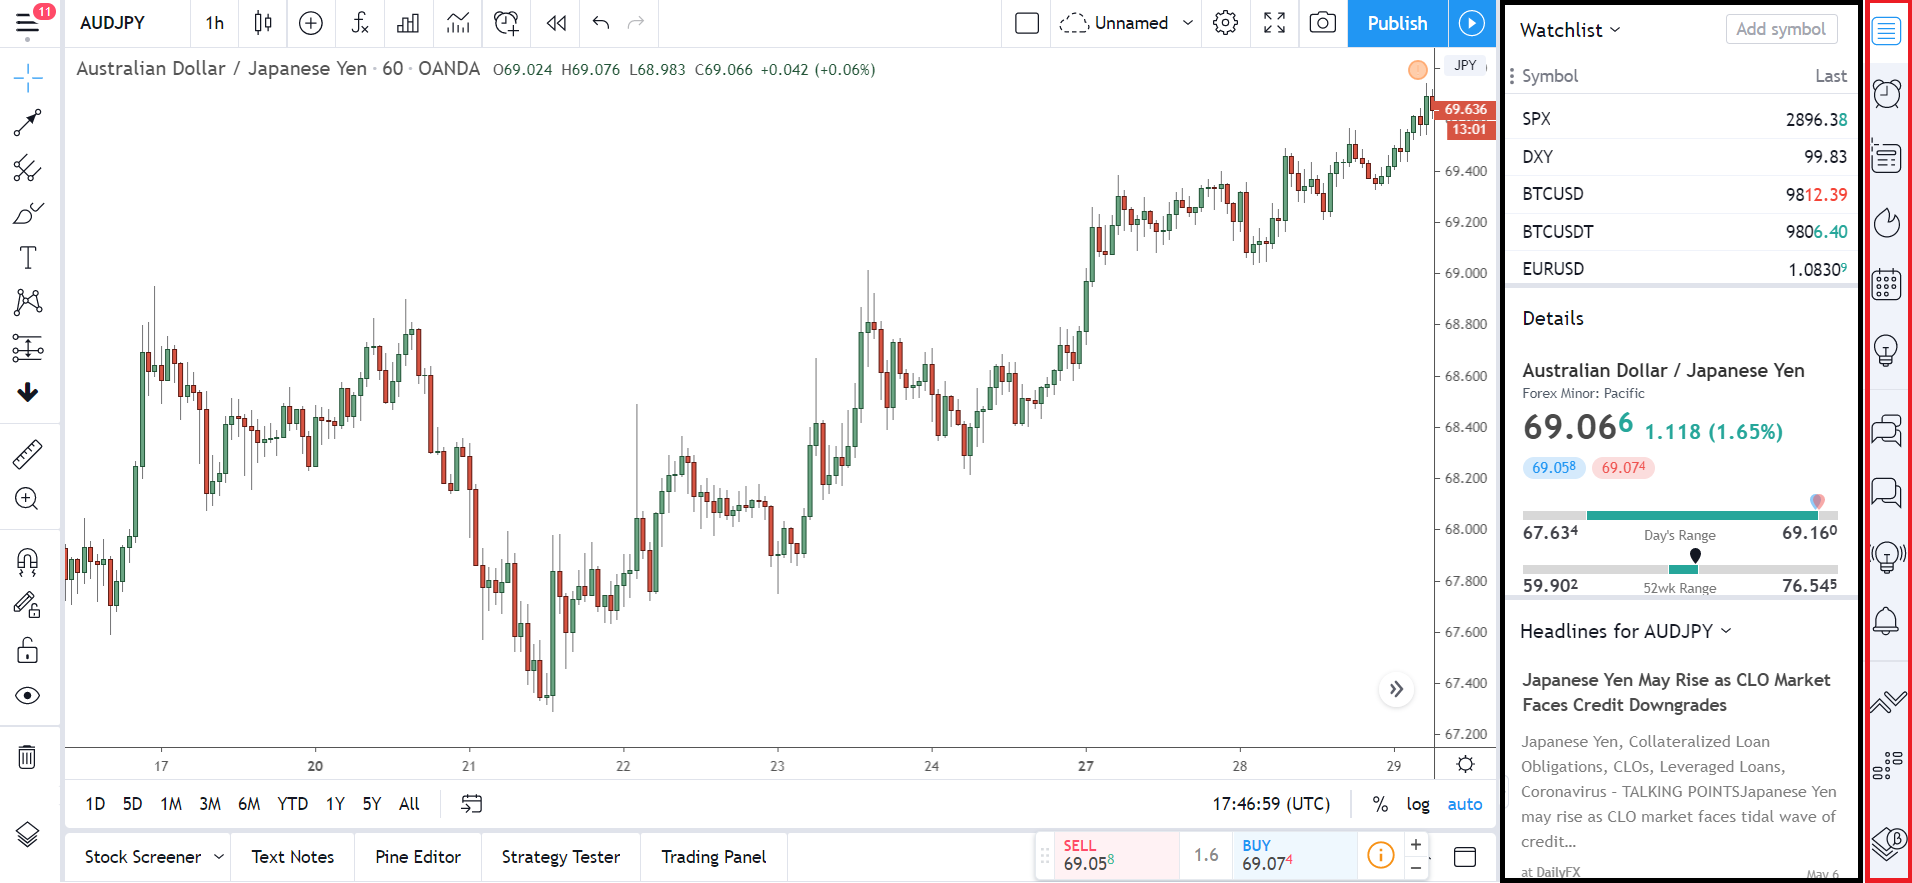
We’ll get to the buttons in a minute, lets look at the three tabs first, starting with the most useful: Watchlist.
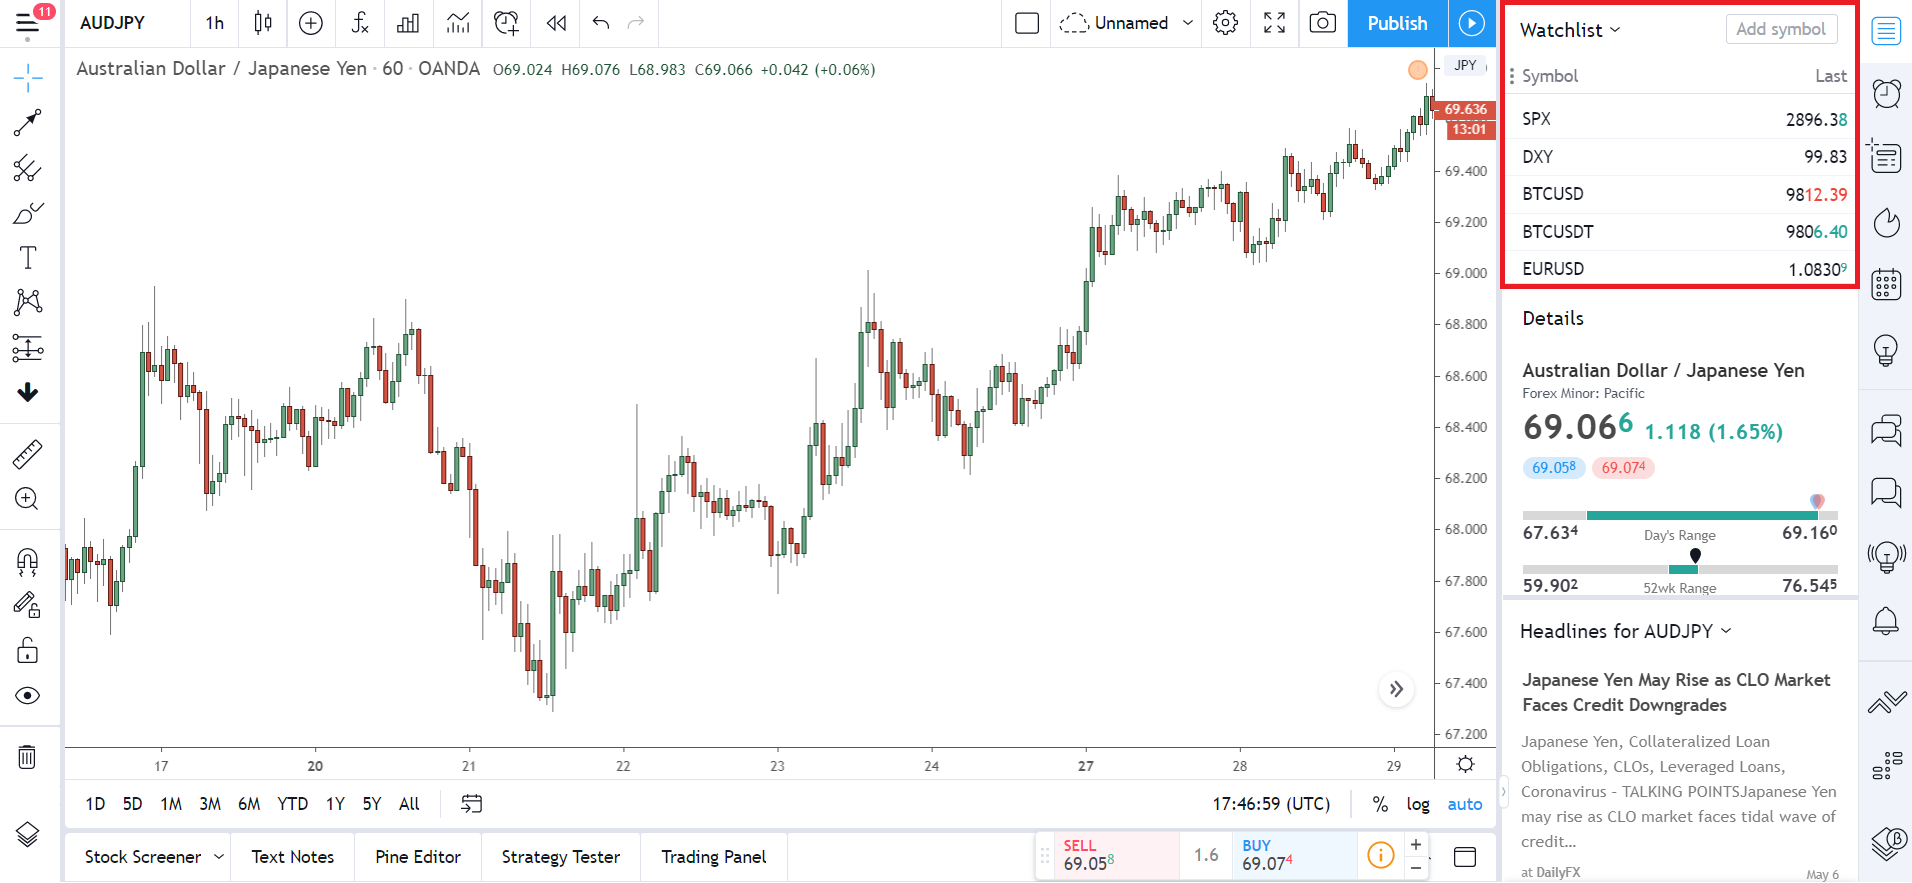
Perfect if you always focus on the same few pairs or track the same set of stocks, Watch-list lets you create your very own list of assets to watch, which you can switch between whenever you want.
Simply click a currency to instantly switch over to it with all your prior analysis in-tact on the chart.
The default watchlist only shows the top-performing assets for each sector, so you’ll need to remove each one to create your own.
To remove an asset, click the little X next to its name.
To add a new asset to the list, enter it into the Add box in the top right. When you begin typing its name, a drop-down list of similar assets (like currencies) will appear.
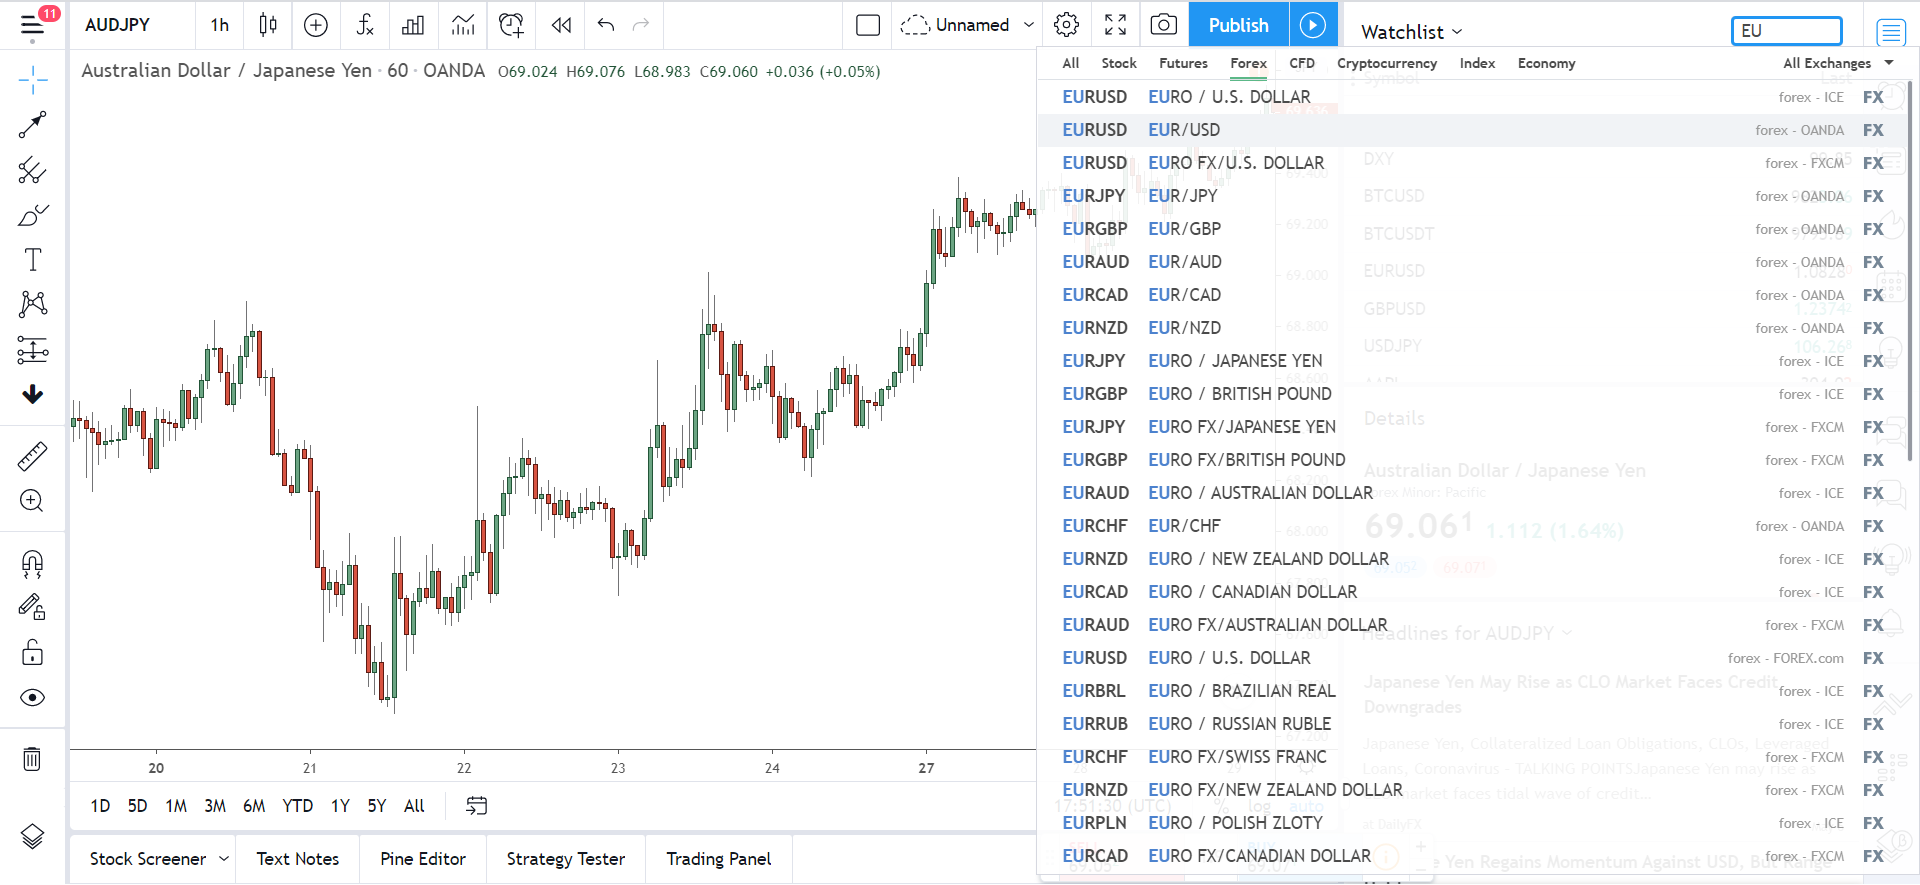
Navigate to the sector you’re interested in (so forex for us) and simply pick the ones you want to add them to the list. Easy!
Like all the tabs on the right menu, you can re-size the watch-list box to make it smaller or wider…. just click one of the edges and then drag inwards or outwards to re-size the box to your liking.
You can create and save as many watch-lists as you want, but you must have a pro account to save more than one.
To manage all your watch-lists, hit the watch-list button at the top. Open this to save, load, and name your different watch-lists – your default watch-list will always be called “Default”.
And with that, let’s move onto the Details tab…
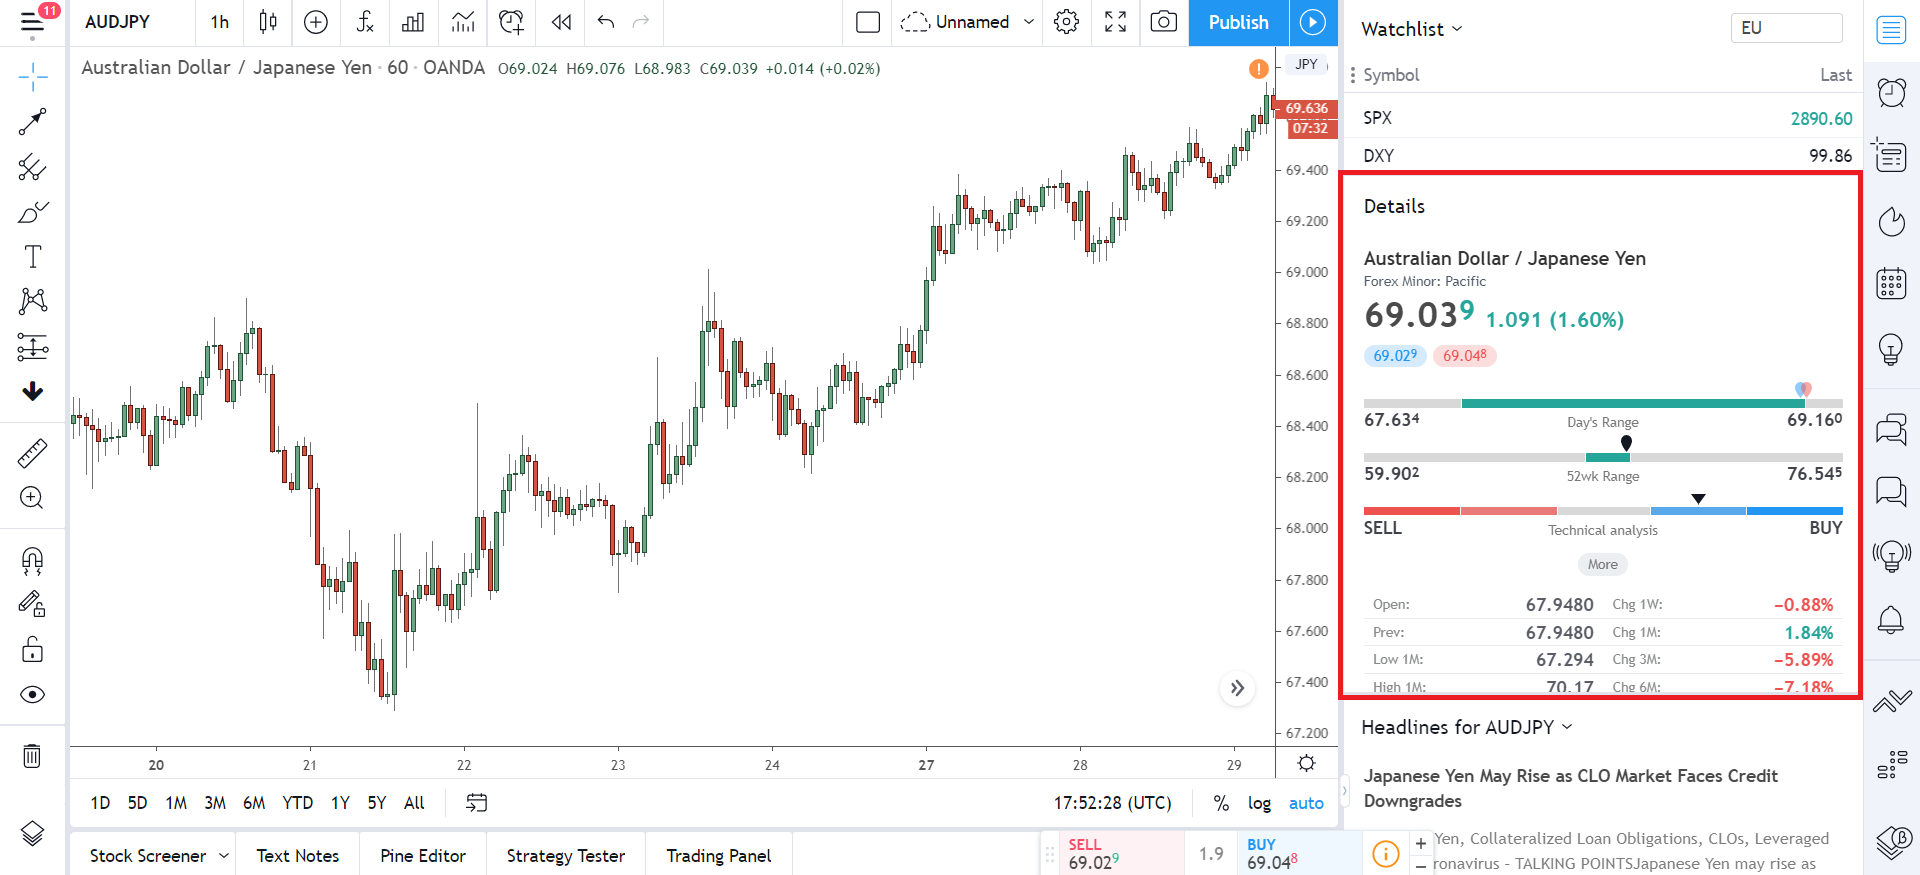
Details does as you’d expect… show you details about whatever you’re trading – no more, no less.
The top half of the tab gives you info on the current buy price and sell price, but you can scroll down to see more advanced info, like the daily range, 52-week highs and lows, plus more. If you click the little more button, you can see which technical indicators are currently showing a buy or sell signal.
Not that useful for us PA traders, but hey, still cool to have.
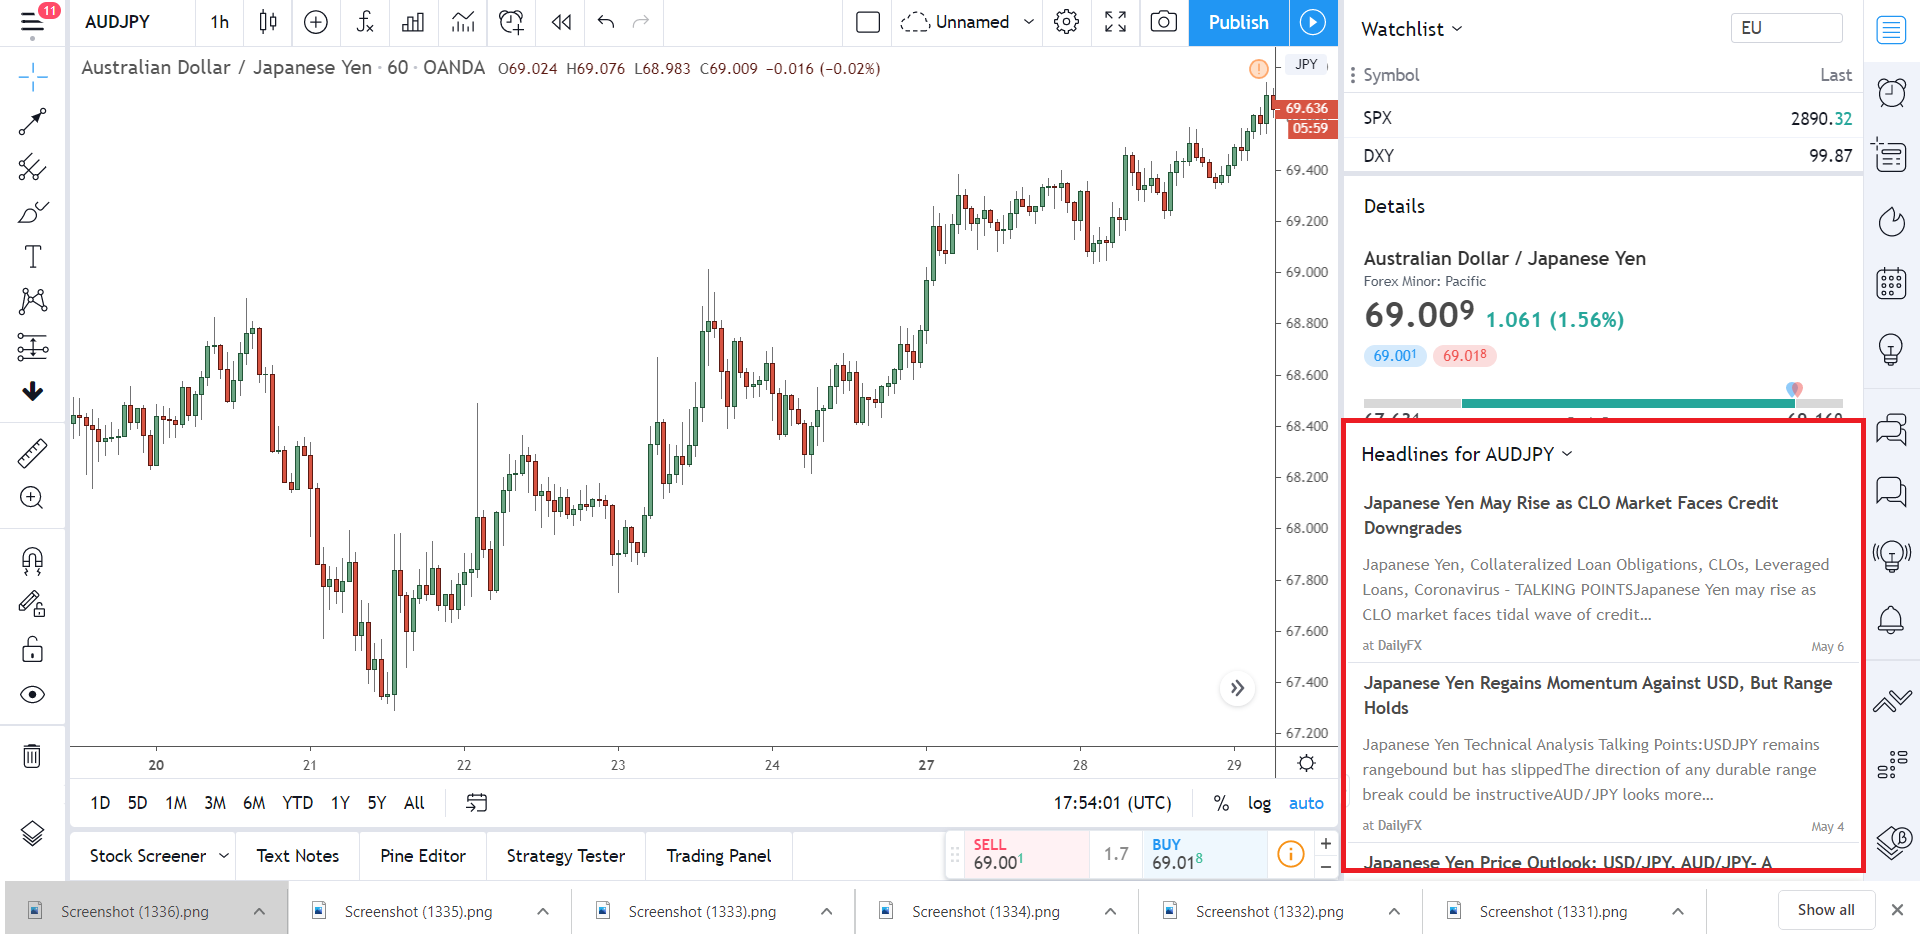
Finally, we have the headlines tab – what do you think this does?
As it says, this tab shows news headlines about the pair from around the world.
A bunch of different forex sites are sources here, so you tend to get a good mix of both current and future information. I don’t really use this much – I’m only interested in the key events – but it’s worth a read from time to time to quickly see what’s going on in the crazy world of forex.
Side Menu Buttons
So to the right of the tabs mentioned above, you’ll see a long list of different buttons…. these are the side menu buttons.
Unlike the buttons we’ve already looked at, you probably won’t use these much.
Most bring up tabs related to the social aspects of Tradingview, like the chat window where you can interact with other traders, or the messages tab, where you can see messages people have sent. I won’t bore you and go through everything here, I’ll just detail the main buttons you should know about and might want to use.
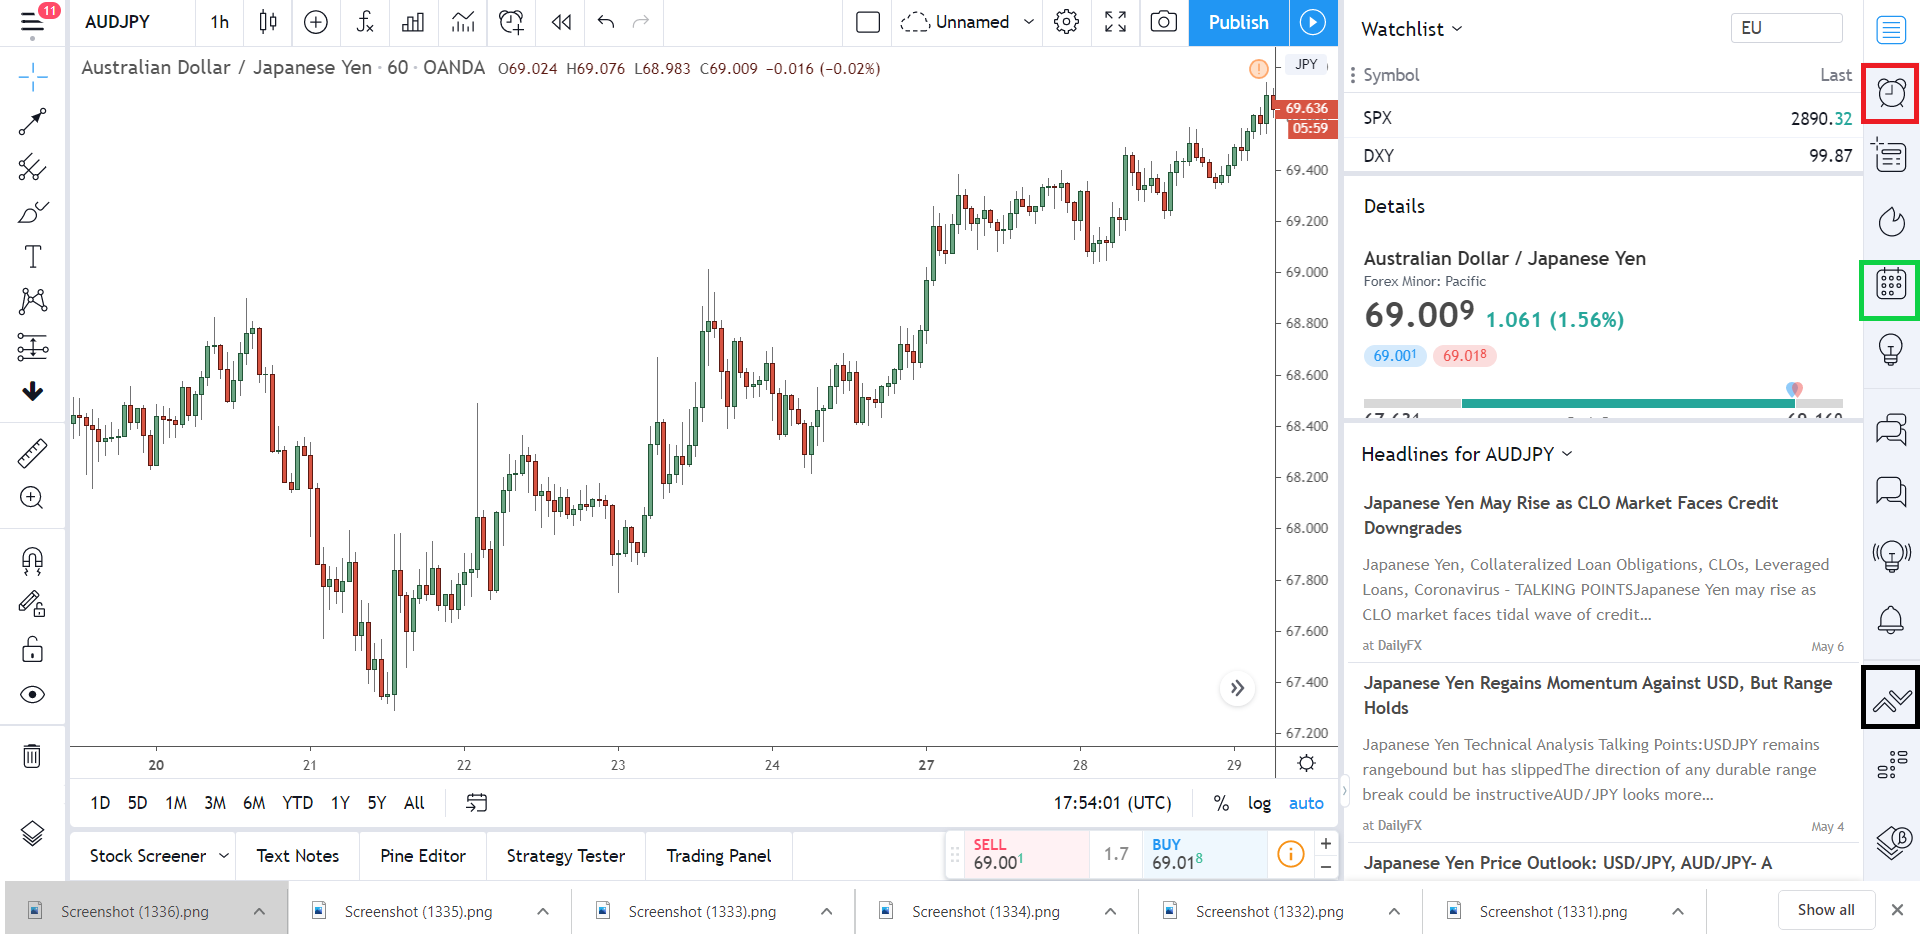
I’ve labelled each of the key (i.e useful) buttons above with a small box placed a yellow box around the social buttons. It’s pretty obvious what these do, so I’ll let you figure them out for yourself.
The key buttons then… what do they do?
Well, starting from the top (red box), you have the alerts button – remember alerts from earlier?
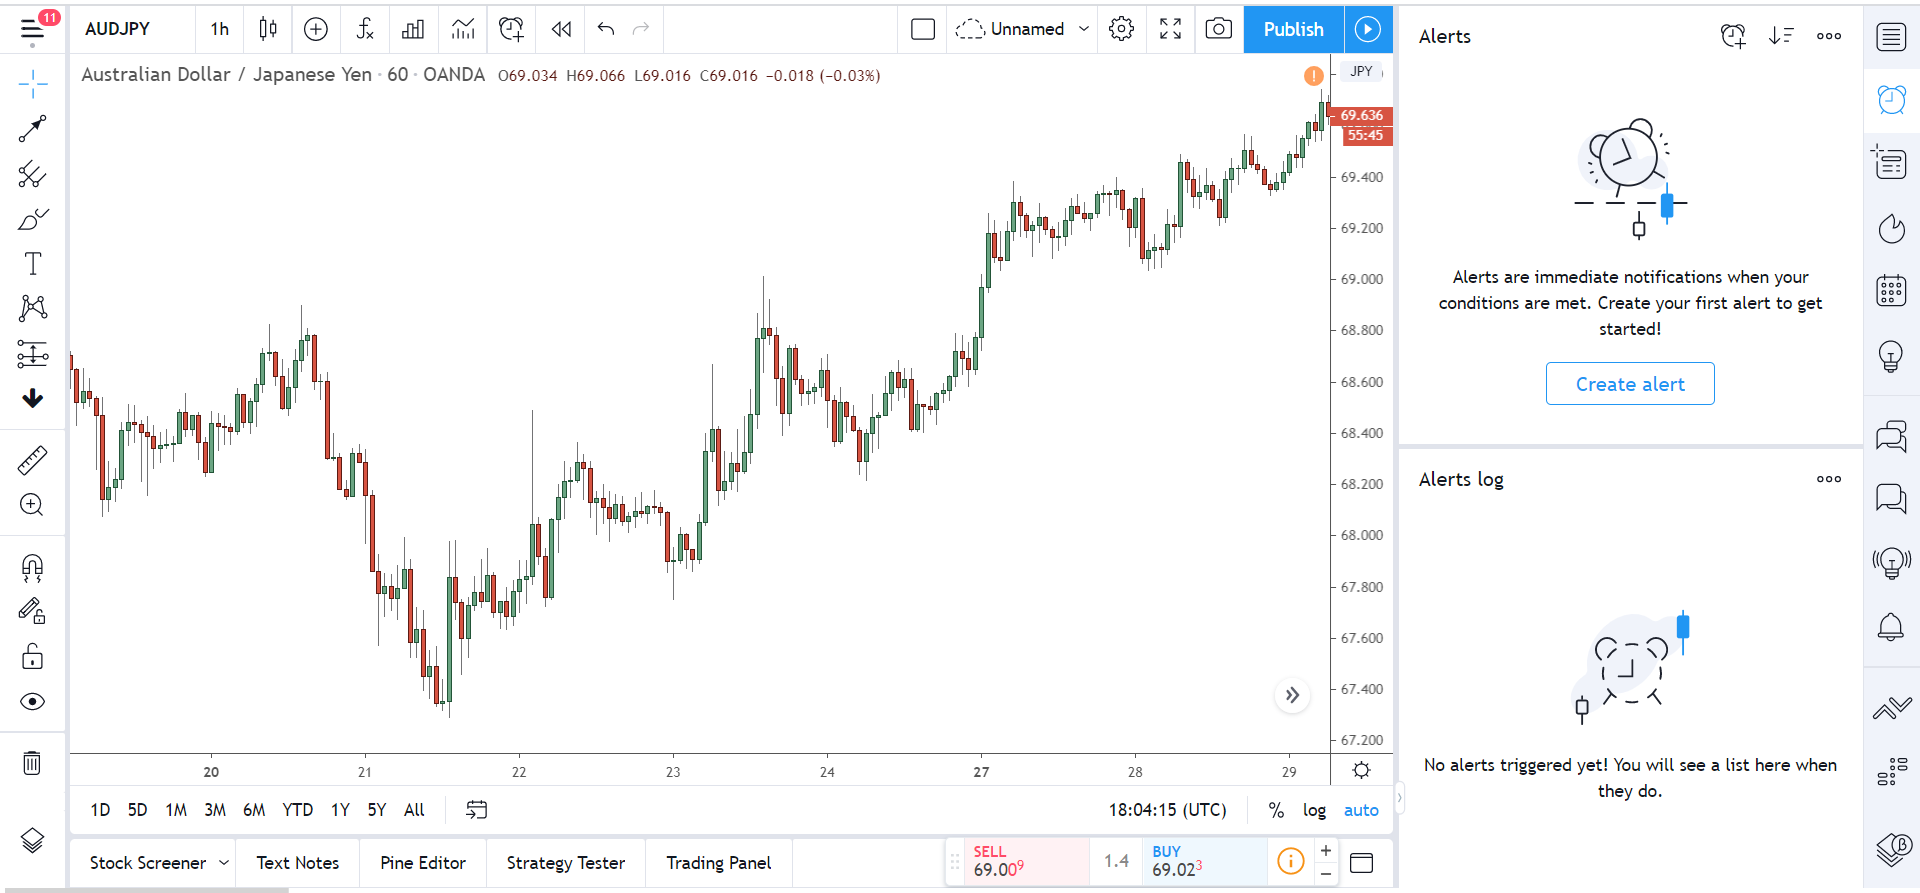
Whenever you set an alert, it’ll show inside this tab for easy viewing.
You can also edit and remove alerts from here if you need to make some changes.
The best way to see upcoming news events is by enabling the “Show Economic Events” inside the chart settings tab I mentioned at the beginning. All the upcoming events will show on the chart at their respective times.
However, another way to see upcoming news is to open up the calendar (green box).
Just like forex factory, Tradingview has a fully functioning economic calendar that shows all upcoming news events along with their predicted impact on the price.
Just hit the calendar button…
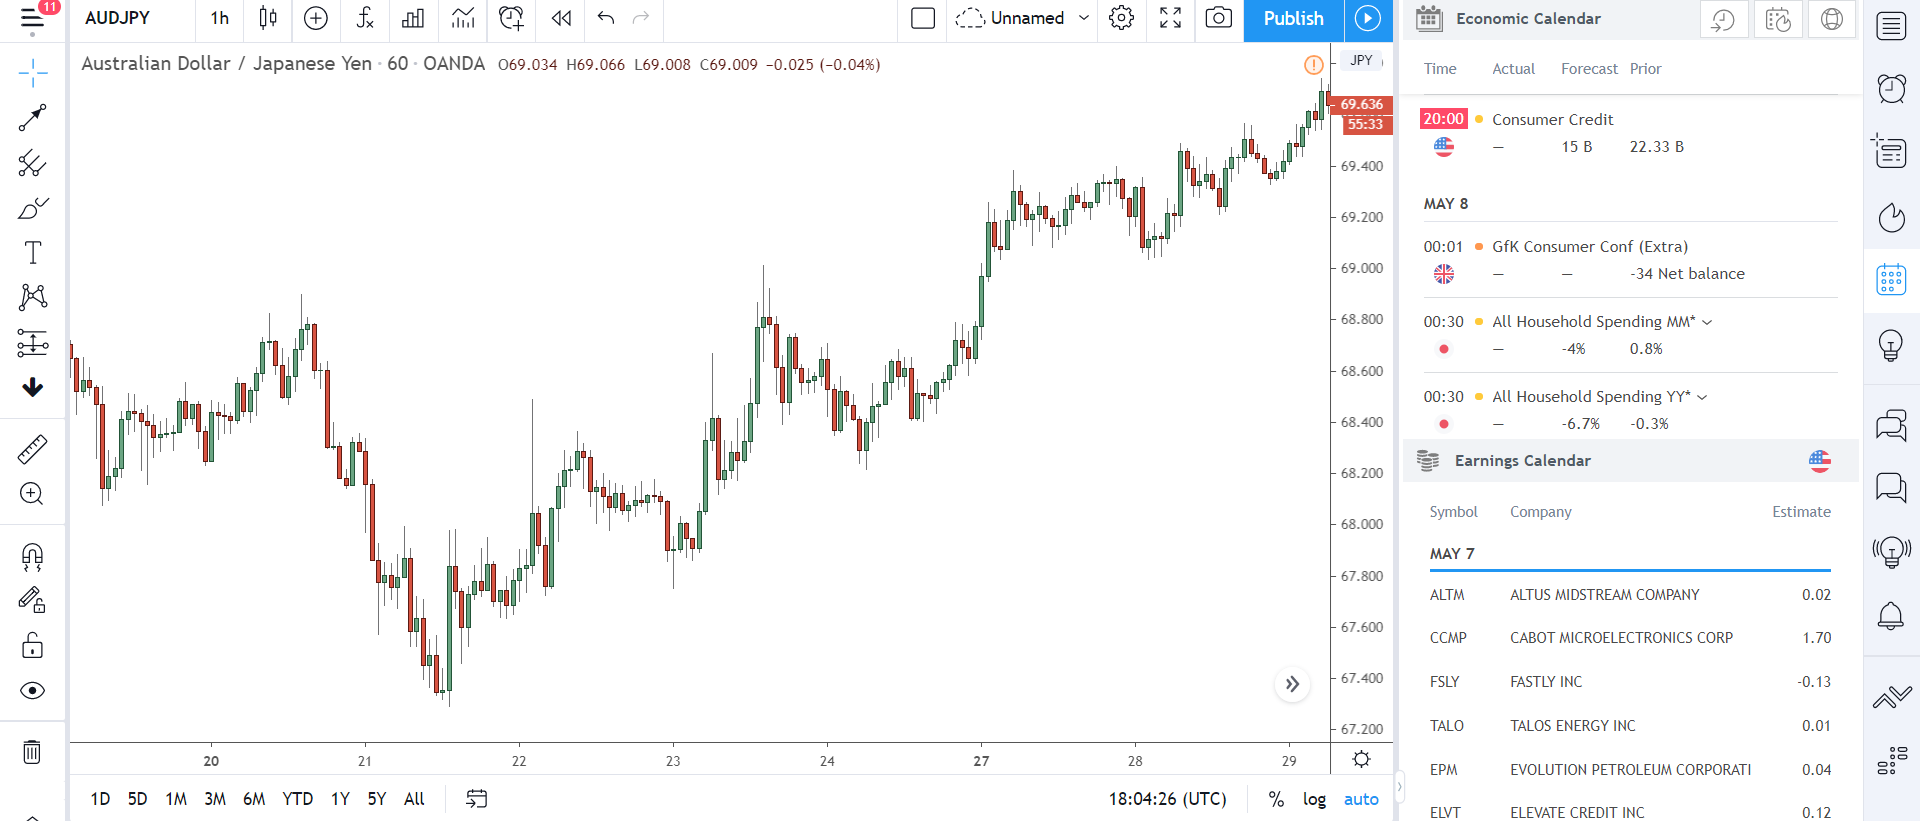
And the calendar will open up, making all the upcoming events easy to see.
For all you stock traders/investors out there, a calendar showing upcoming earning announcements also shows.
So if you’re not sure when a stock is set to announce its earnings, you can just check the calendar.
If you decide to connect your broker to Tradingview to trade directly through the chart – more on this in a minute – the order panel (black box) is where you can place and view open orders.
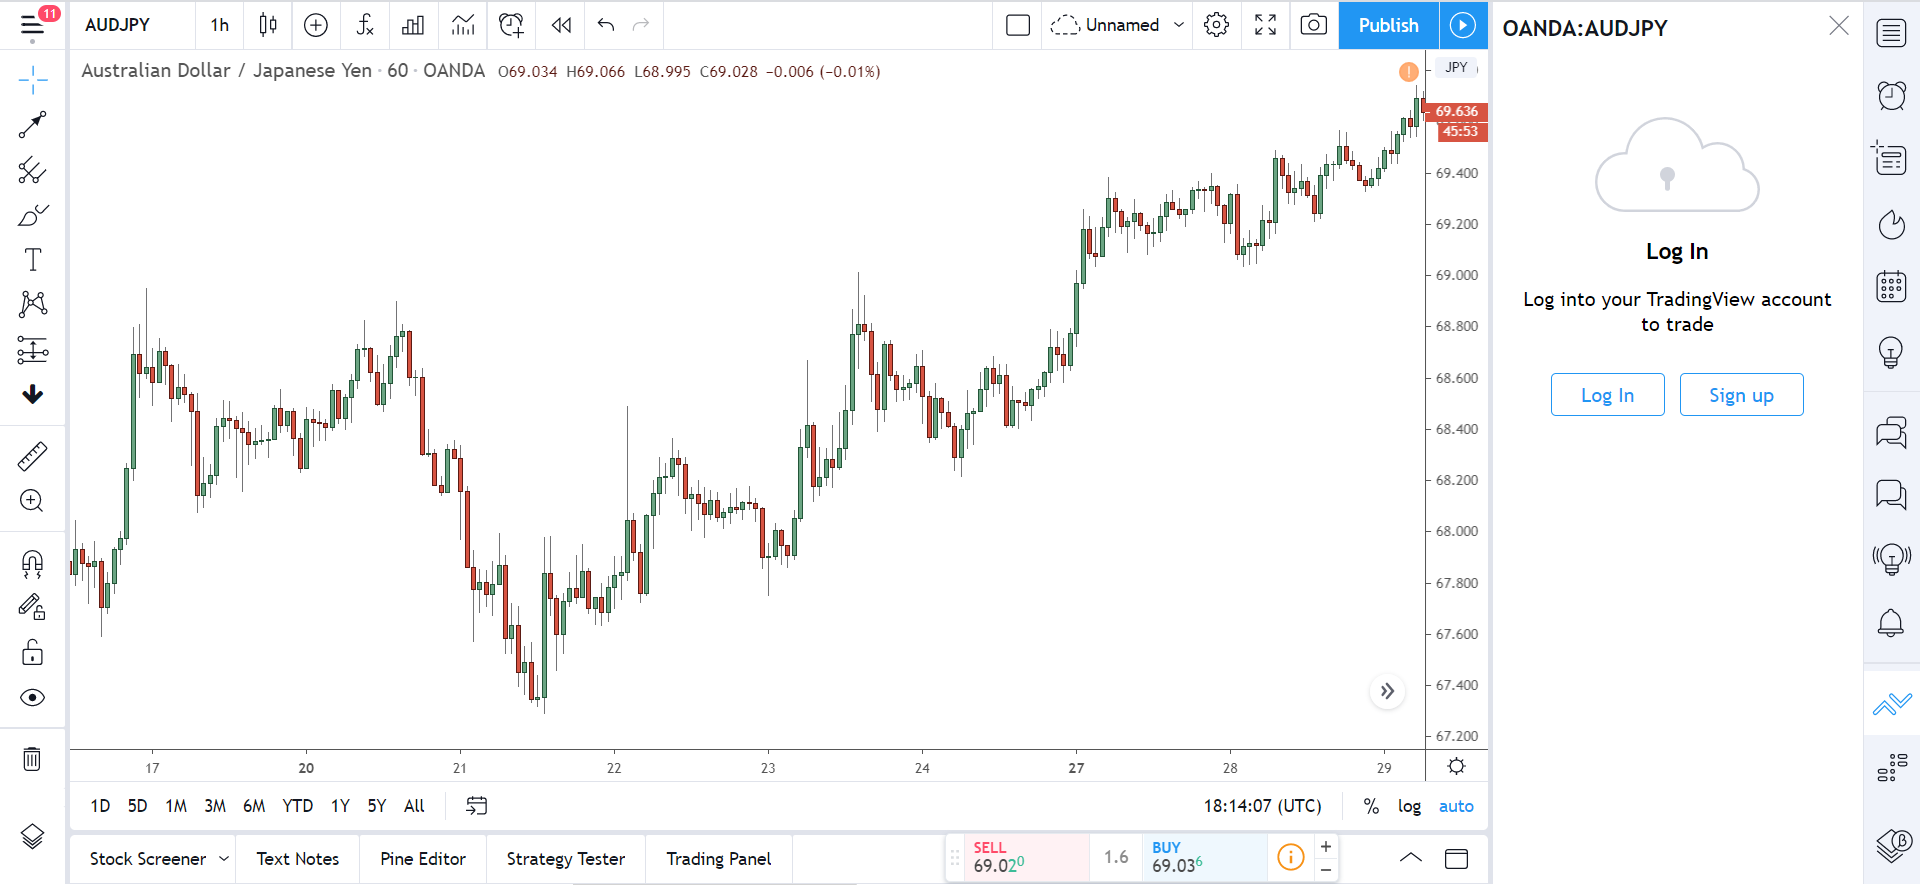
I haven’t got my broker connected, so the options don’t show here. But once it’s set up, all your options for placing, closing and managing open trades and orders show inside this tab.
Bottom Menu
The bottom menu contains some of the best tools on Tradingview.
These tools, some of which you have to pay for on other sites, will save you a huge amount time and make your trading life a whole lot easier.
Lets dive in and take a look at tool #1: the screener.
Stock/Forex/Crypto Screener
For us forex traders, knowing which pair to trade usually comes down to personal preference.
We have our favourite pairs, and we mostly stick to them while occasionally dabbling into other pairs from time to time, depending on what’s happening and what opportunities have arisen.
Unfortunately, stock and crypto traders don’t have this luxury…
Many stocks and crypto’s hardly move or move so much that the spread makes it impossible to make money. As a result, the traders usually have to siphon through hundreds of stocks and cryptos to find the right ones to trade, which is #1 quite annoying and #2 takes up a lot of precious trading time.
Luckily, Tradingview comes with a FREE built-in screener that makes finding the right crypto’s or stock’s easier than ever…
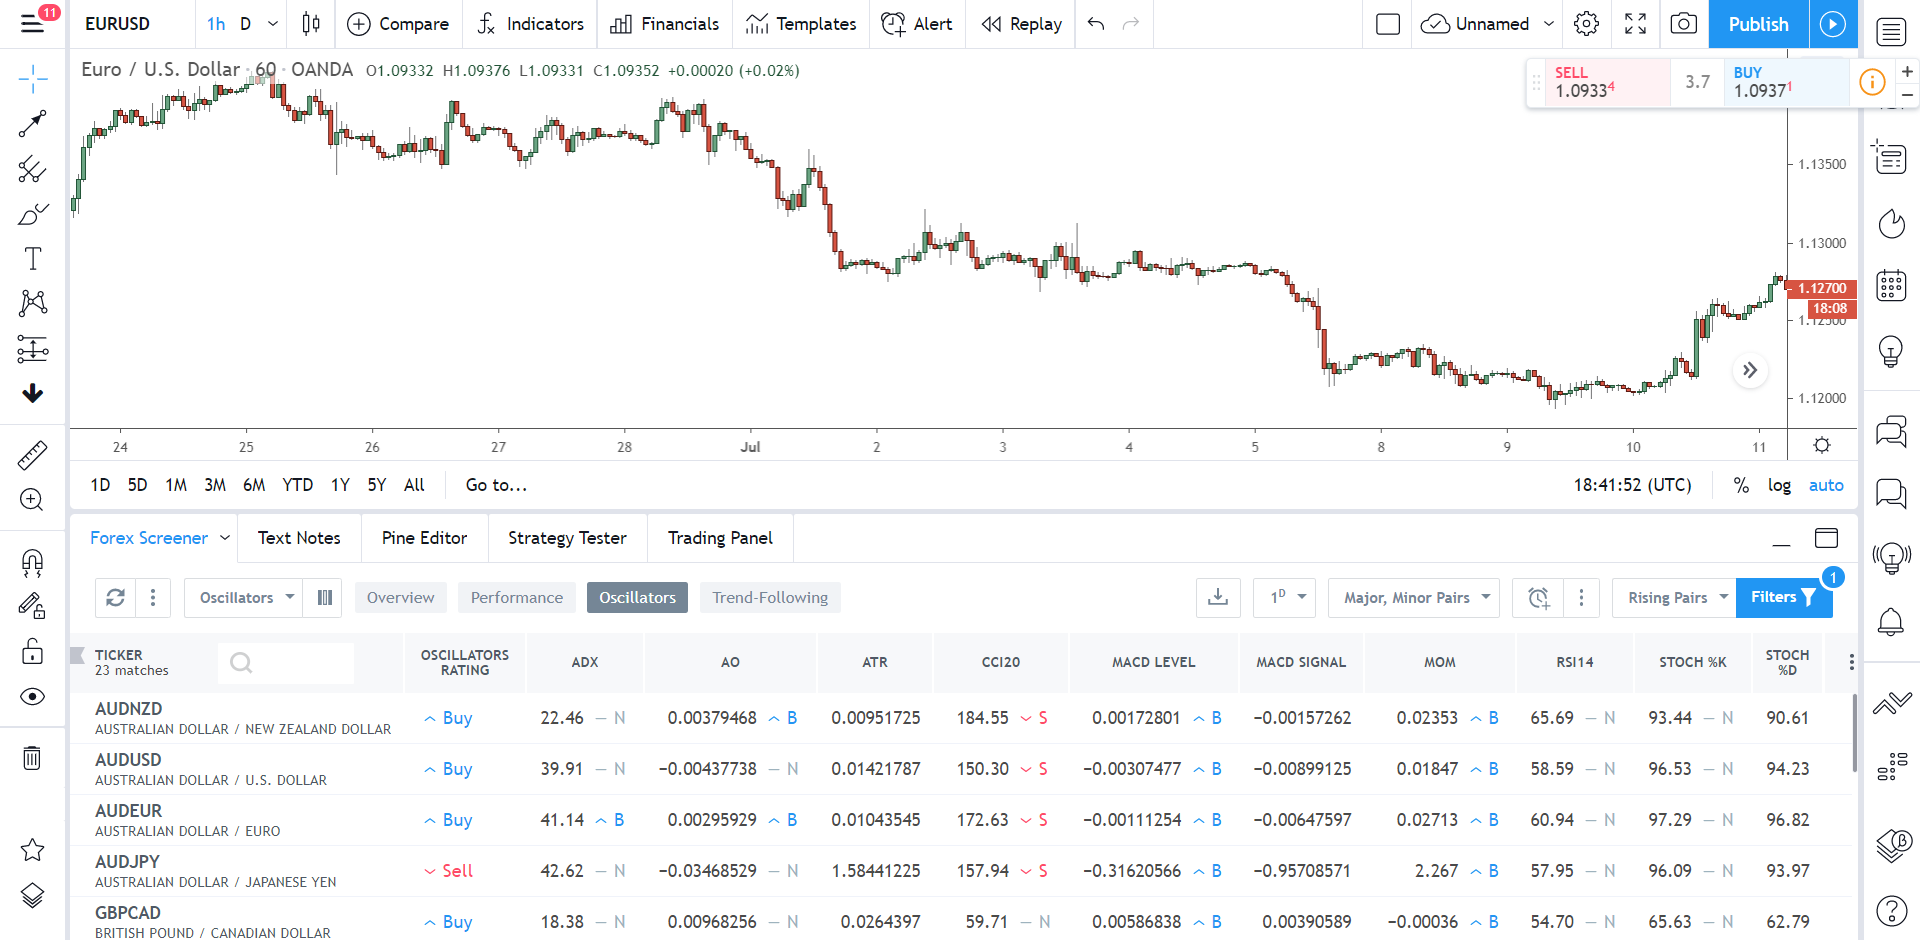
It lets you screen stocks, currencies, and crypto using all sorts of different metrics, so you can find EXACTLY the right one to trade or invest in.
A huge variety of metrics are supported too.
Screen assets according to new highs and lows, biggest percentage gains, indicator changes… really advanced stuff, considering it’s free.
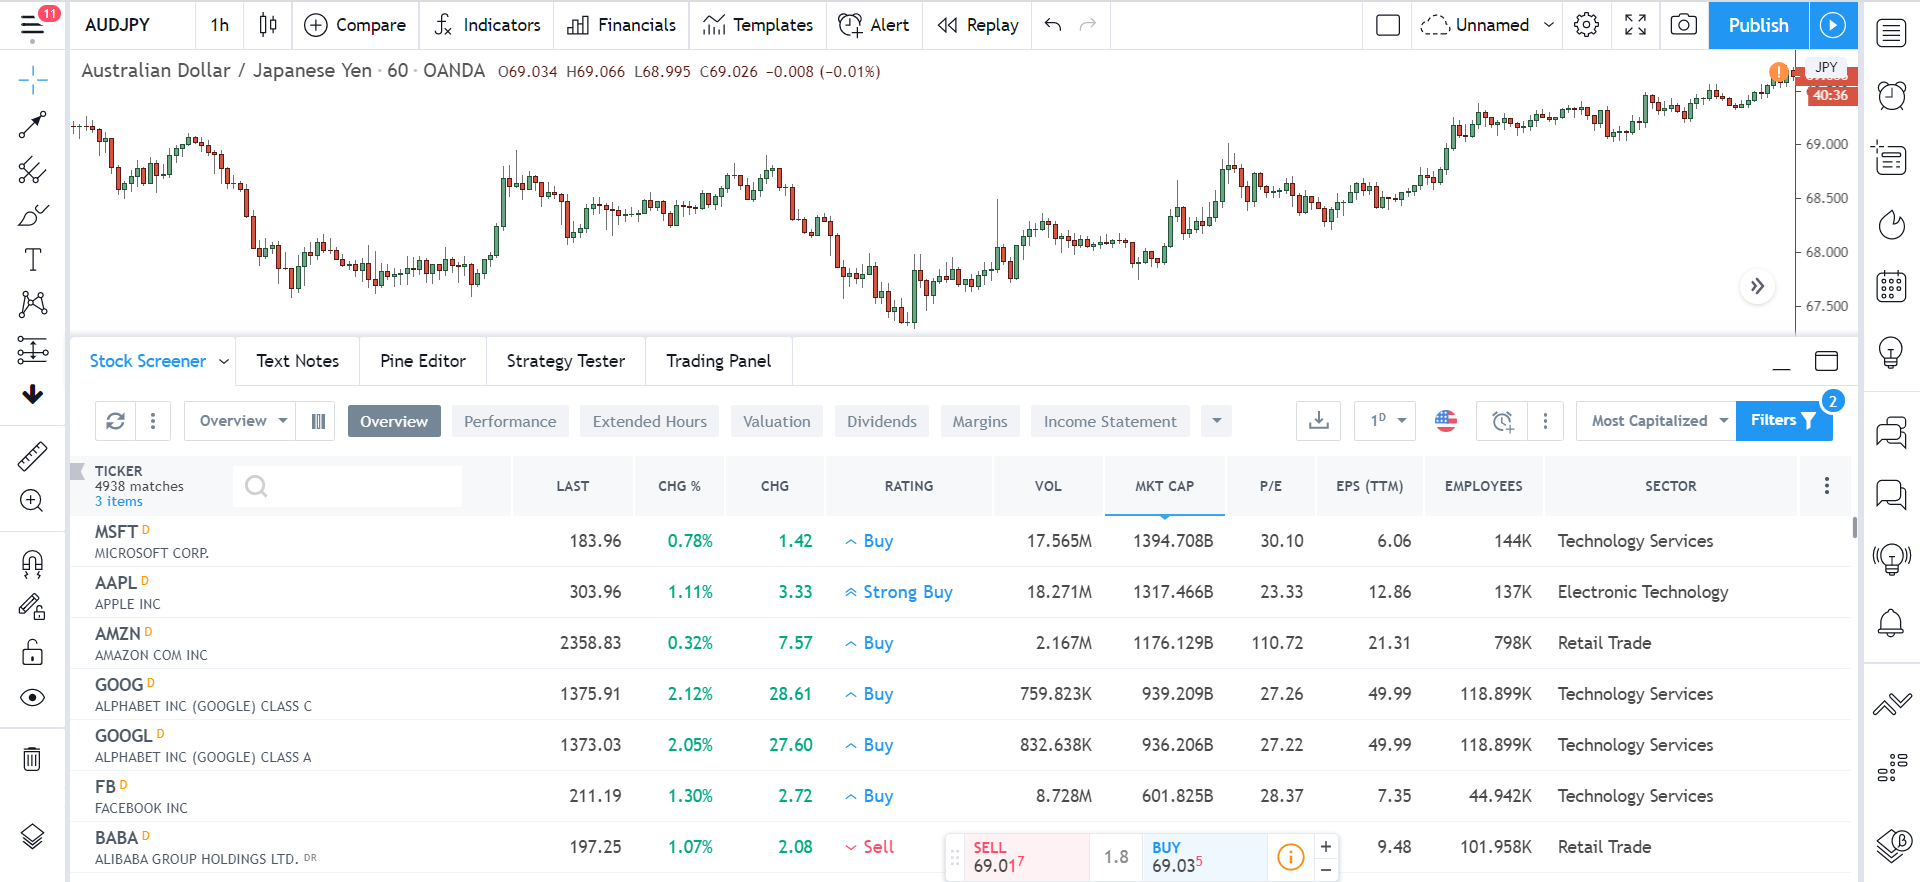
To change how the assets are screened, simply click on the tabs inside the box: Overview, Performance, Extended Hours, Valuation, Dividends, Margin, etc.
Further customize these by clicking the Filters button on the right.
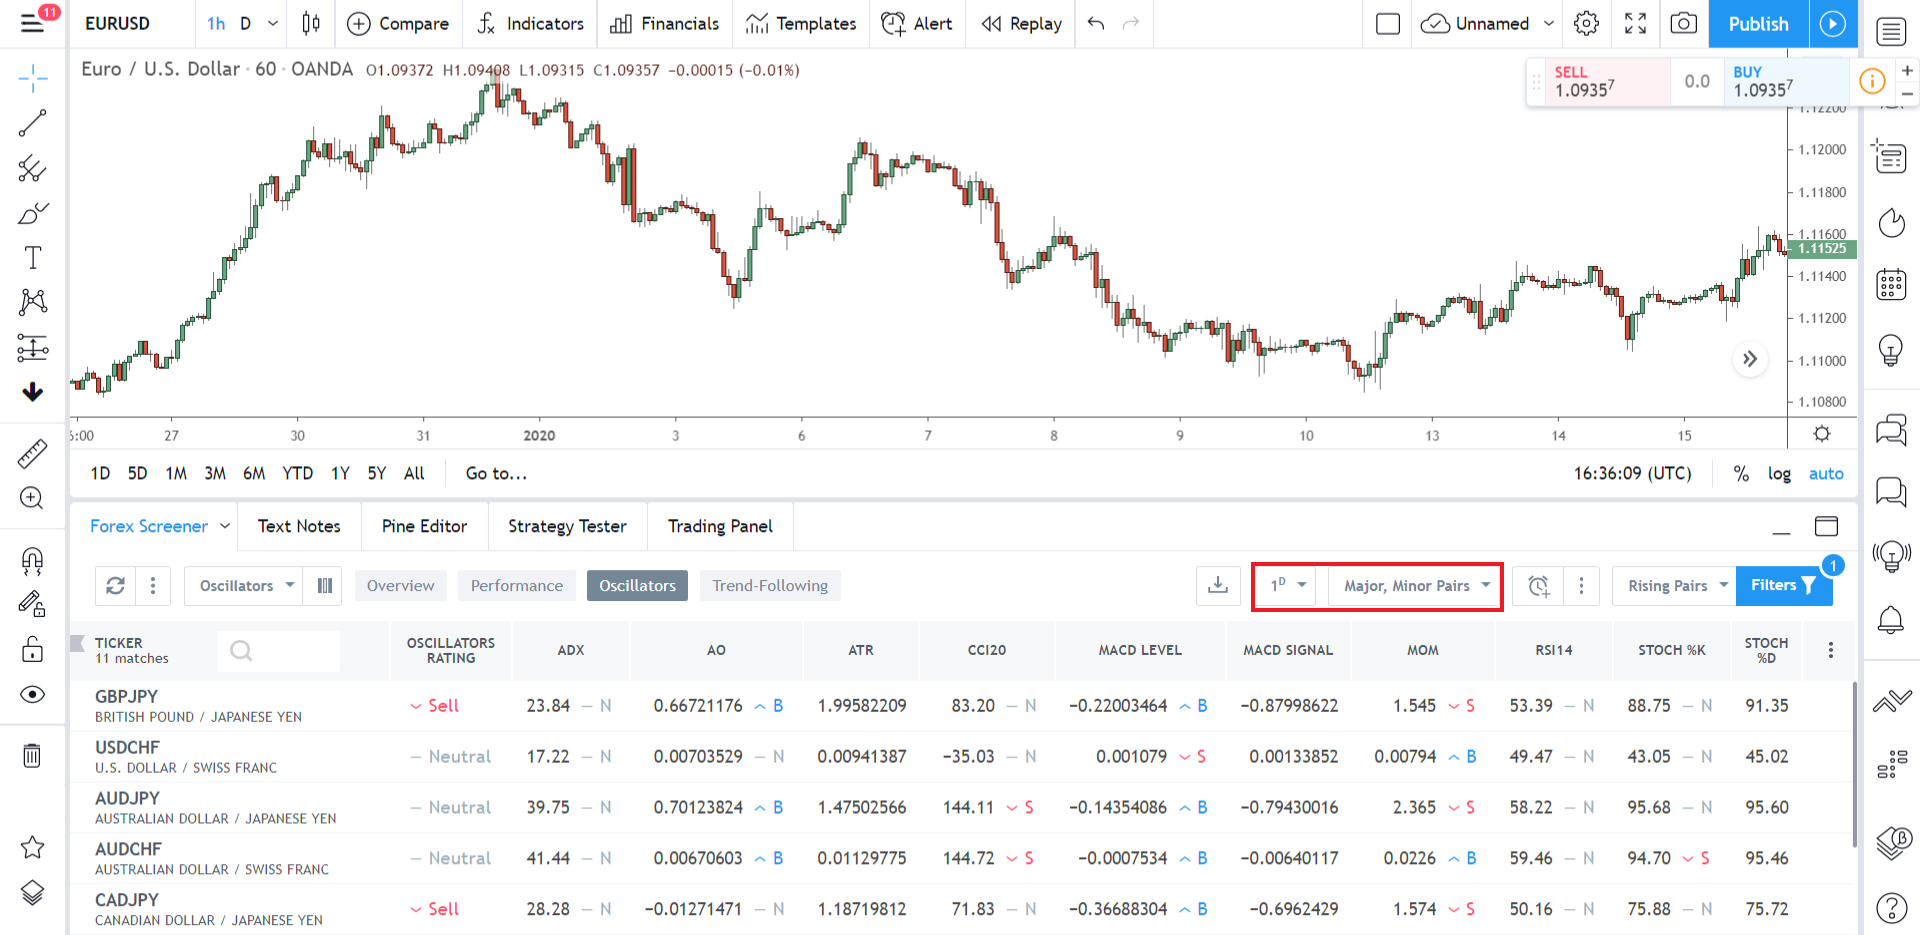
If you want to screen out whole groups of stocks and currencies, click the box above.
You can screen according to timeframe too, but this is a paid-only feature, so you’ll need the pro version of Tradingview for access.
Text Notes
And just when you think Tradingview couldn’t get any better, it throws a fully edged text editor into the mix – take that MT4.
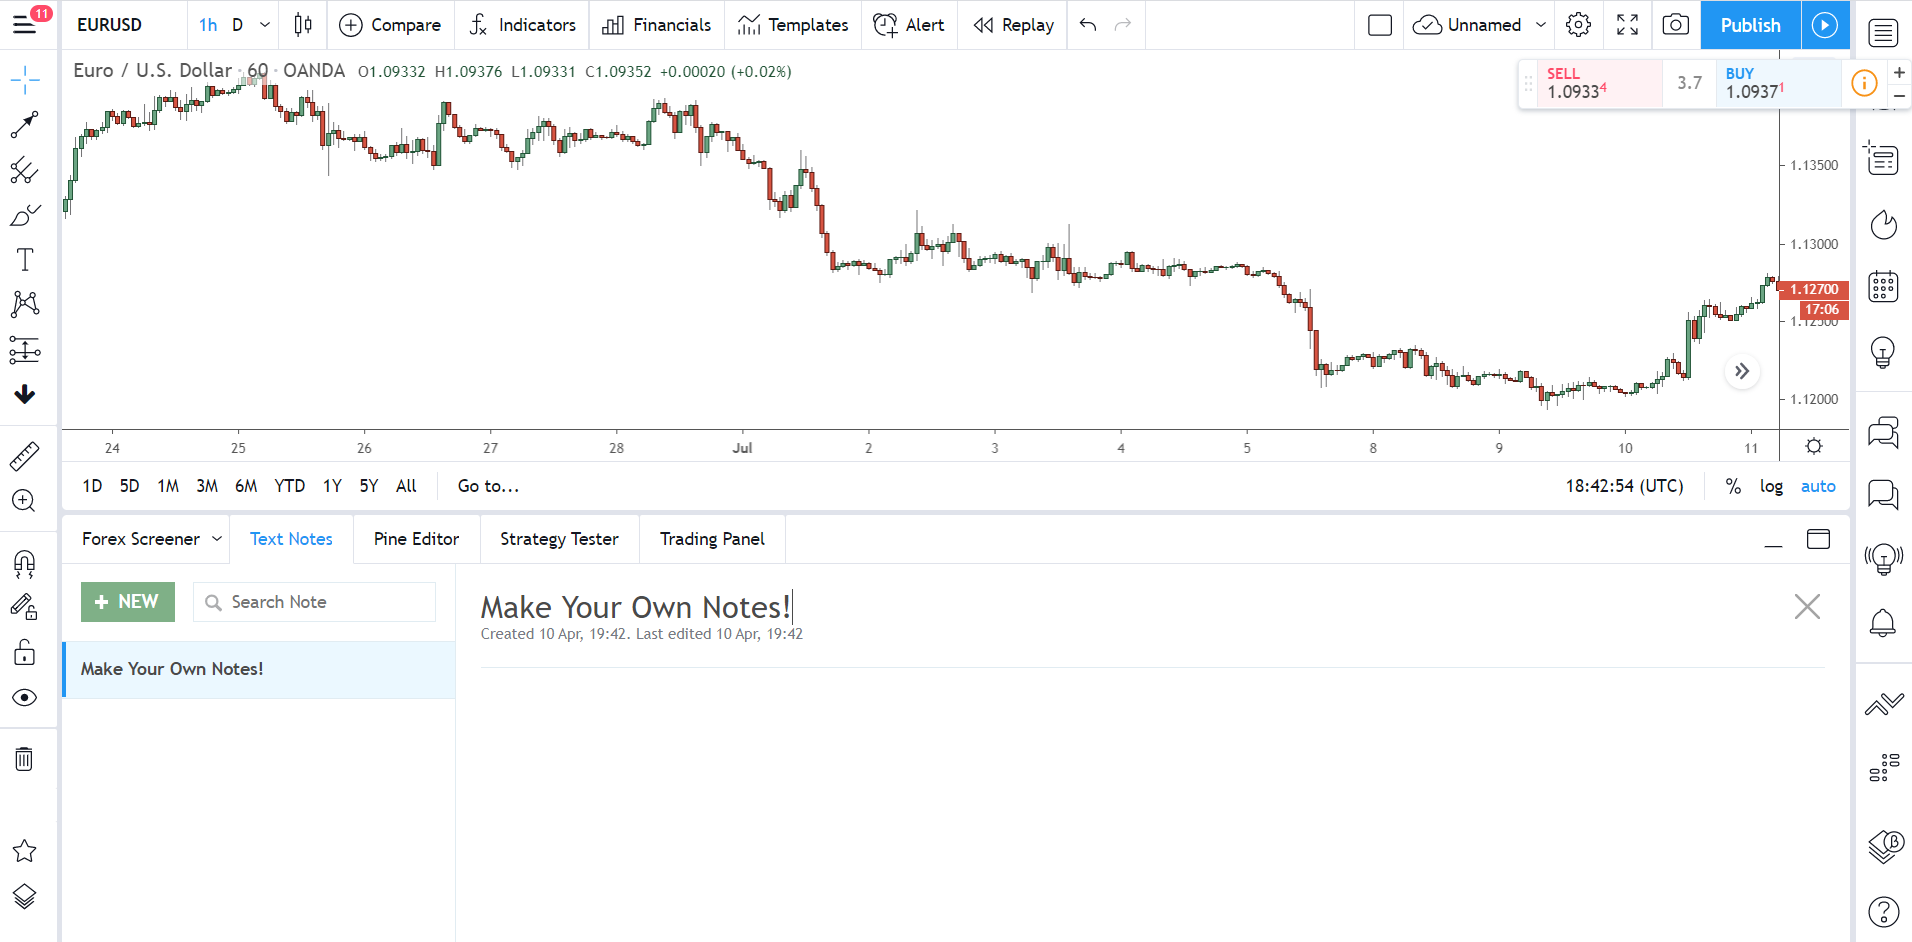
The notes tab allows you to keep well… notes.
Create small notes and save them to look back at later.
I sometimes use this to keep little reminders on what price is up to, in case I need to get something down quickly, but you could use it to keep a trading plan or even as your own personal trading diary. All your notes get saved to the cloud, so you don’t have to worry that they’ll get deleted every-time you leave the site.
It’s no Microsoft word, but hey, gets the job done, right?
Pine Editor
If tinkering with indicators or creating new trading strategies is your thing, the pine editor is where you’ll be spending a lot of time on Tradingview.
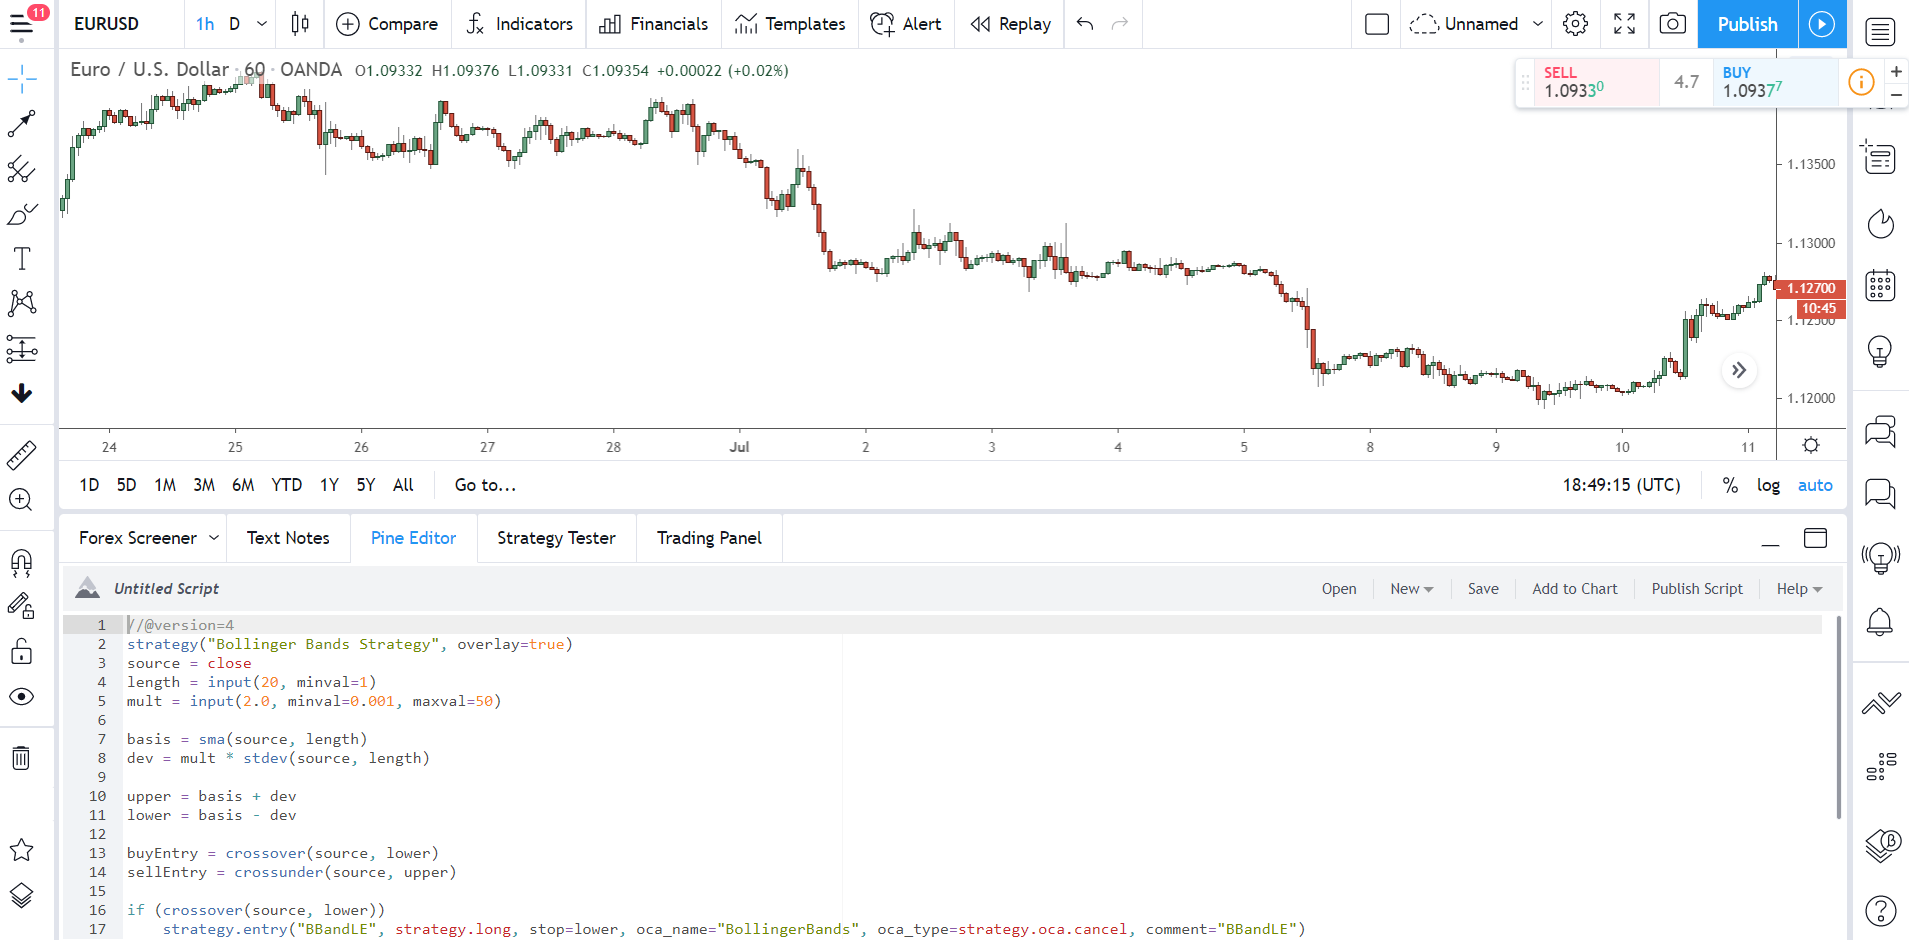
The pine editor is your own personal coding suite. Here you can customize, create, and tinker with indicators and strategies to your heart’s content.
Want to change the way MACD calculates price?
Put it in the editor and change it.
The standard RSI interval not good enough for your needs?
Drop it in the editor and make it how you want.
You can change anything and everything, and even create your own strategies if you like.
And you know what else is cool? You can even send your created indicator or trading strategy over to Tradingview for verification. If it passes, Tradingview will put it in the custom indicators folder for everyone else to see and use.
How about that, aye?
Note: Tradingview has some pretty stringent quality guidelines your indicator/strategy must meet, so make sure you read them carefully before sending it over.
Strategy Tester
As traders, we must test our strategies – otherwise, how do we know they work?
Tradingview knows how important testing is, so in addition to all their other features, they’ve also implemented a fully-fledged strategy tester (also FREE) that allows you to test strategies to see all sorts of data about their performance.
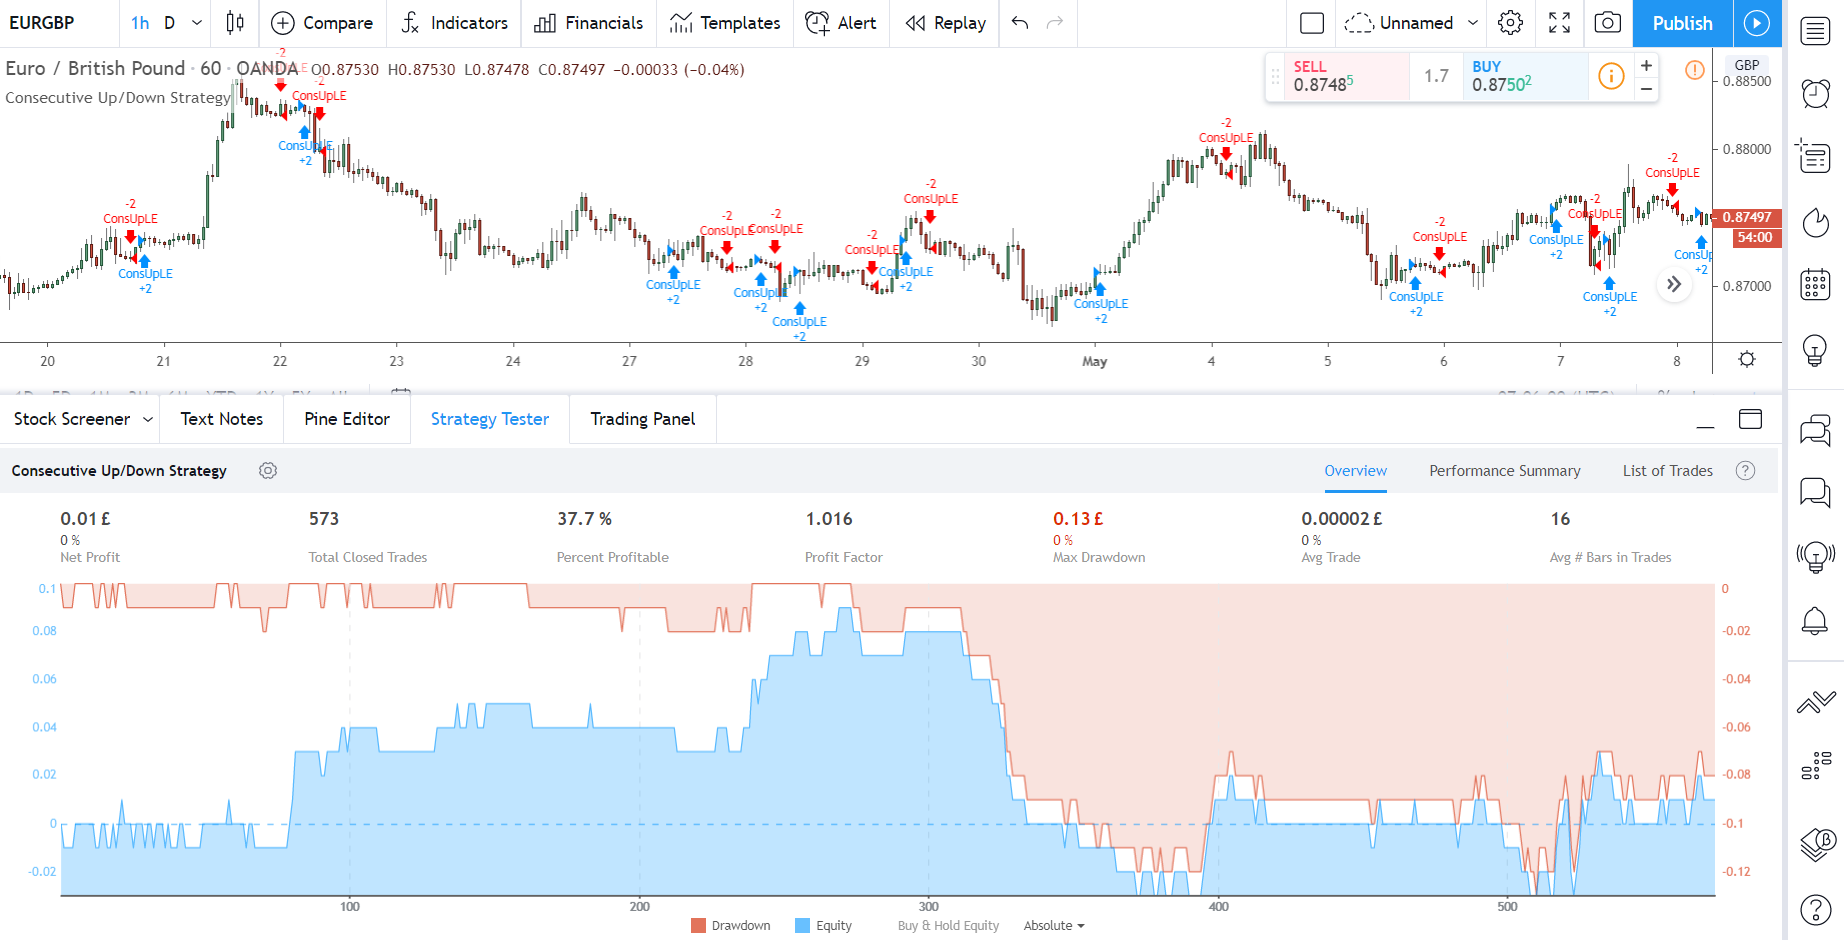 Considering it’s a free tool, the tester is surprisingly in-depth.
I’ve used a few paid testers in my time – Ninjatrader, Forextester 4, to name a few – and this almost matches them. It doesn’t have every feature they do, but it comes pretty damn close, even beating them in some aspects I’d say.
The tester shows all the important information through a simple window at the bottom.
Look here to see net profit, max total draw-down, Sharpe ratio, winning trades vs losing trades, average risk to reward ratio among other important stuff. If you click List of Trades to the right, you can even get a trade by trade breakdown, giving you even more info about your strategy.
For us price action traders, the tester isn’t the most useful of tools – our strategies are far too subjective for automated back-testing. But for those that use indicator-based strategies, it’s well worth checking out.
Trading Panel
All you MT4 stans will be kicking yourself over this tool, given it’s one of the few legit things MT4 has over most other charting platforms.
Flicking back and fourth between your broker and charting platform gets really annoying, but on Tradingview, it’s not a problem… like MT4, you can connect your broker to trade directly through the chart screen.
Just head over to the trading panel, find your broker or exchange and hook it up to your account.
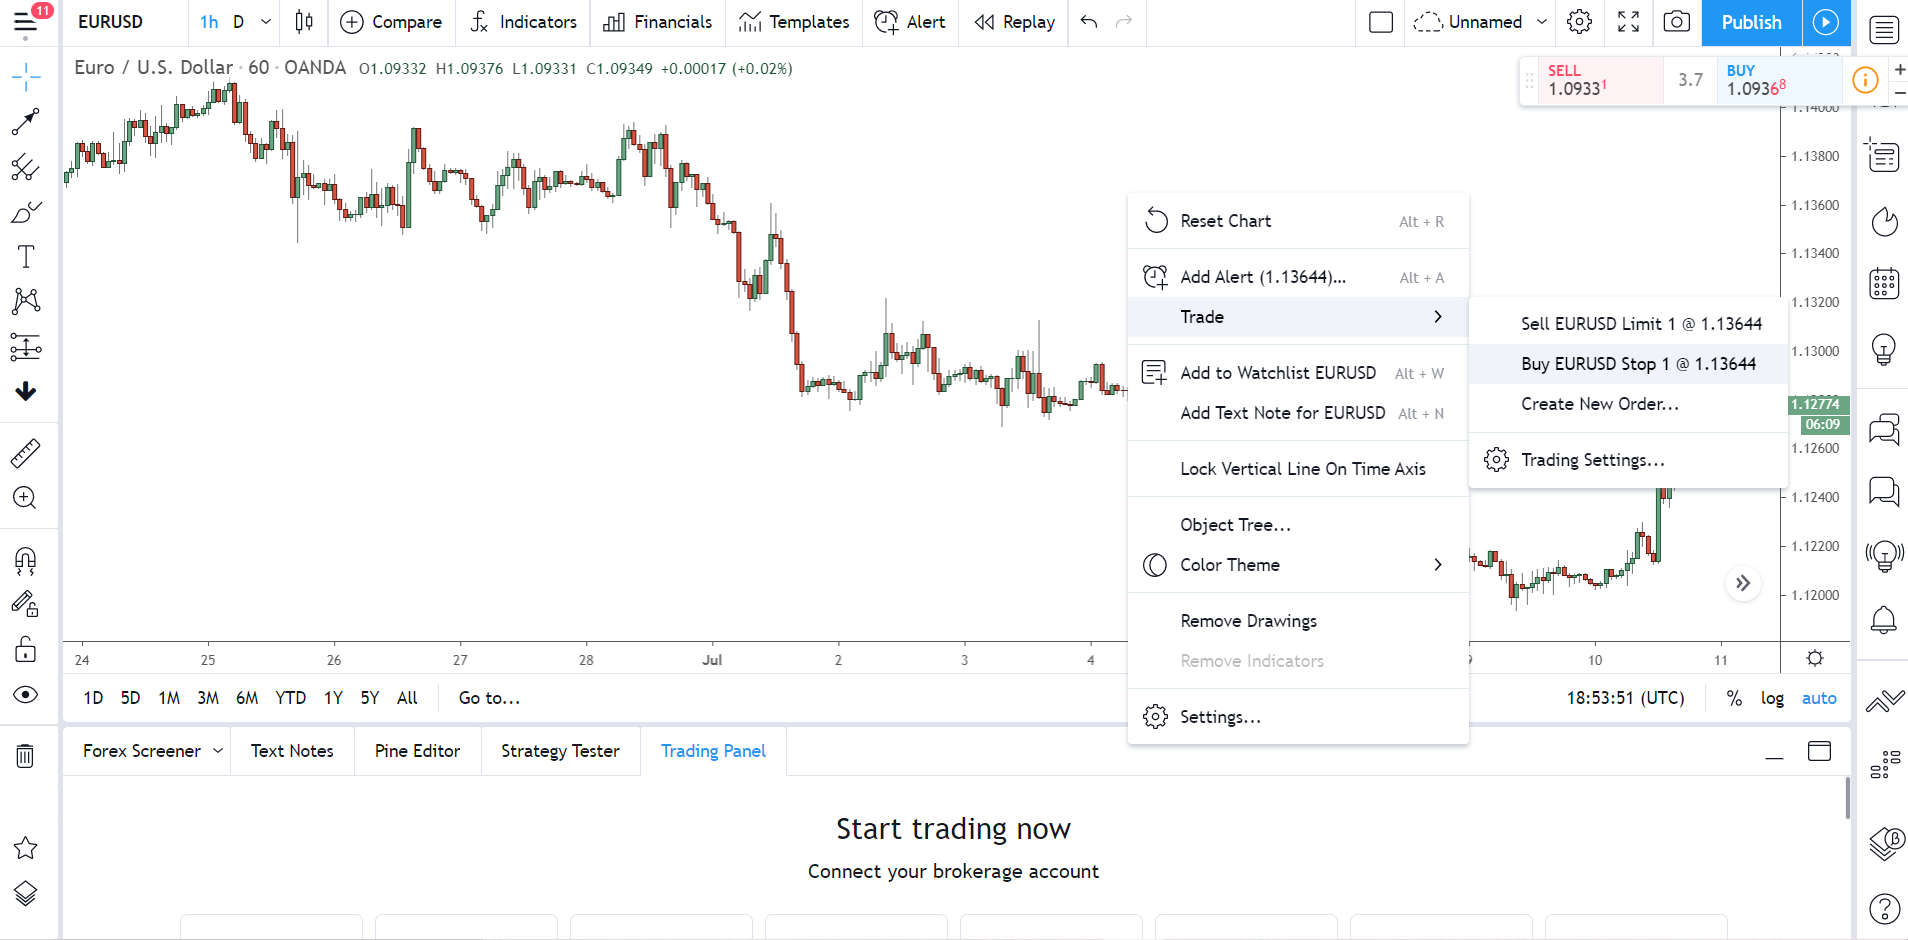
Once connected, right click anywhere on the screen and select “trade” to place a trade at that price. You can then manage the trade through the trade menu at the bottom.
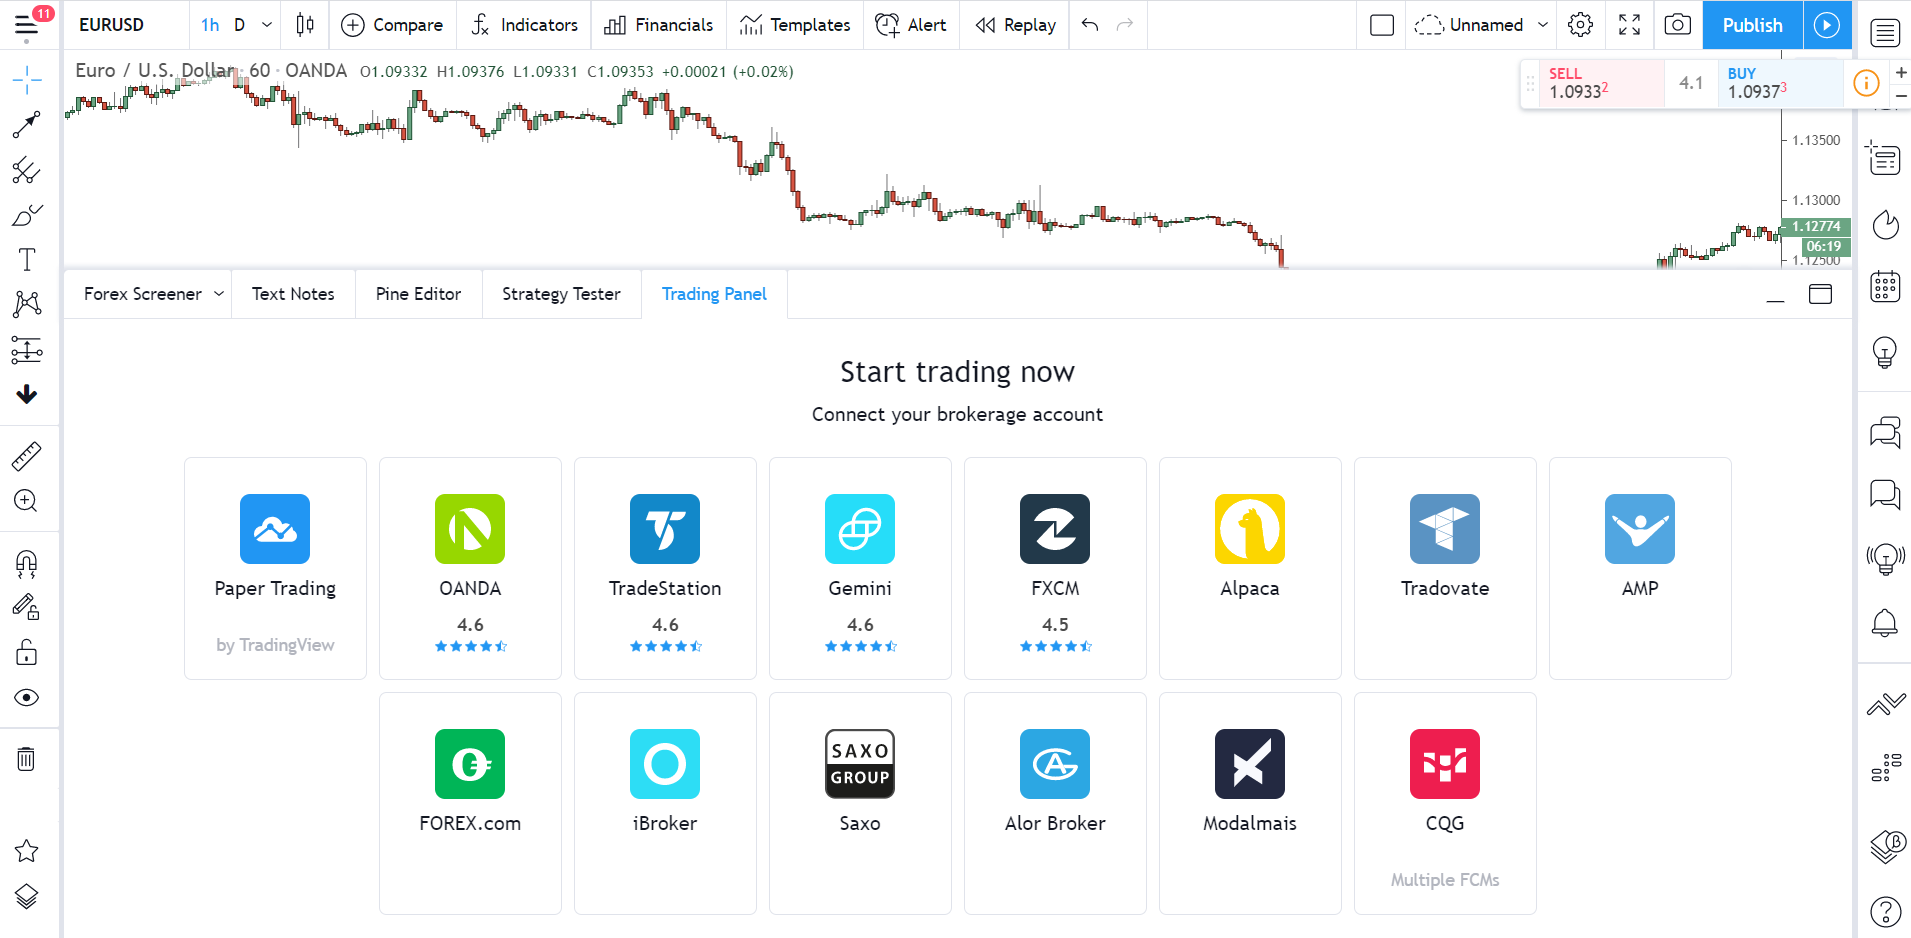
Admittedly, the list of supported brokers isn’t that big, which might pose problem for some of you. However, all the top brokers and exchanges – Oanda, FXCM, IG etc – are all fully integrated, so you shouldn’t have too many issues.
How To Set Your Charts Up Like Mine
Ask any profession trader, and they’ll all say the same thing: the way you set up your charts plays just as much a role in whether or not you make money as your trading strategy and risk management skills.
So it makes sense to set them up correctly, doesn’t it?
Earlier, I showed you how to set your charts set up, but that was mainly for beginners who are just getting started. Now I’m going to show you how to set them up for real to be just like mine.
For the most part, the settings are the same, so don’t discard what I said earlier. Use them as the default settings, even if you set up your chart differently to how I’m about to show you. The stuff I change here are mainly small things that get rid of unnecessary information or tell us stuff we don’t need to see.
However you set your charts up, make sure to always use the default settings I explained at the beginning.
Step 1: Remove ALL News Tabs And Boxes
I like to keep my charts super clean and super simple. I don’t want anything distracting me or taking my attention away from what’s important: the price.
Because of this, I always remove the watch-list, details, and headlines tabs from the right-hand side of the chart window.
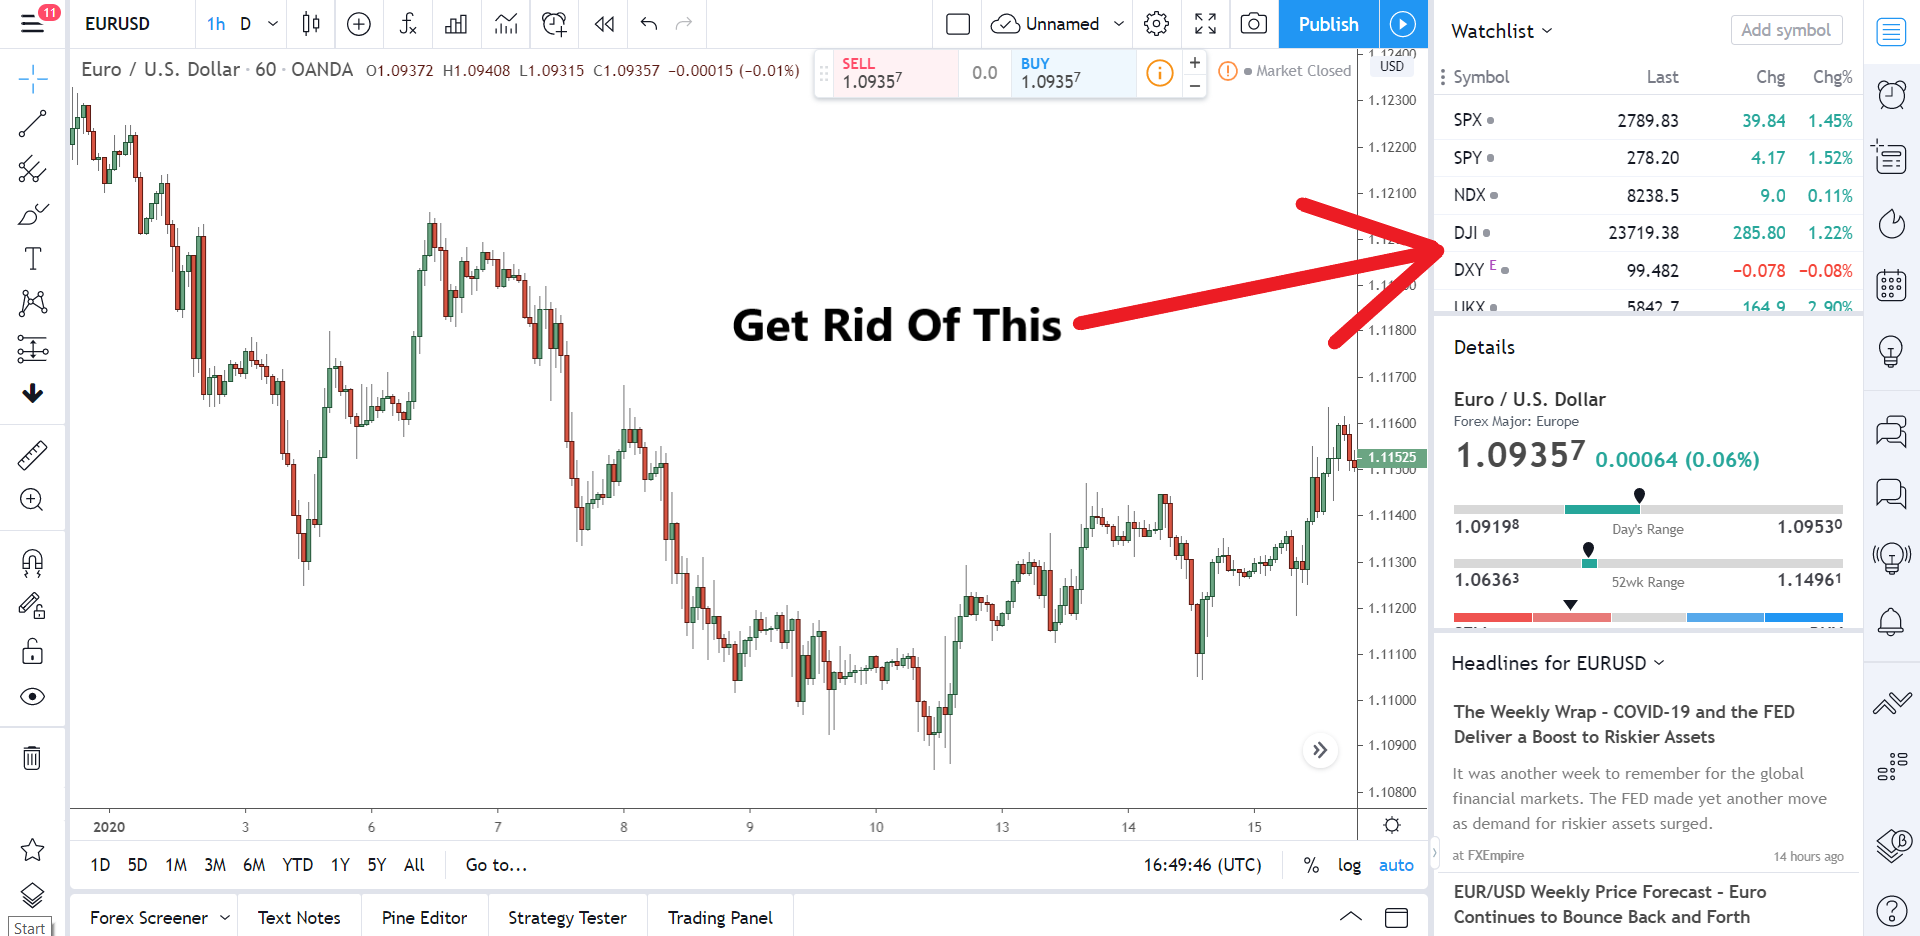
These 3 tabs give us great information, no doubt, but most of it isn’t necessary to have on the screen when we’re trading, so it just takes up valuable chart space.
If you want to bring it all back, you easily do so by clicking the button in the top right.
Step 2: Remove ALL INDICATORS
I’m a price action trader, so I had to put this on the list.
Unless its to aid in price based decision making, indicators have NO PLACE on your chart. Keep them OFF. Using them for anything other than confirming a signal or something you see happening is a quick way to ruin, as hundreds of failed traders will tell you.
Not all indicators are bad, however…
Some do provide valuable information or help you find or see something that’s difficult to do manually.
A great example is the swing high/low by patternsmart indicator…
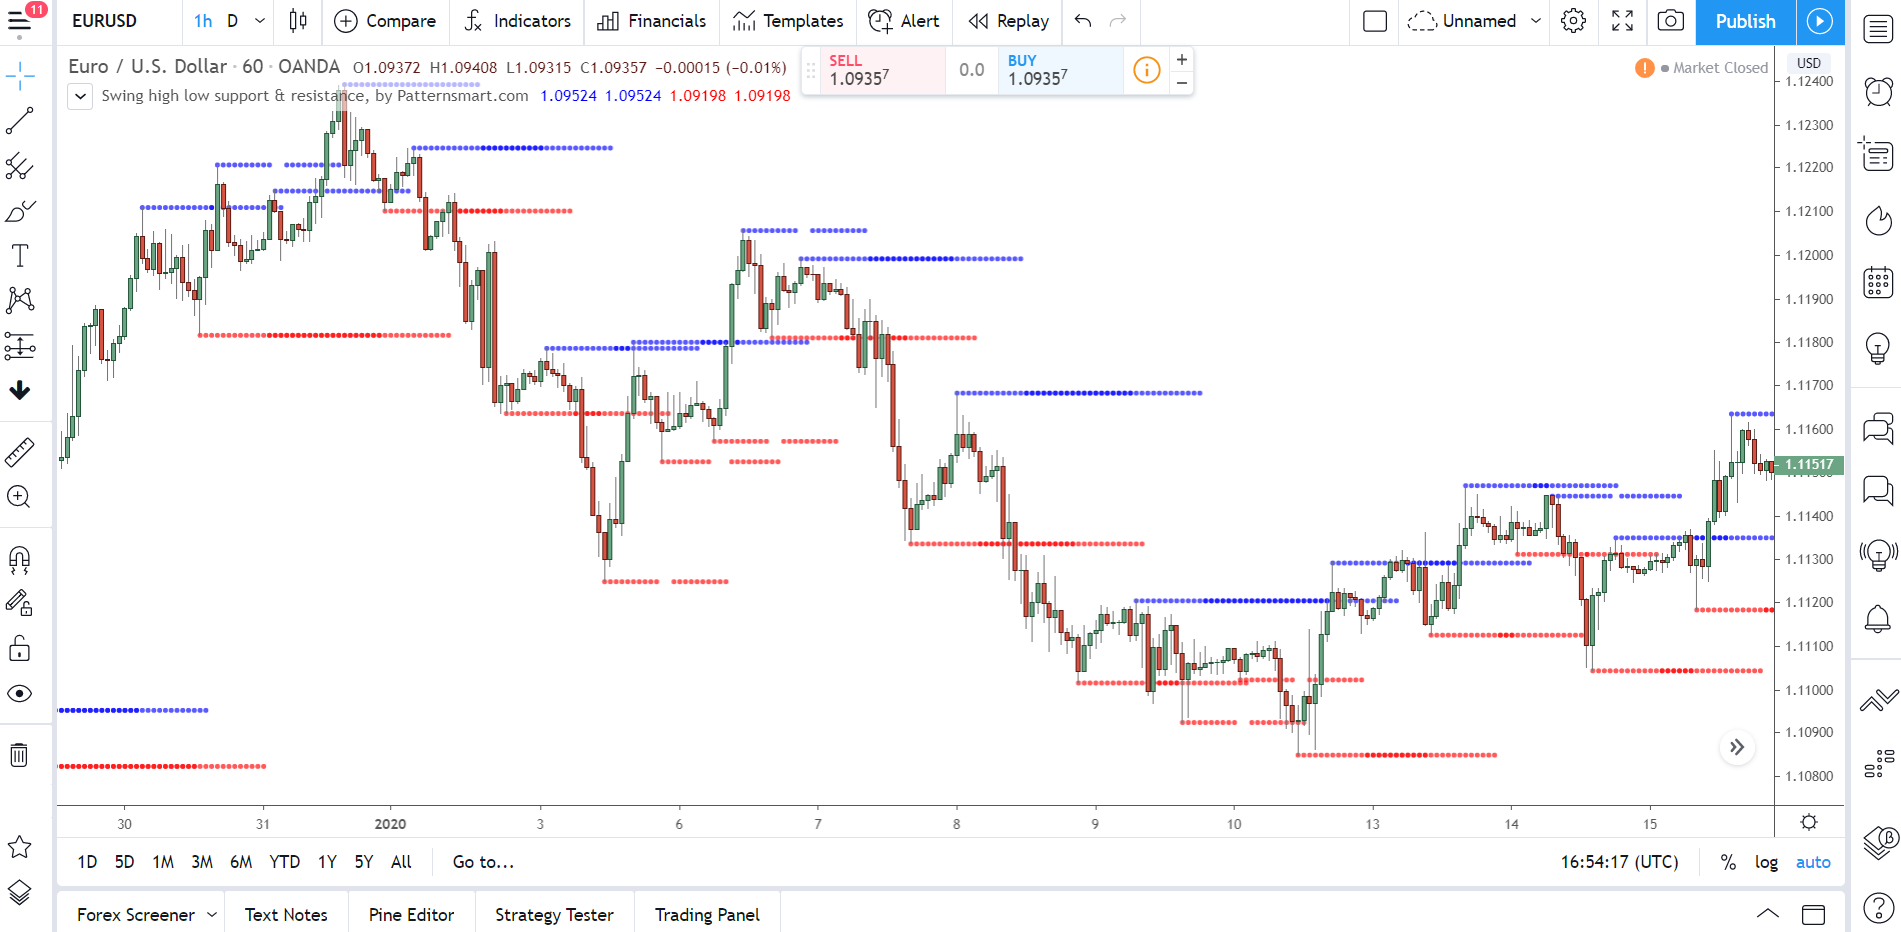
A custom indicator, this automatically finds and marks all swing highs and lows for you.
No price action or trading experience required. Maybe not that useful for experienced traders like us, but for beginners, a great tool that makes finding and marking swing highs and lows very easy.
Tradingview has a few useful custom indicators like this. I’ll get a post out soon that details some of my favourites and how you can use them when trading.
Step 3: Switch To A Candlestick Chart
When you first open a chart on Tradingview, it’ll show a line graph – might be a bar chart too sometimes. Get rid of this and switch over to a candlestick chart. The line graph has its uses, don’t get me wrong. For day to day trading, however, it just doesn’t show the level of price information we need to see.
The candlestick, on the other hand, tells us everything.
So make sure you switch them over when you open the chart.
Step 4: Remove Volume And Change Background To White
A disclaimer… If you know how to use volume, DO NOT remove it from your charts.
My volume skills really aren’t up to scratch, that’s why I leave it off. If you’re one of those volume guys who knows it like the back of your hand, keep it on, as it will help you understand price better.
It’s a good idea to change the background of the chart to white also. White contrasts best with the chart colours mentioned earlier, so it just makes everything stand out more and easier to see.
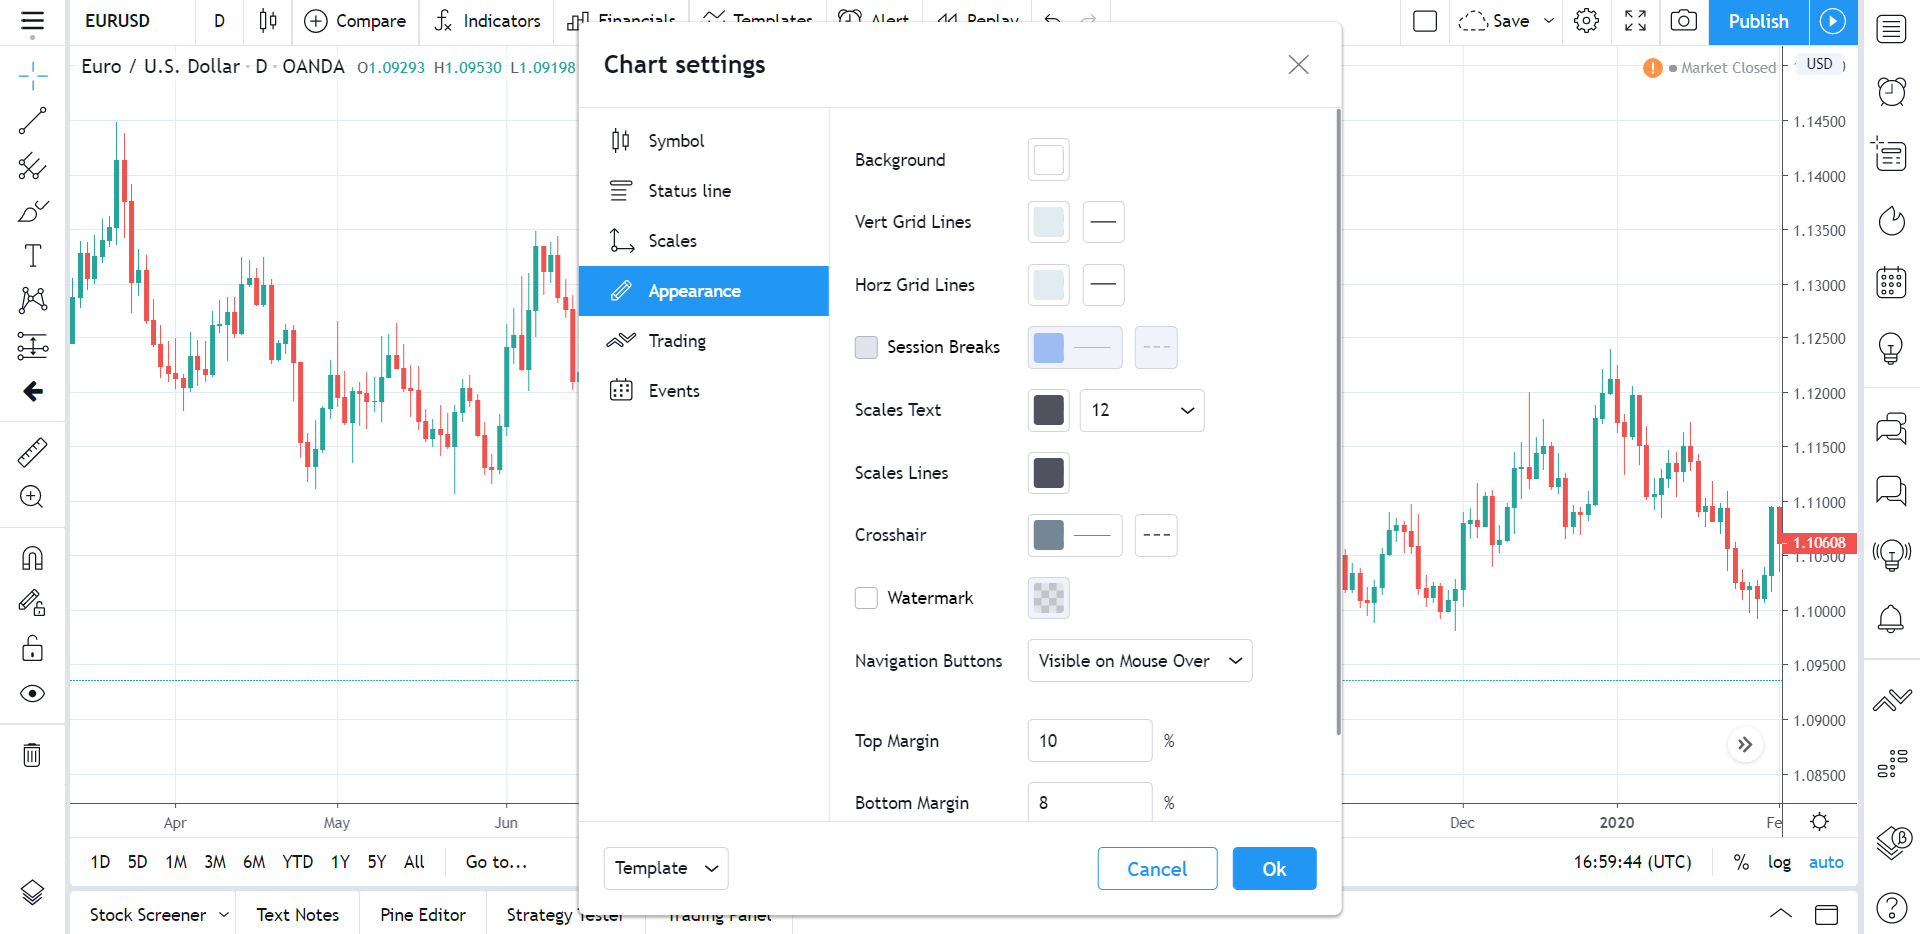
To change the colour, head over to the Appearance menu in chart settings (right-click somewhere on the chart to open the menu) and change the chart colour to white.
And with that, you’re all set to go.
Final Thoughts On Tradingview And What To Do Next
Well, that concludes my guide on how to use Tradingview – phew, what a read aye!
It’ll take some time to really learn all of the ins and outs of how to use the platform – it took me a good few weeks, and that’s coming from MT4 – but with this guide, you should pick it up in no time. And if you do have any trouble, just let me know below or shoot me an email and I’ll help you out – check the FAQ below as well.
I’ll have some more posts detailing my favourite tools and custom indicators (and how to use them) on Tradingview available in the coming weeks, so be sure to watch out for them.
Oh, I almost forgot…
If you want to get a taste of the Pro features Tradingivew provides like the market replay function, the volume profile indicator – I’ll have a post about this up soon – and the strategy tester, you can sign up for a 30-day FREE trial. The trial gives you access to all pro account features, including those I listed at the beginning – see the full list here.
It’s a great way to see some of the additional features Tradingivew provides without putting any money down – this is what convinced me to get a pro account back in the day.
Just remember, the trial will automatically switch to a paid account after the 30 days is over. So make sure you end it by then, otherwise, you might get a nasty surprise the next time you check your bank account.
So what are you waiting for?
Head over to Tradingview today to see what all the fuss is about…
Tradingview FAQ
I’m guessing you guys probably have a few questions about Tradingview? Below I’ve left a small list of the most common questions people ask as well as my answers to them.
Q 1: Is Tradingview Free To Use?
Yes, 100%. Everything on the site from the charts, social tools, to most of the analysis features are completely free to use… no money or account required.
You really should create an account, though.
With no account, your analysis will disappear whenever you open a new chart or exit the site. Many features also won’t be available. Plus, after a certain time (I think it’s 15 minutes), a pop up will appear and lock you out of the chart until you either create a free account or pay for the pro version.
So unless you want to lose your analysis, it’s a good idea to open a free account.
Q 2: Is Tradingview A Broker?
It’s easy to get this mixed up, so I had to put it on the list.
Tradingview is a charting platform, not a broker. It does have broker integration, however. Just head over to the Trade tab at the bottom like I showed earlier, select your broker from the list (get the full list here), and then hook it up to your Tradingview account.
You can now trade directly through the Tradingview chart screen without having to go back and fourth between the site and your broker.
Pretty cool, eh?
Q3: Does Tradingivew Have An App For Download?
Yes, it does! I’ve got it on my phone.
It’s free to download and contains all the same features as the web-based platform…. view charts, conduct analysis, and interact with other traders all from your device. It’s available for both android and IOS. Just head over to the respective store on your phone or tablet and download it.
Once it’s installed, simply enter your account details, and the chart will open with your analysis intact.
Easy.
The Next Step? Learn The 5 Rules For Trading Supply Demand Like A PRO Trader...
Take your trading to the next level. Sign up today to download my FREE E-Book and learn how the pro's trade supply and demand - Includes Order Block PDF and S & D Guide PDF

thank you
Well explained all the key features. Thanks for your time and effort
Cool thanks can be overwhelming
Great post. quite helpful. thanks for your time and efforts
I’ve seen once, that the favorite drawing toolbar was integrated into the lower border. Can anyone tell me how to get the tools there? Then one doesn’t have to mess around with this annoying window on top of the charts.